Cloud Failback to VMware
Cloud Failback to VMware
Scene description
This document is applicable to the operation process of safely switching back to the original VMware environment for business systems that have taken over disaster recovery to the Cloud Computing Platform without expanding the computing resources of the source production environment.
Using a WordPress host running in a VMware environment as an example, demonstrate how to complete the business failback from the cloud disaster recovery platform and ensure normal service access is restored.
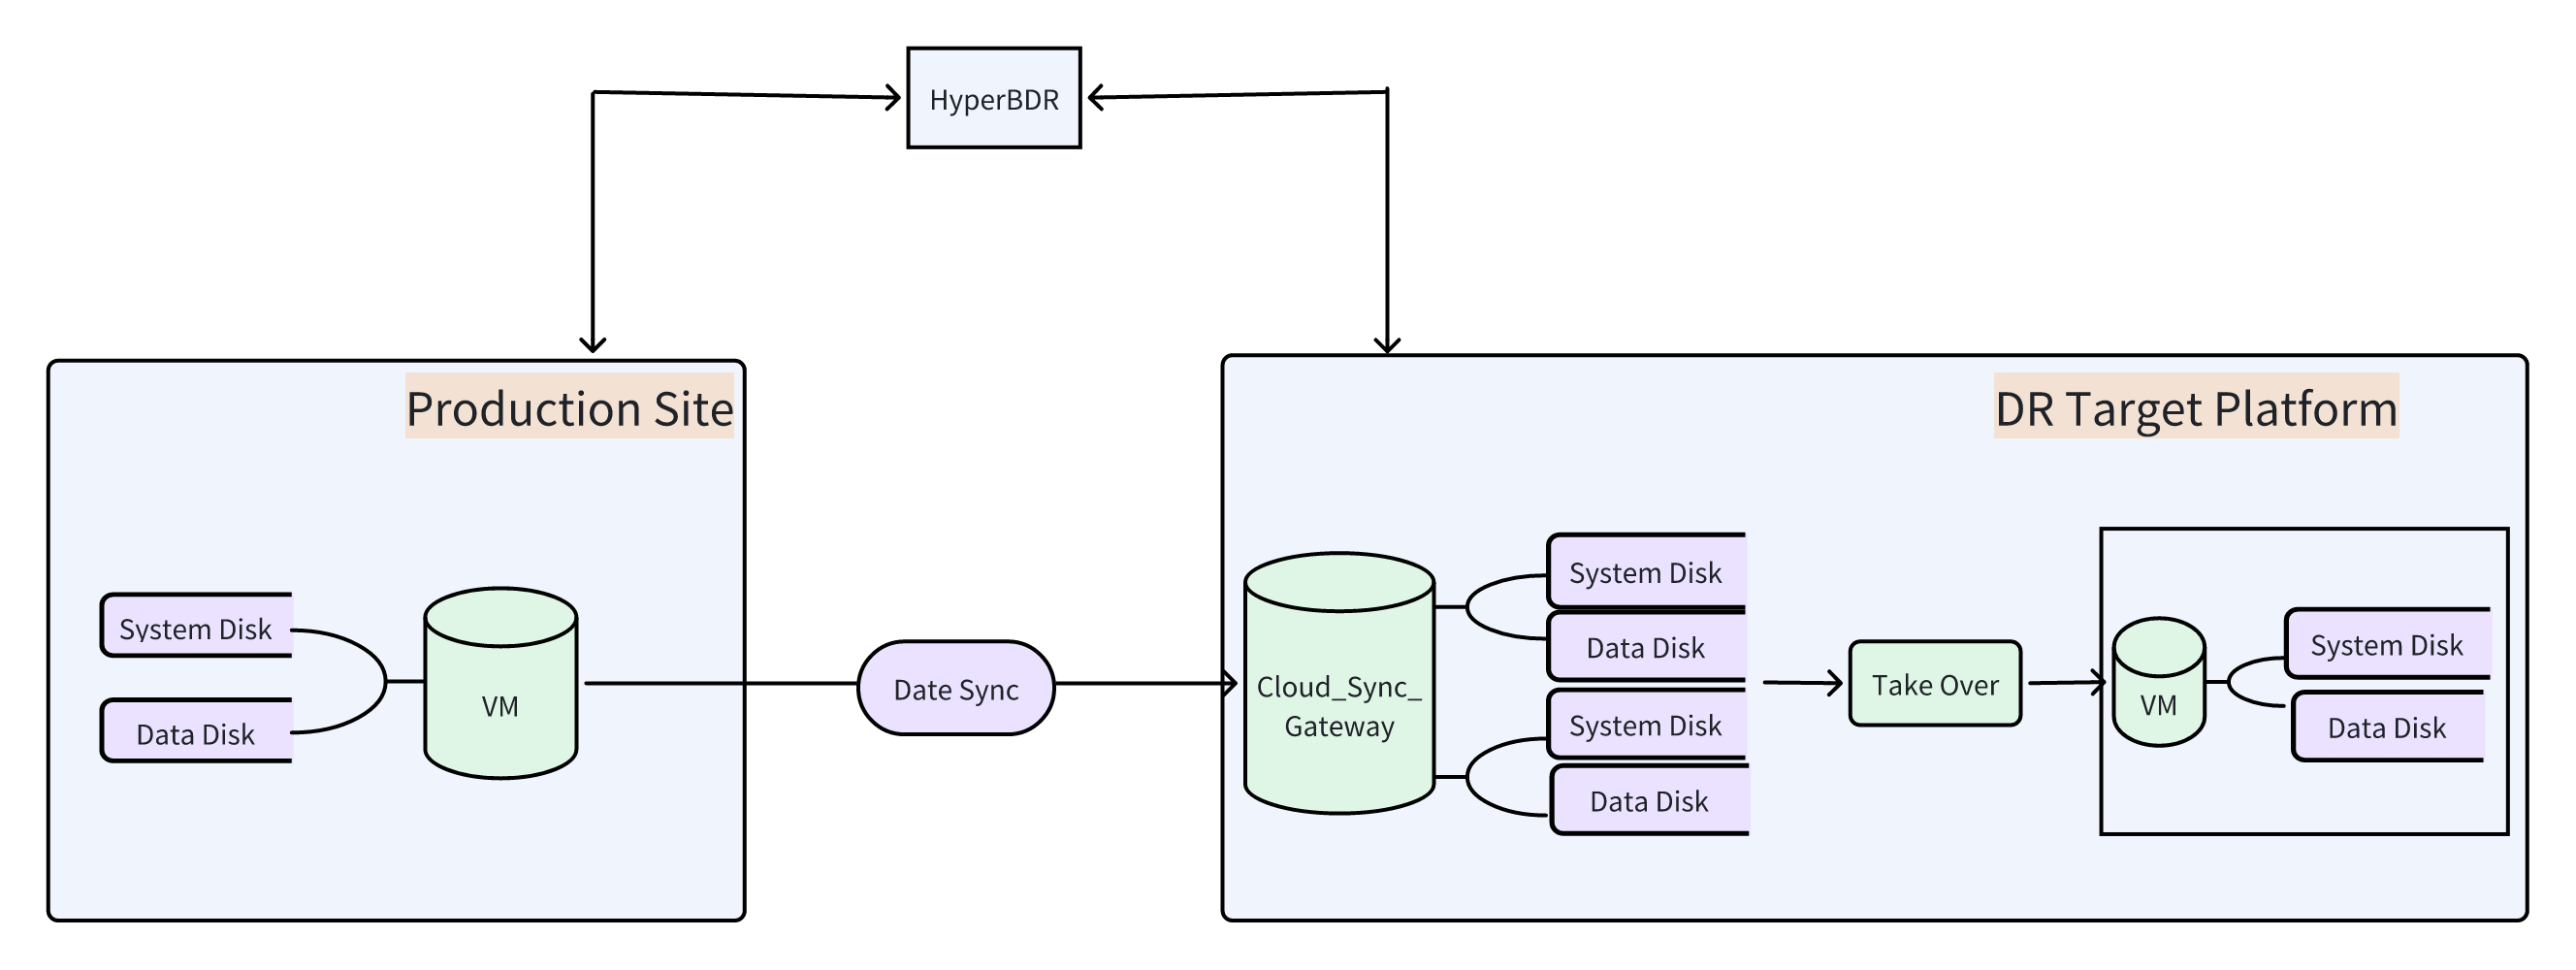
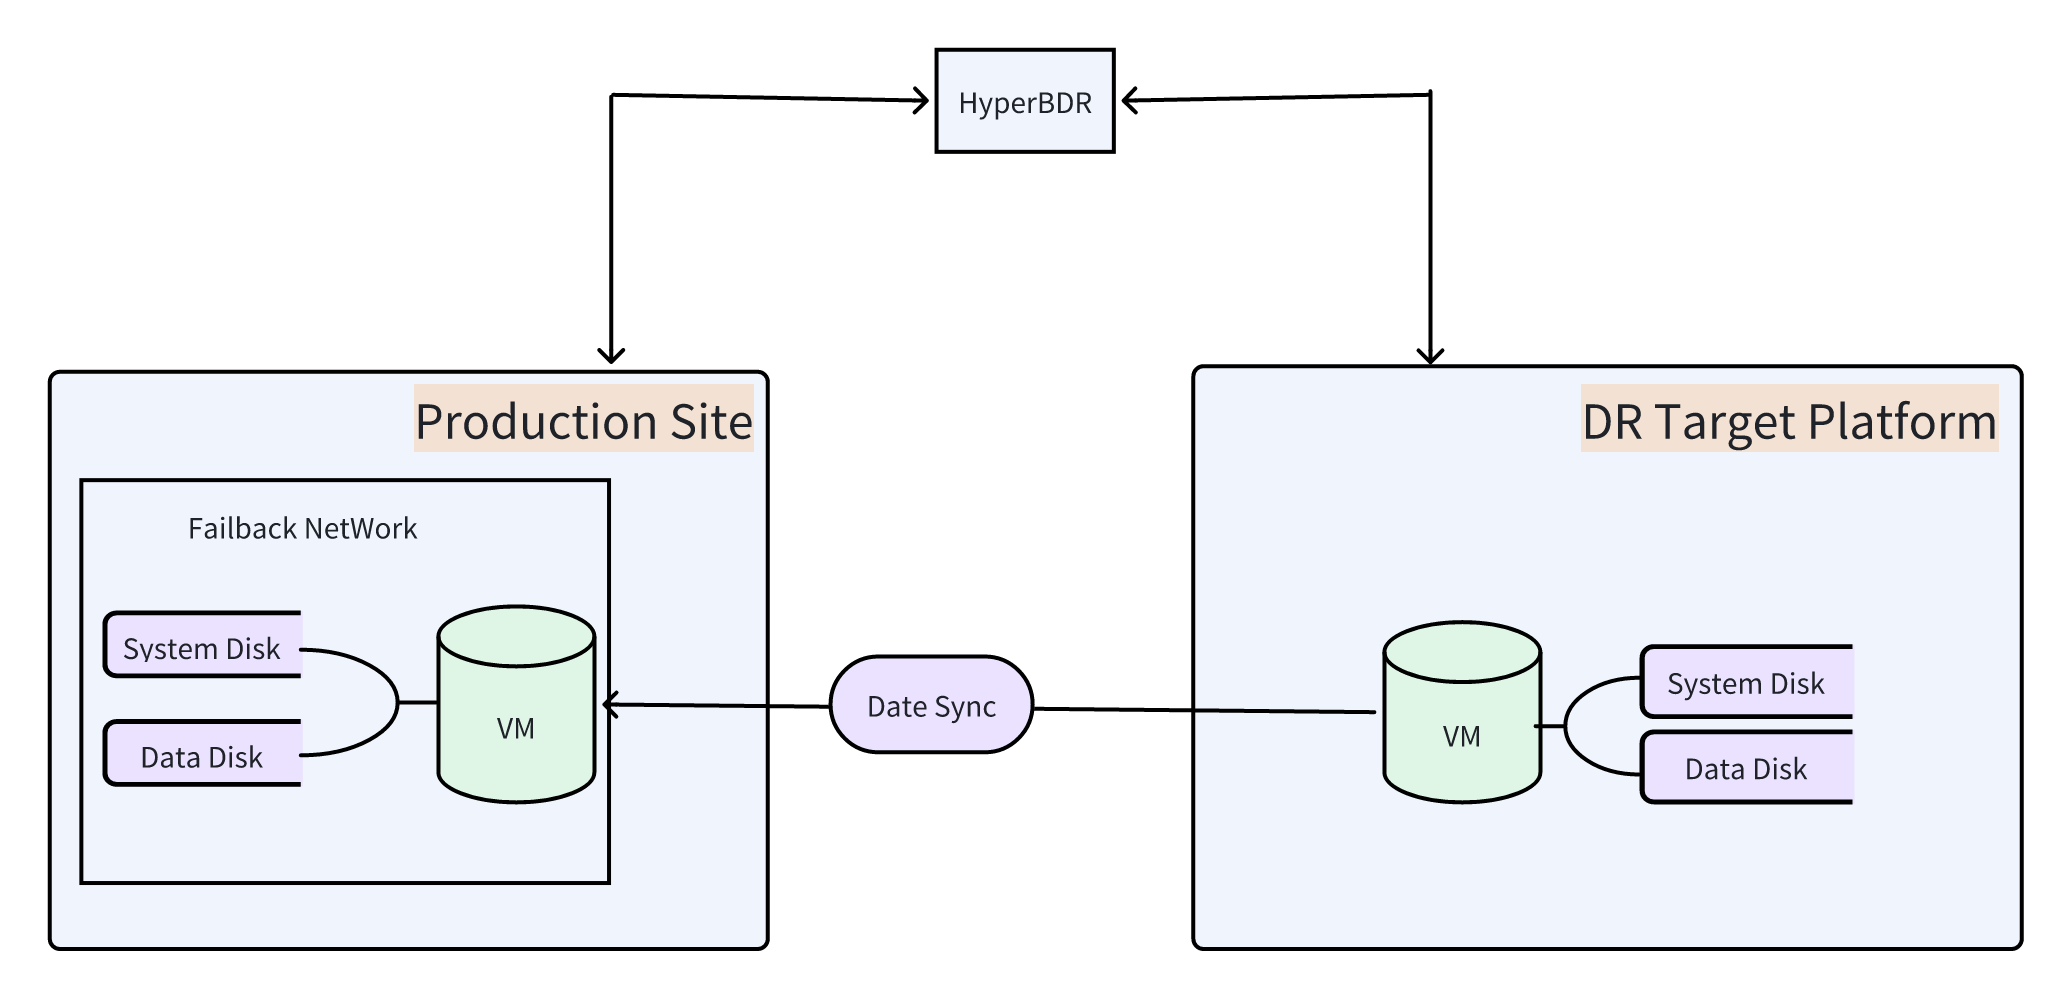
Architecture diagram
Disaster recovery takeover architecture : disaster recovery from the source production environment to the target cloud
Disaster recovery failback architecture: failback from the target cloud to the source production environment
Operation process
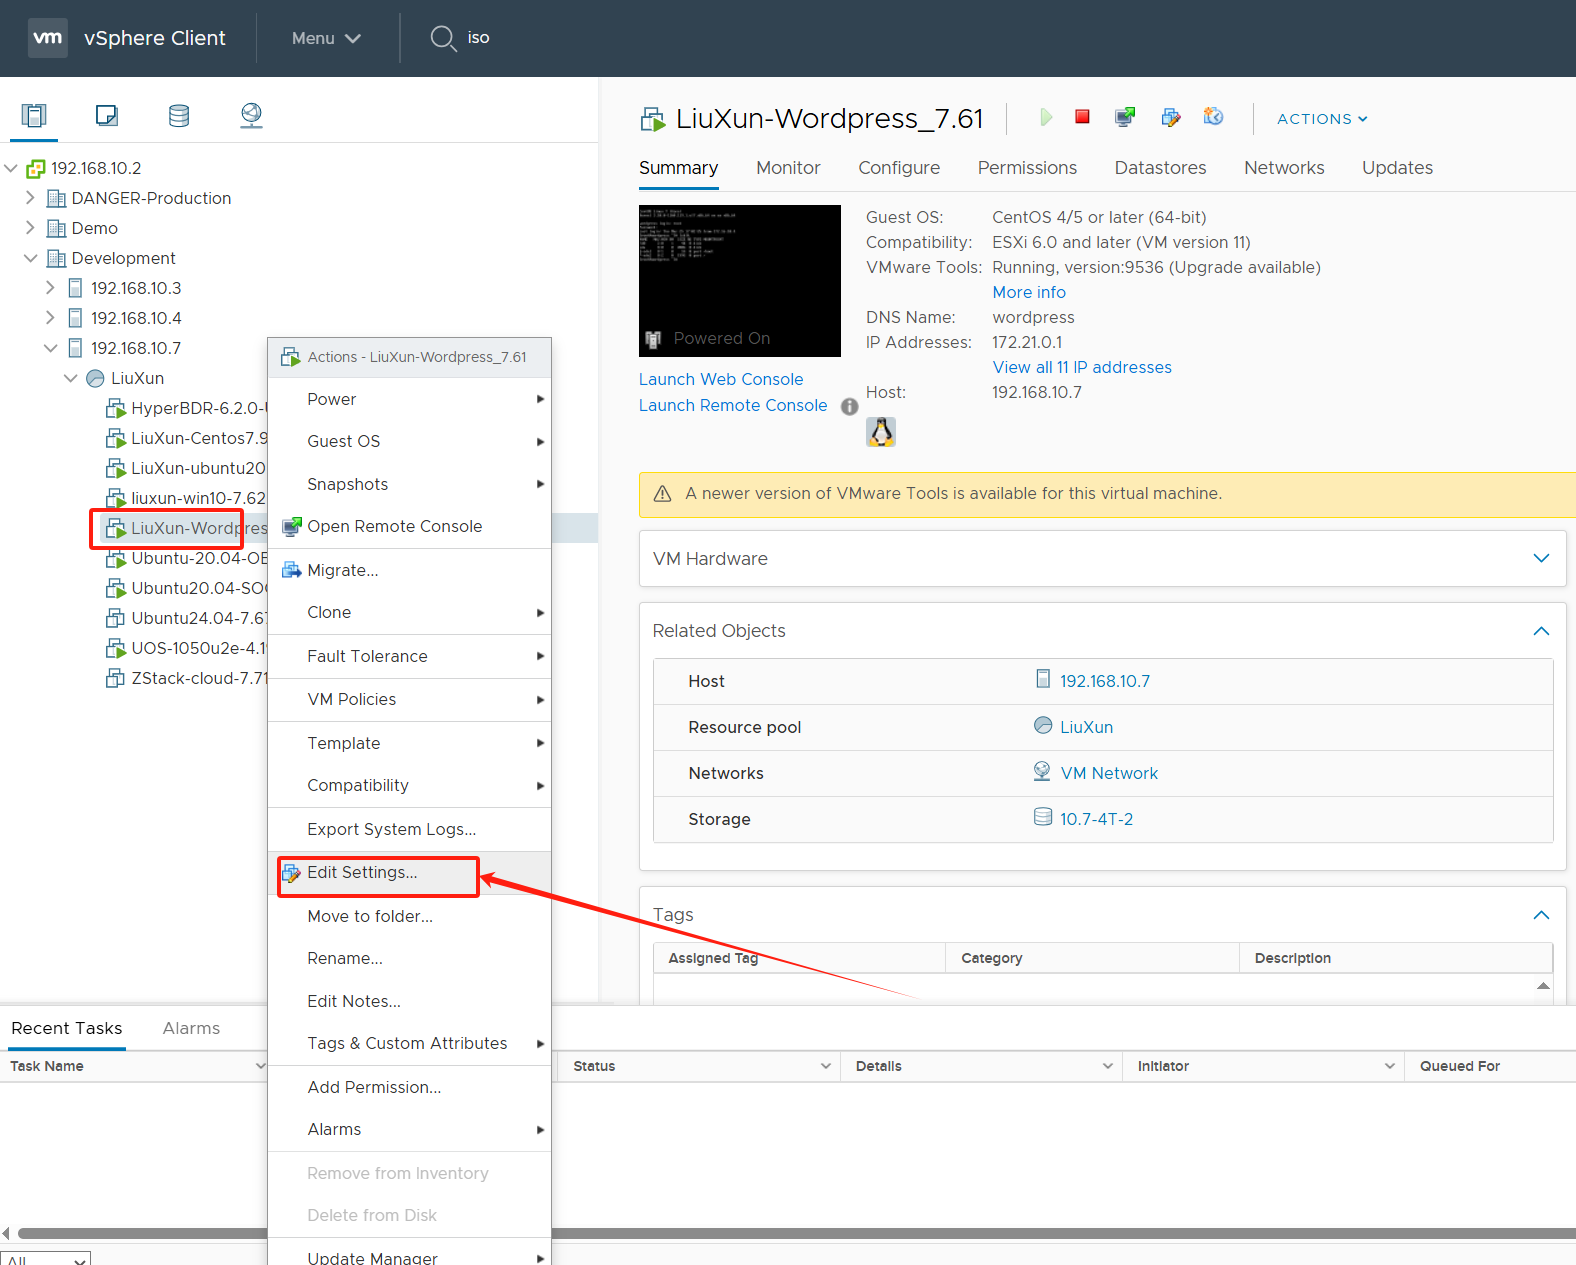
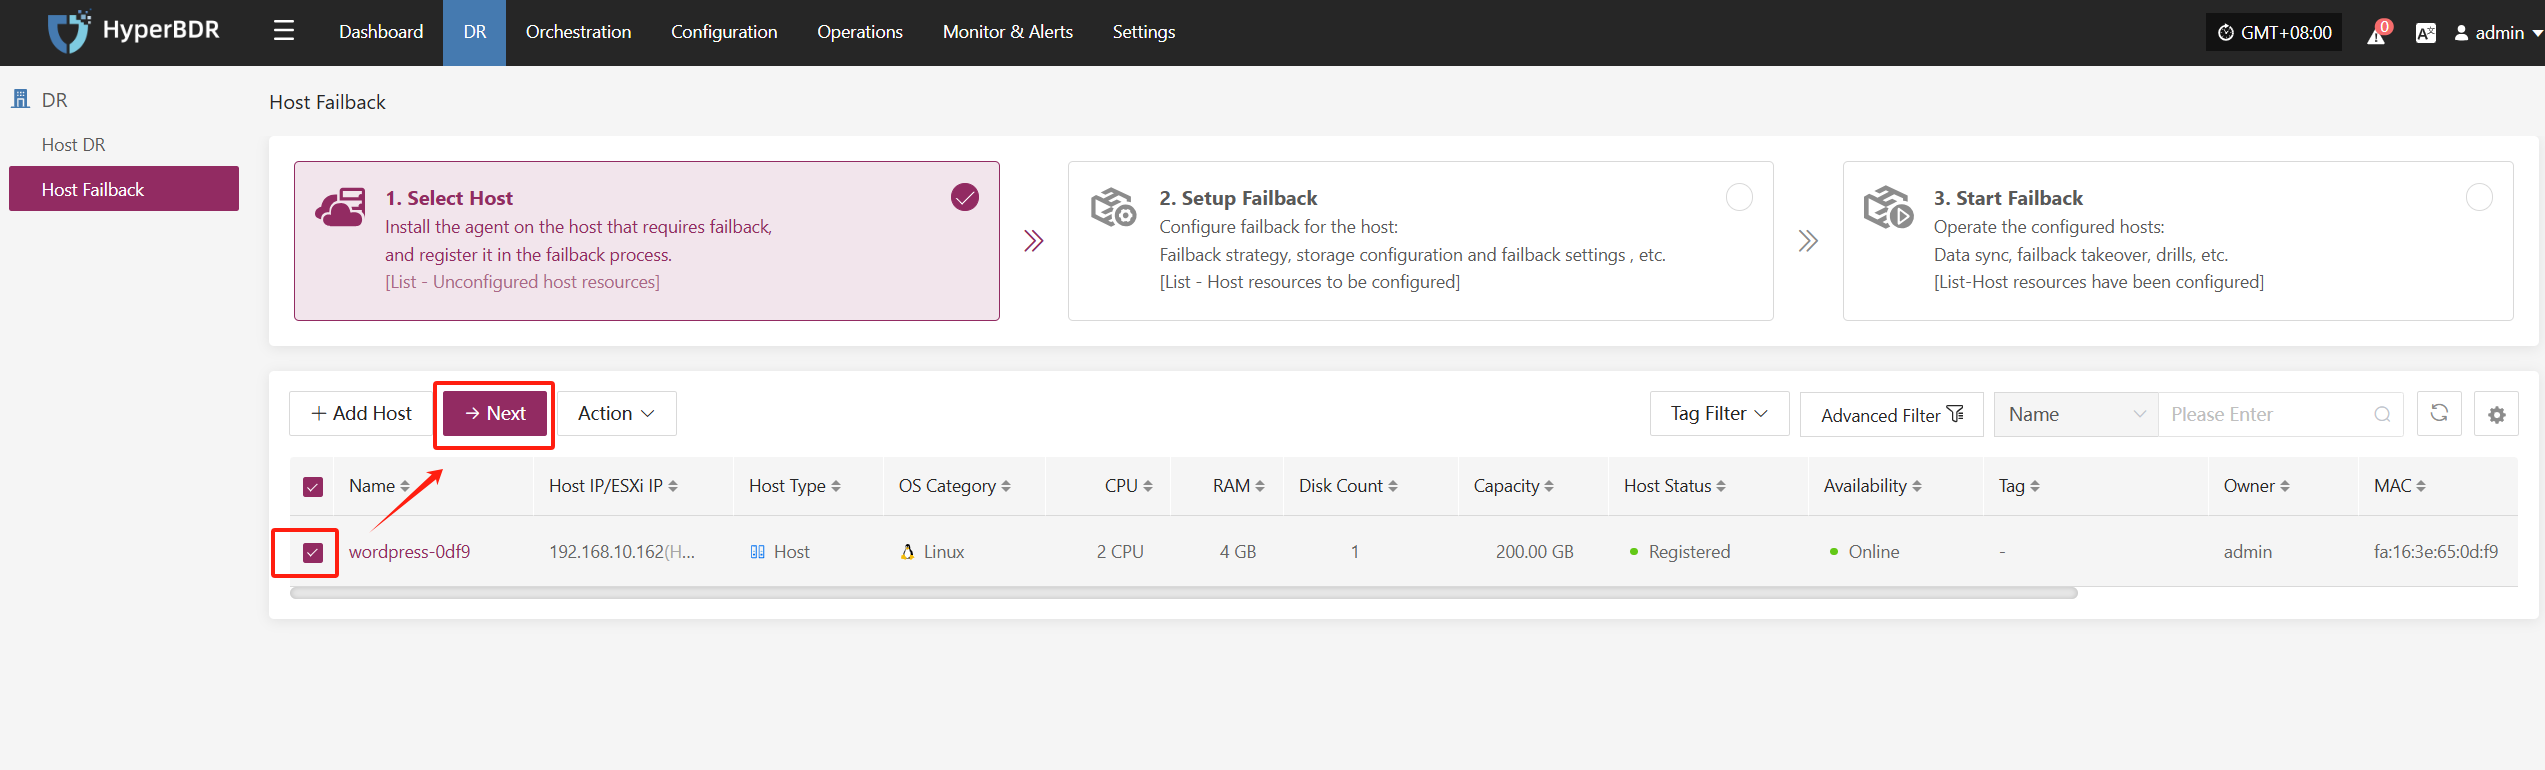
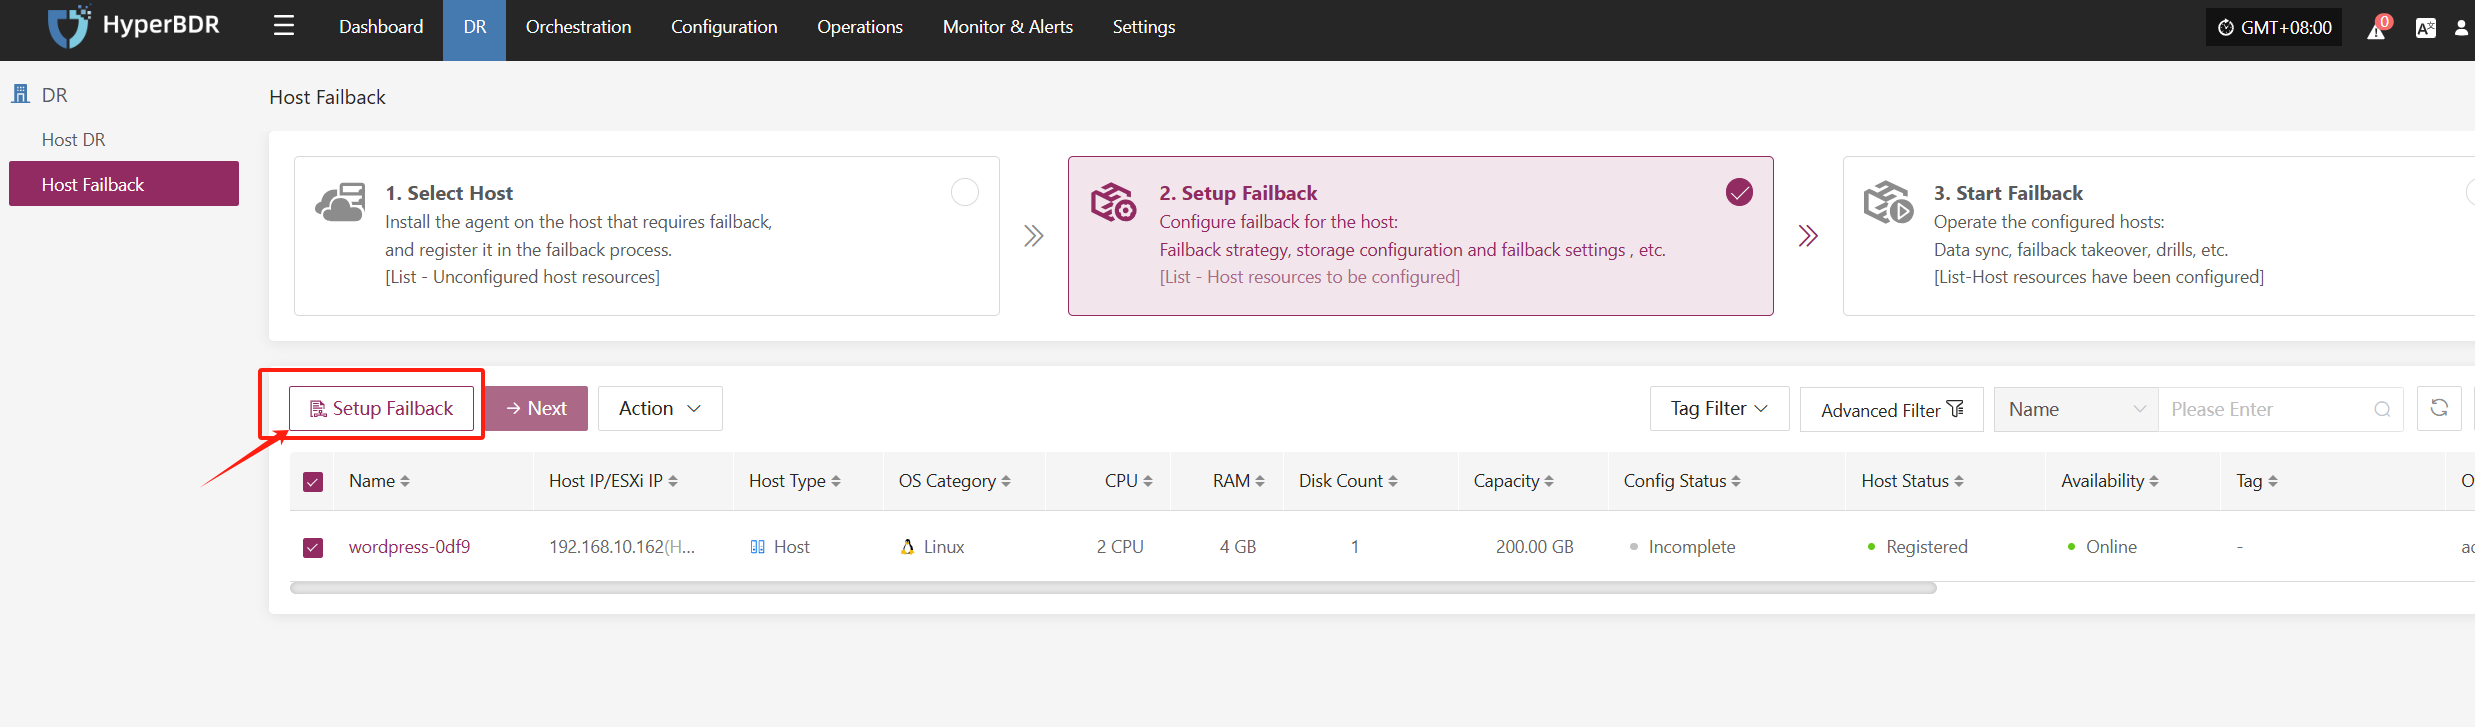
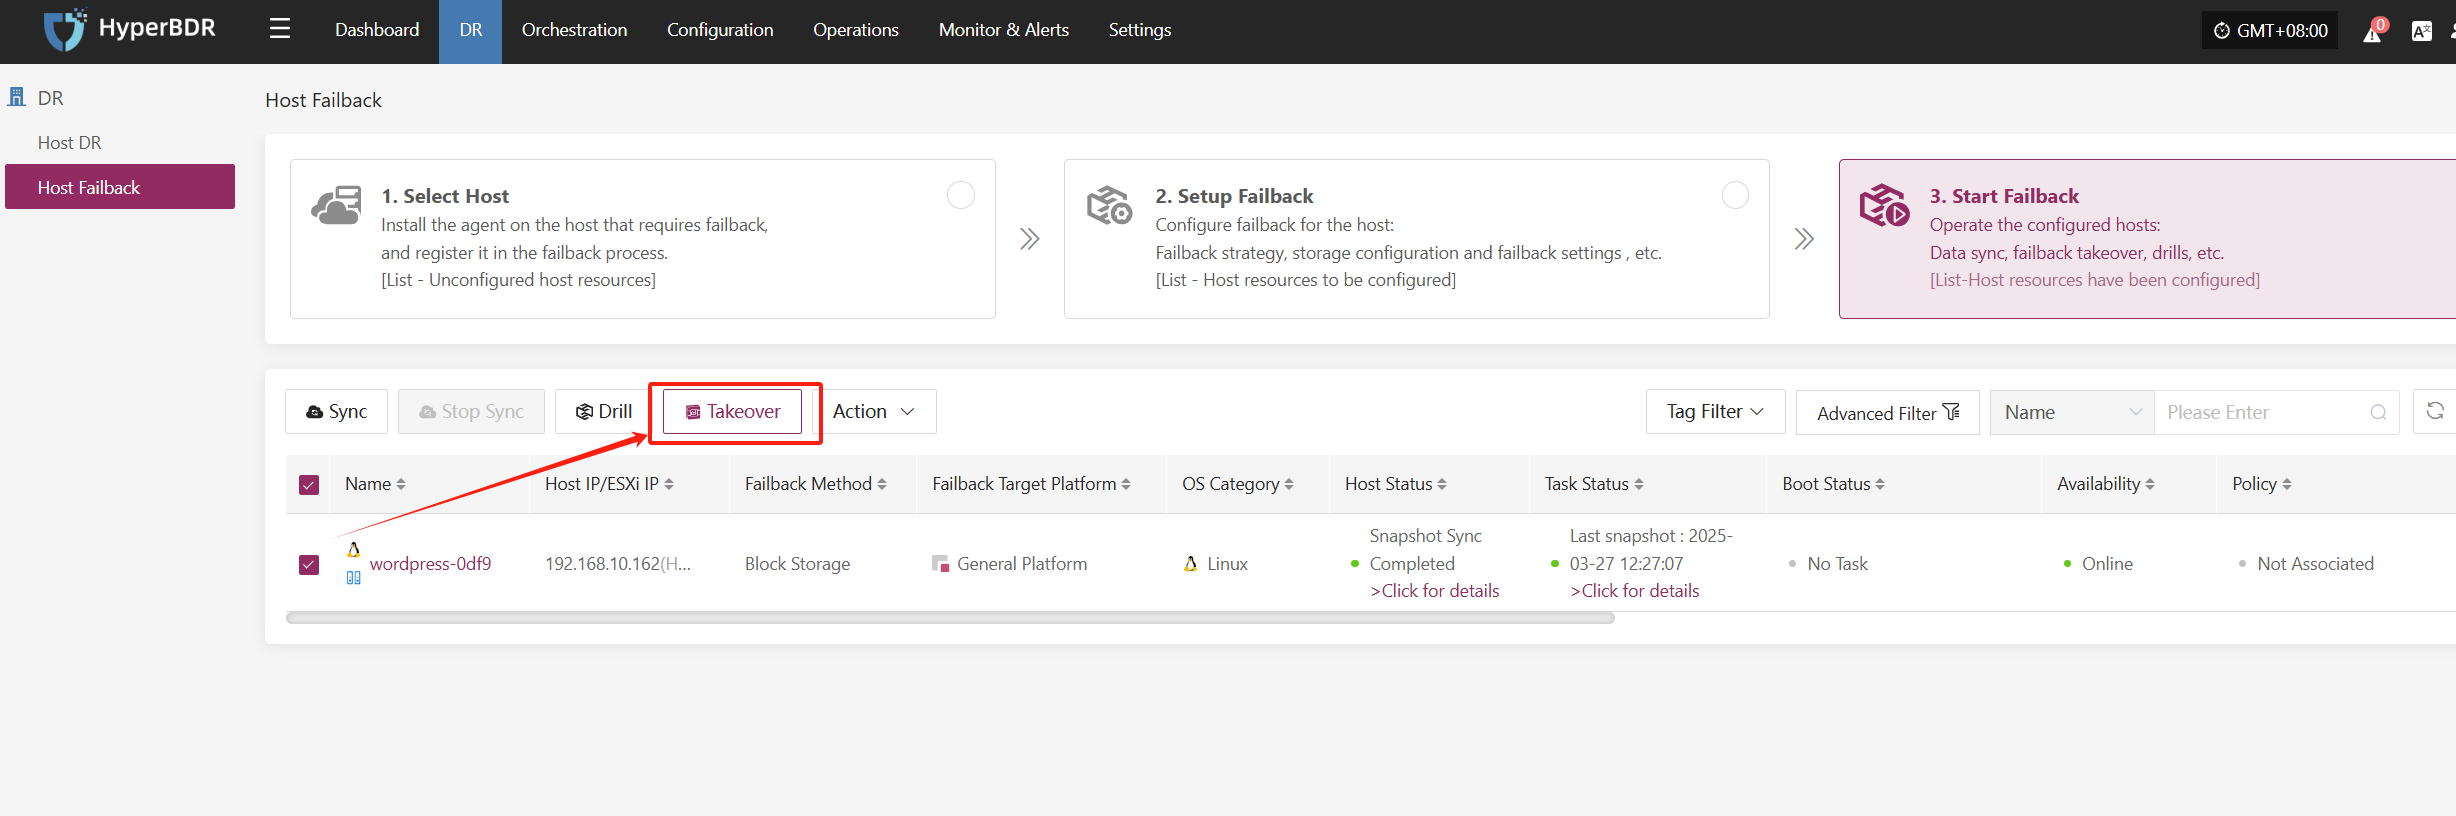
Add the host to be failback to the disaster recovery platform
"Configuration"--"Product Site"--"Failback"--"Failback Agent"--"Copy command"
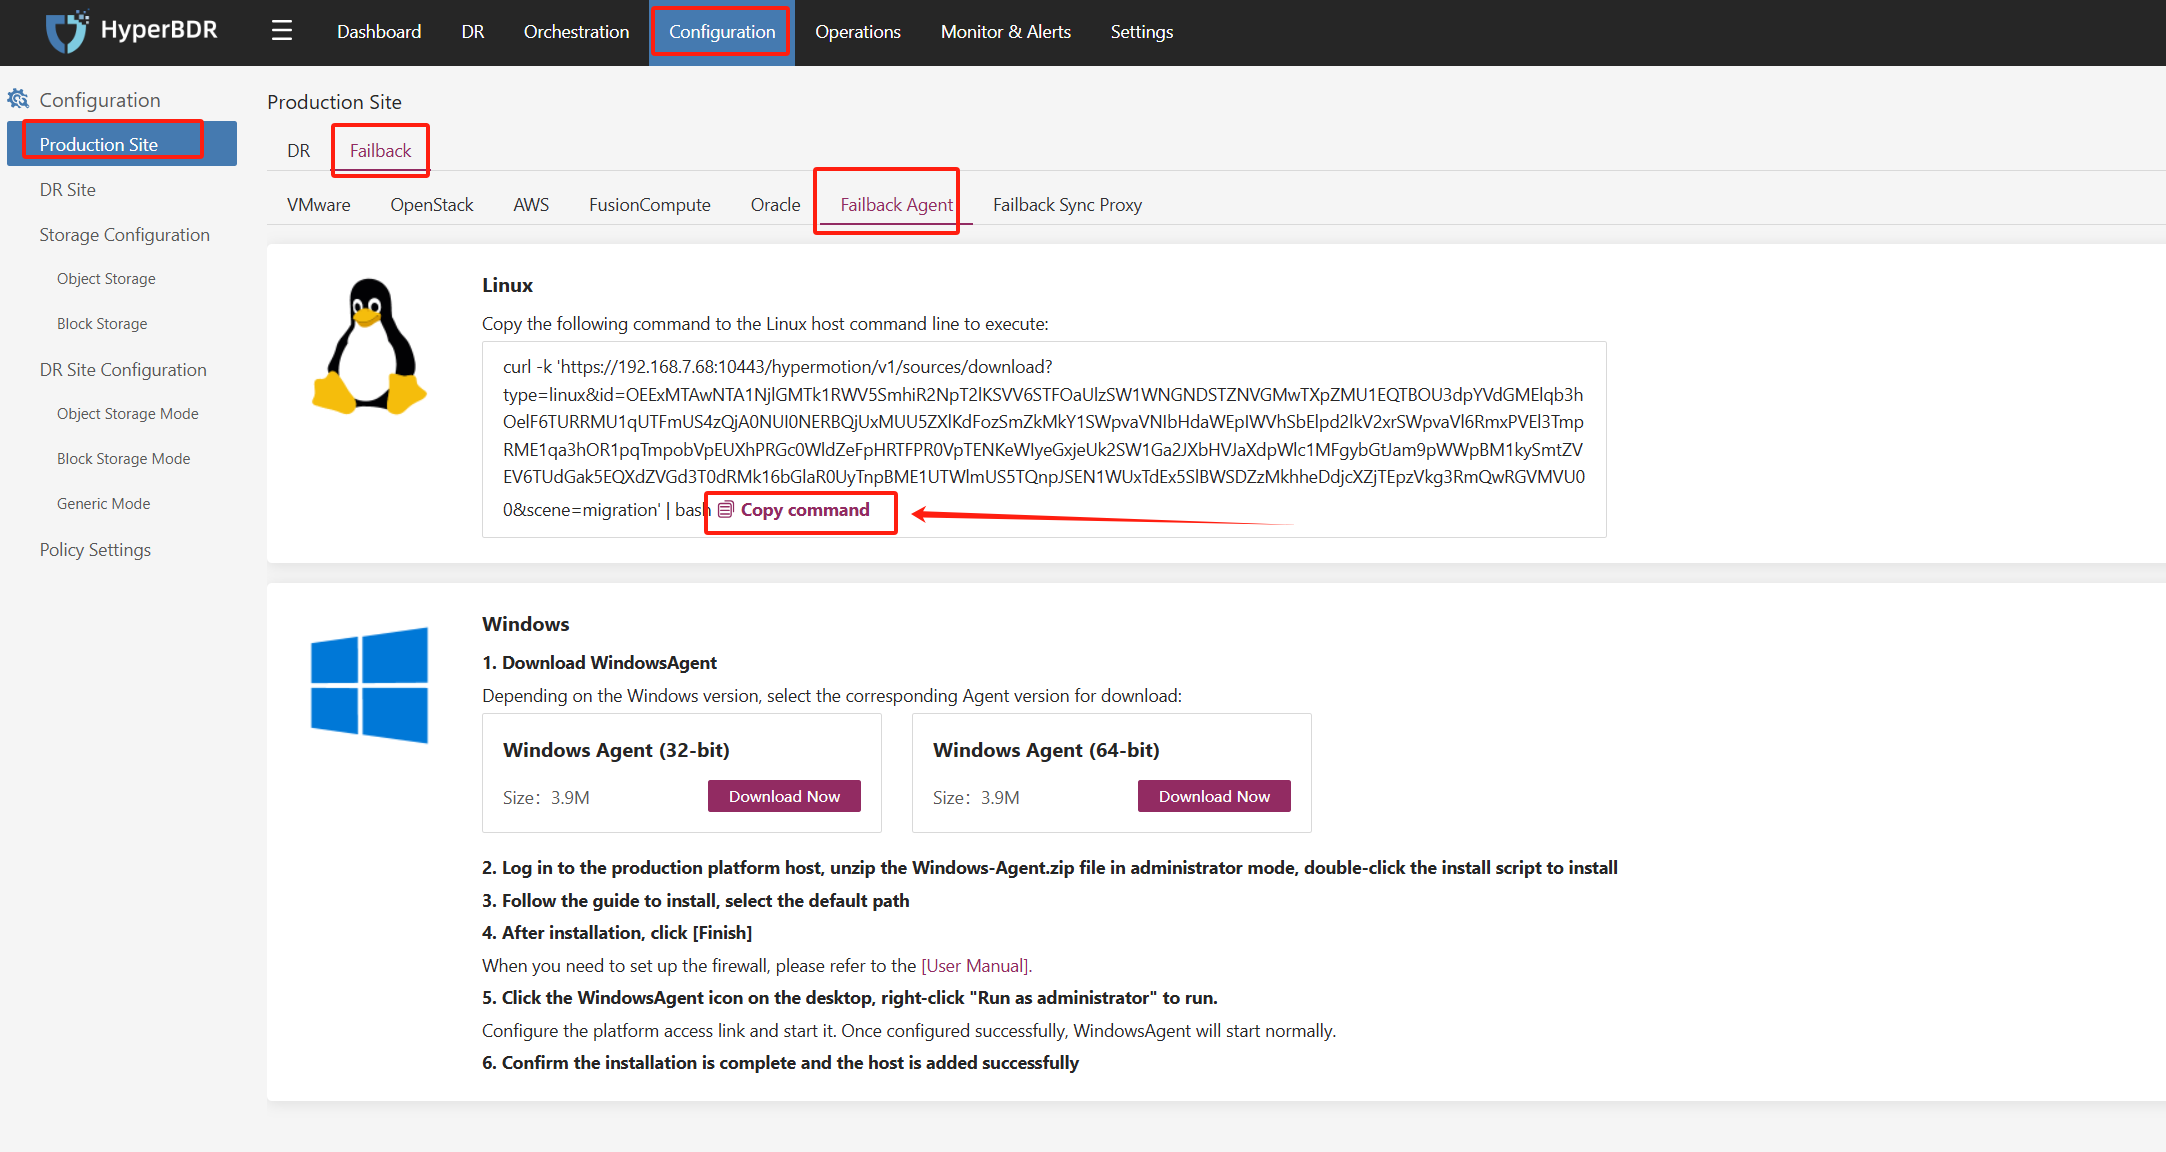
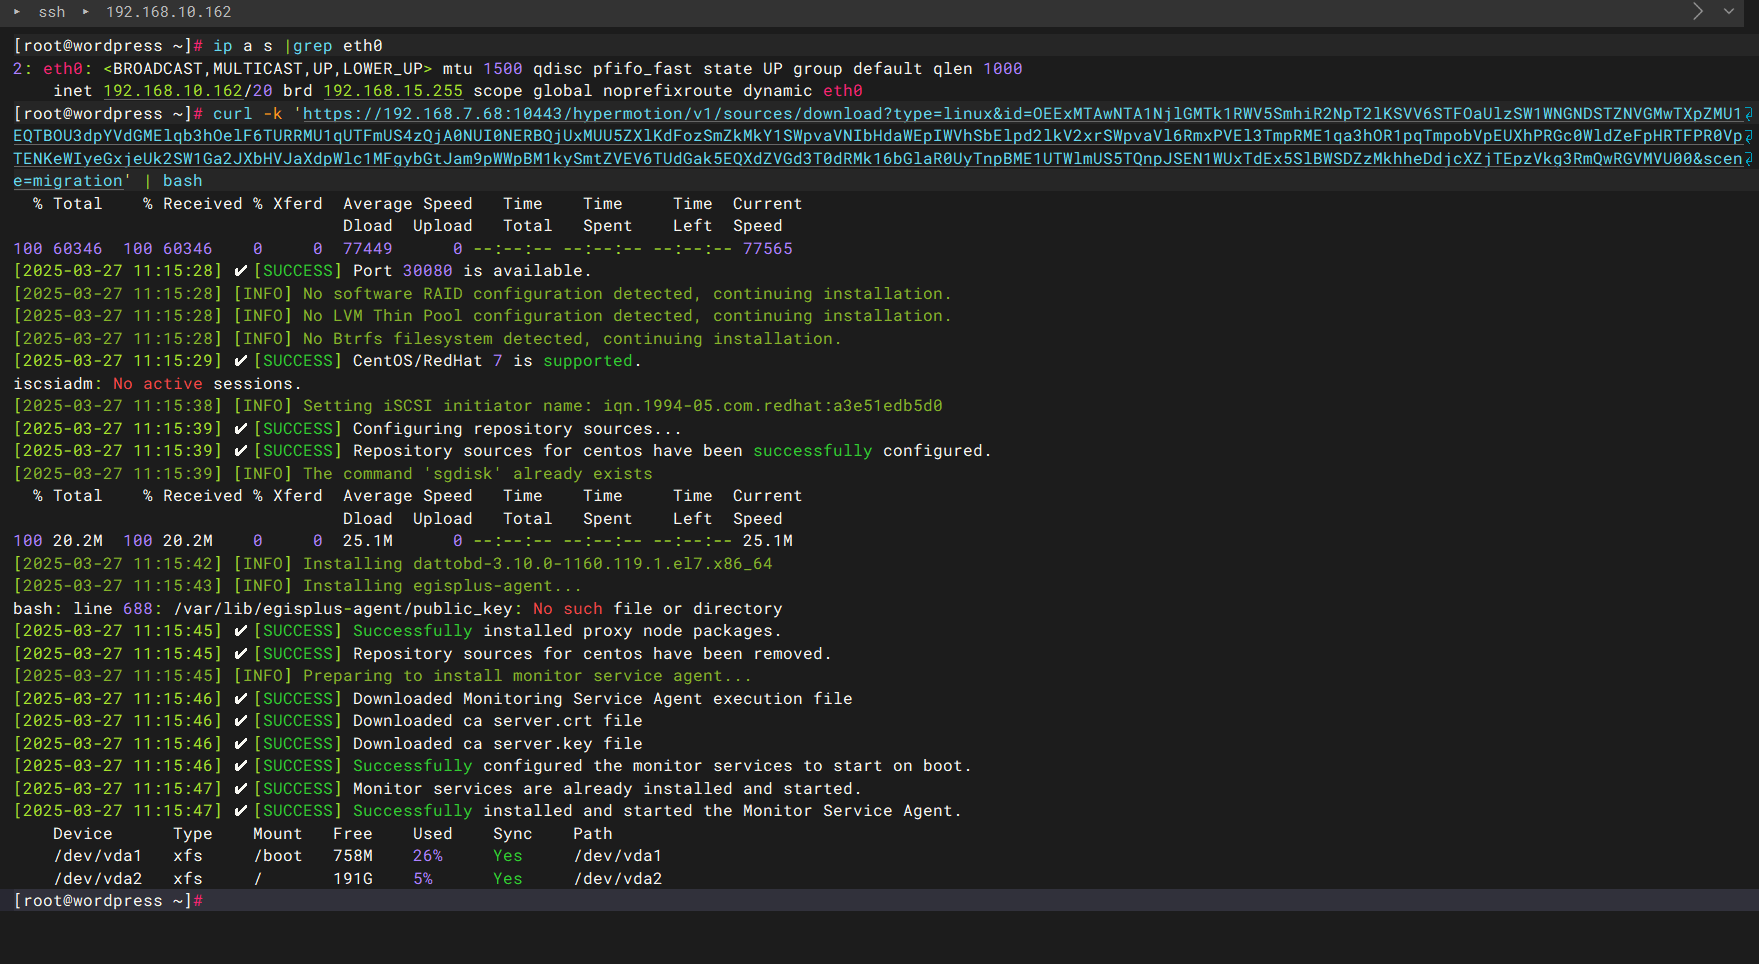
Log in to the host to be failback through SSH and execute the Agent installation command
After completing registration, the failback host will be displayed in the disaster recovery Console

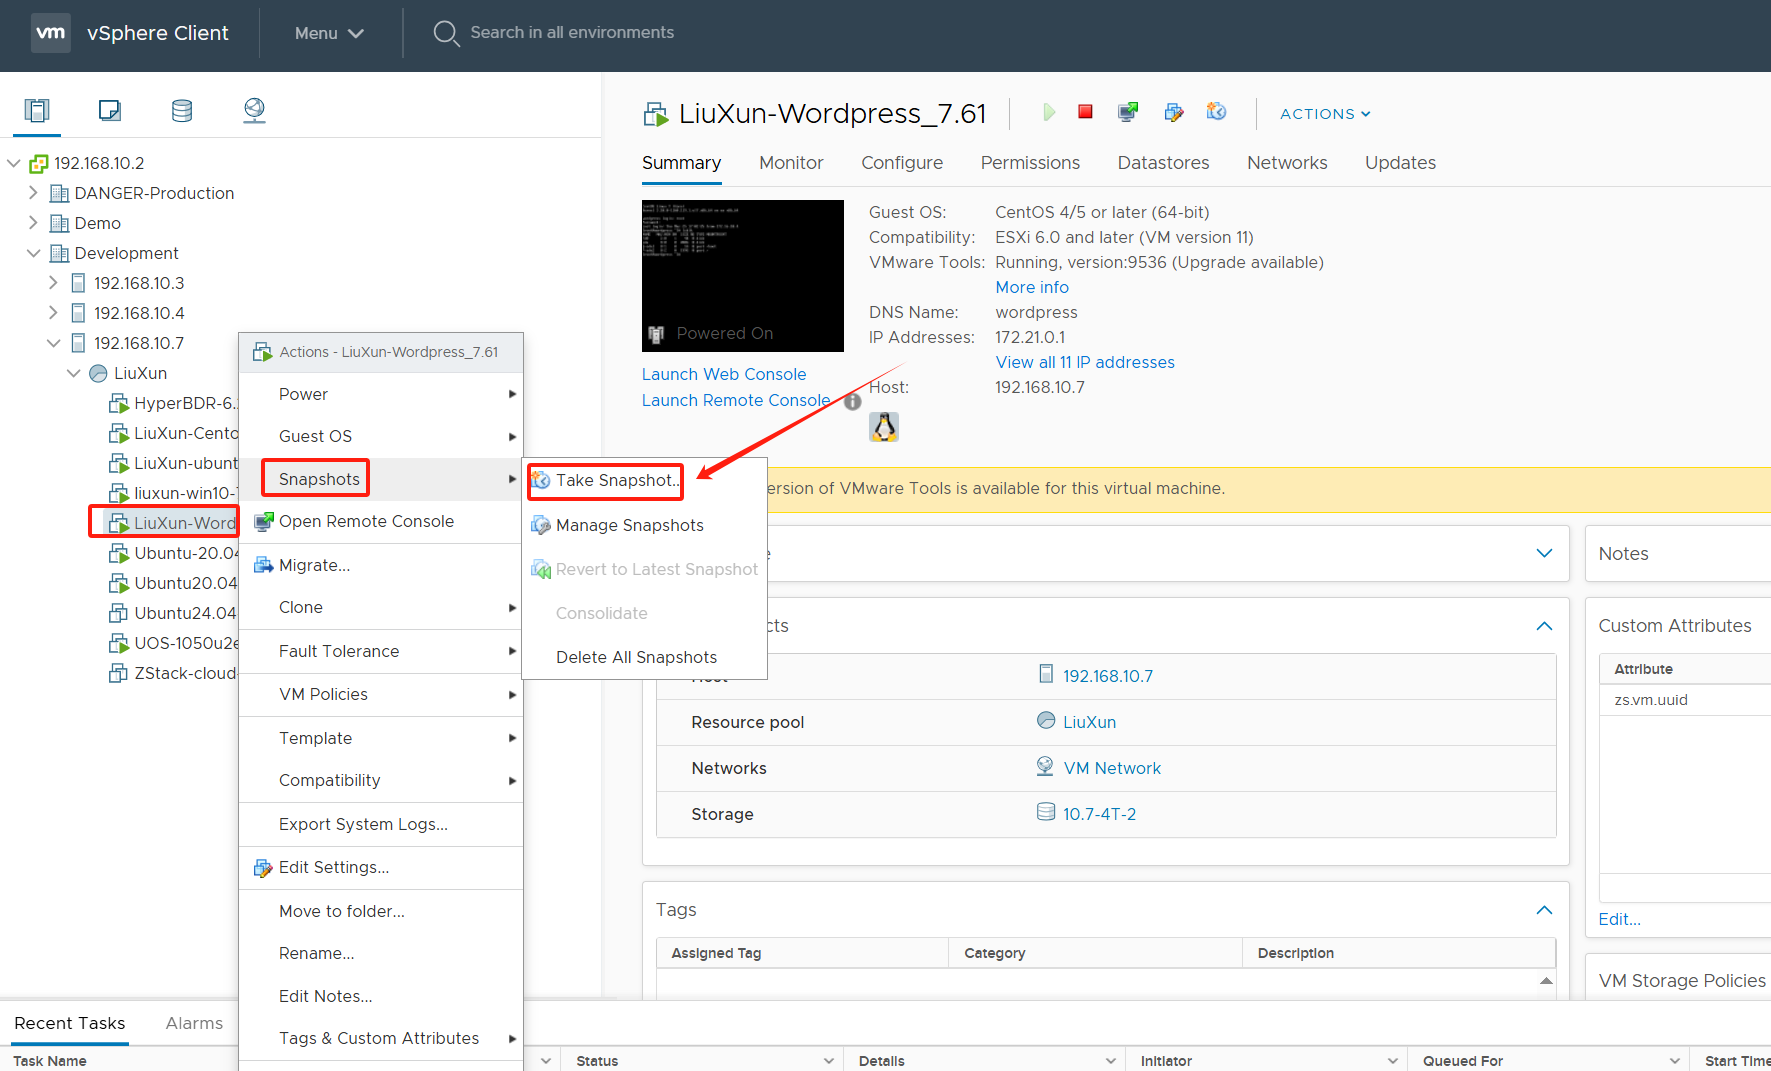
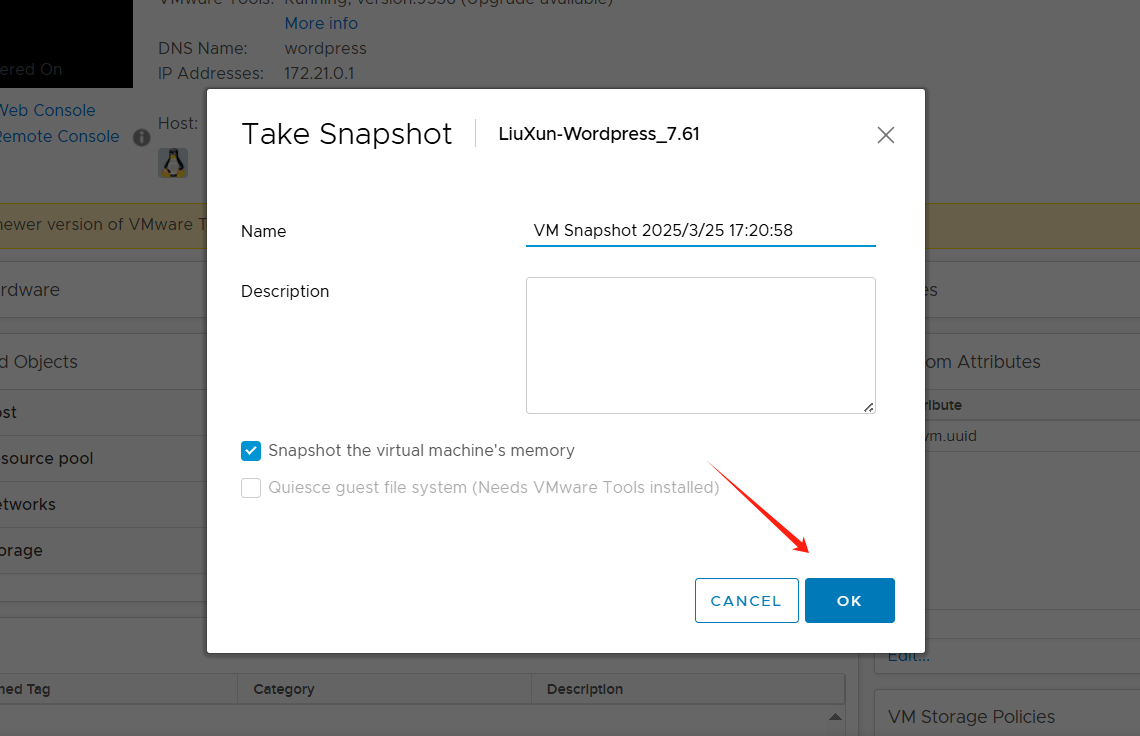
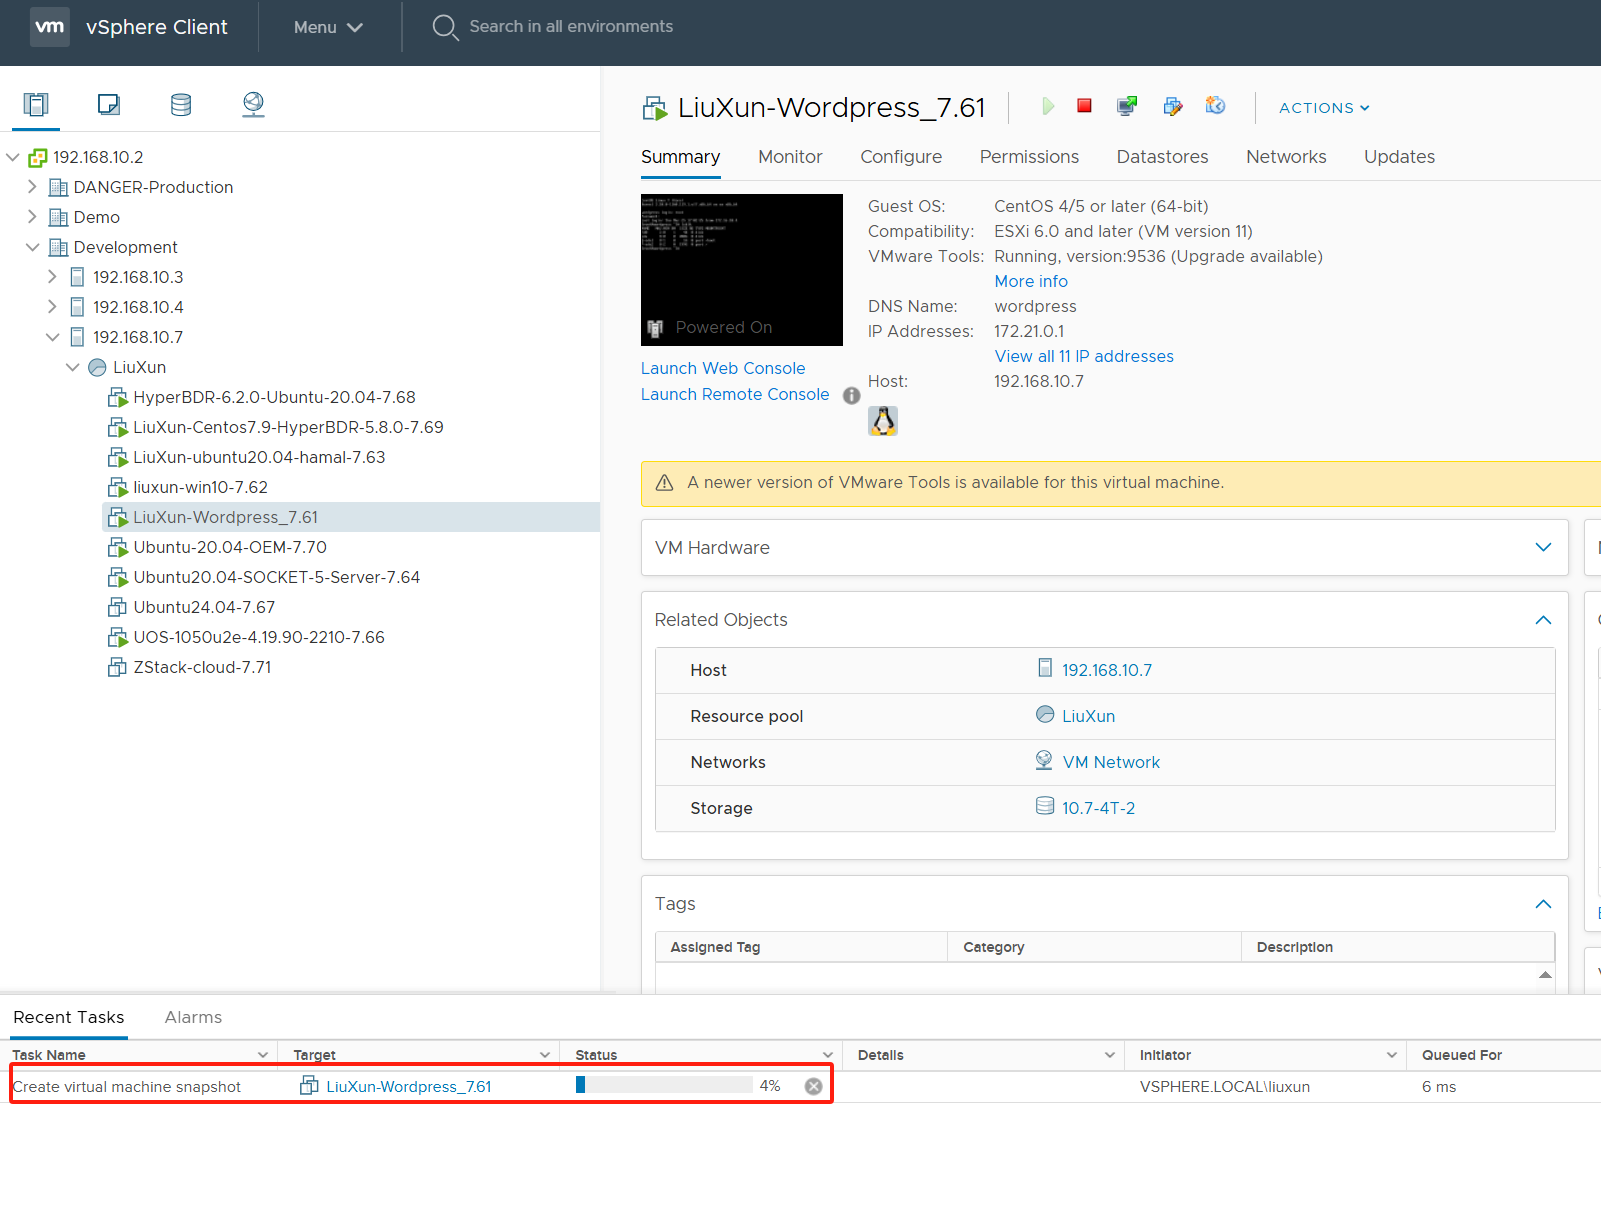
Create a snapshot for the VMware original host (must be done before failback)
Note: To prevent data loss caused by a failback failure, a snapshot of the original VMware host needs to be created.
Download and upload LiveCD-HyperDoor mirroring to VMware
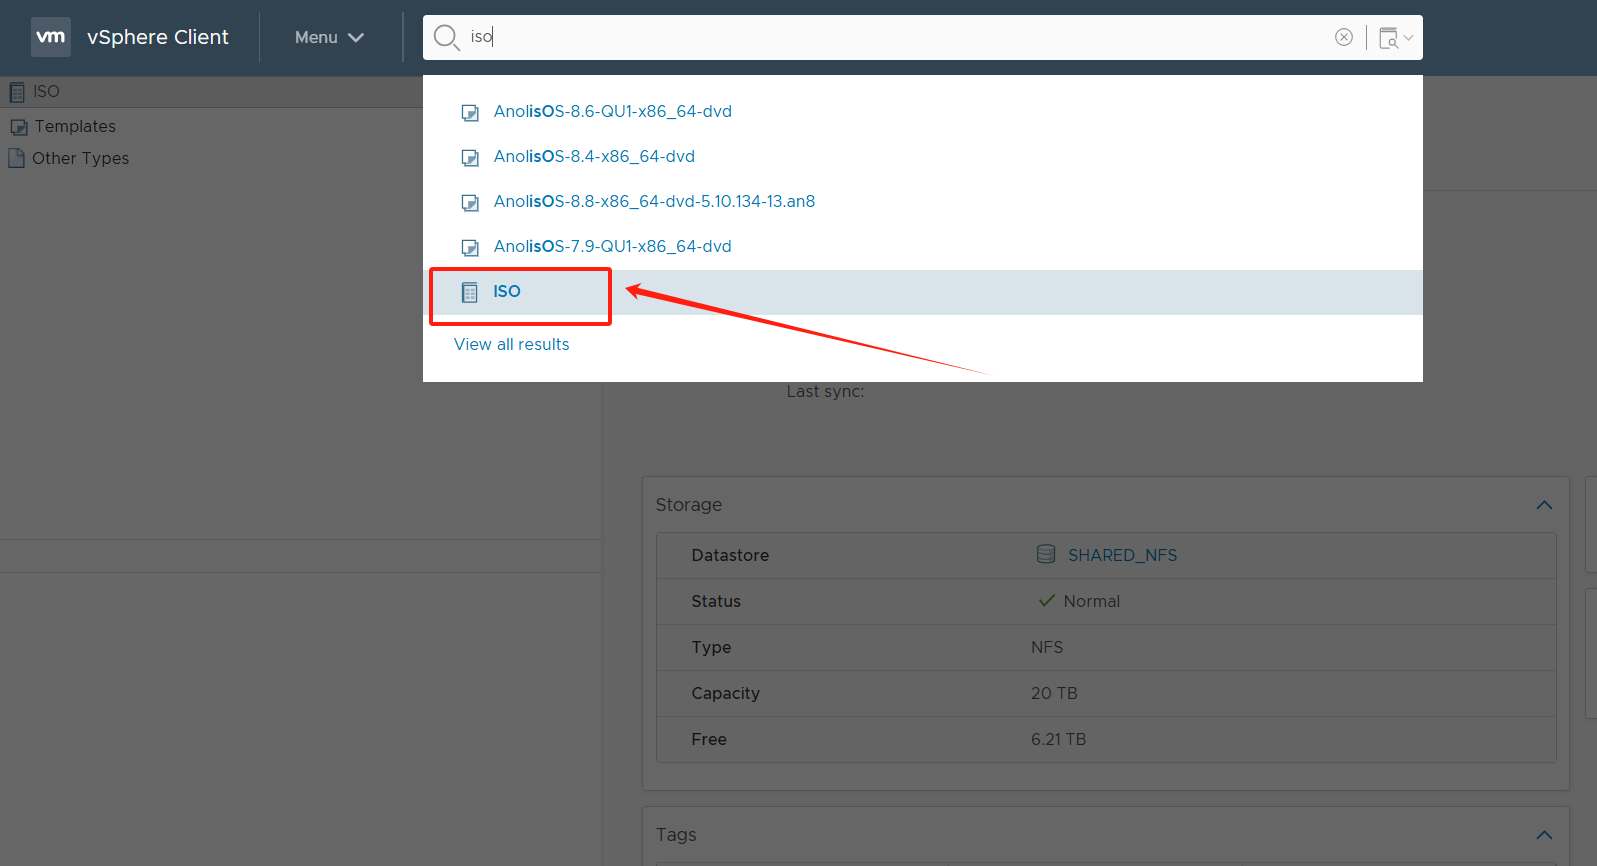
Get the Livecd-HyperDoor.iso mirroring file

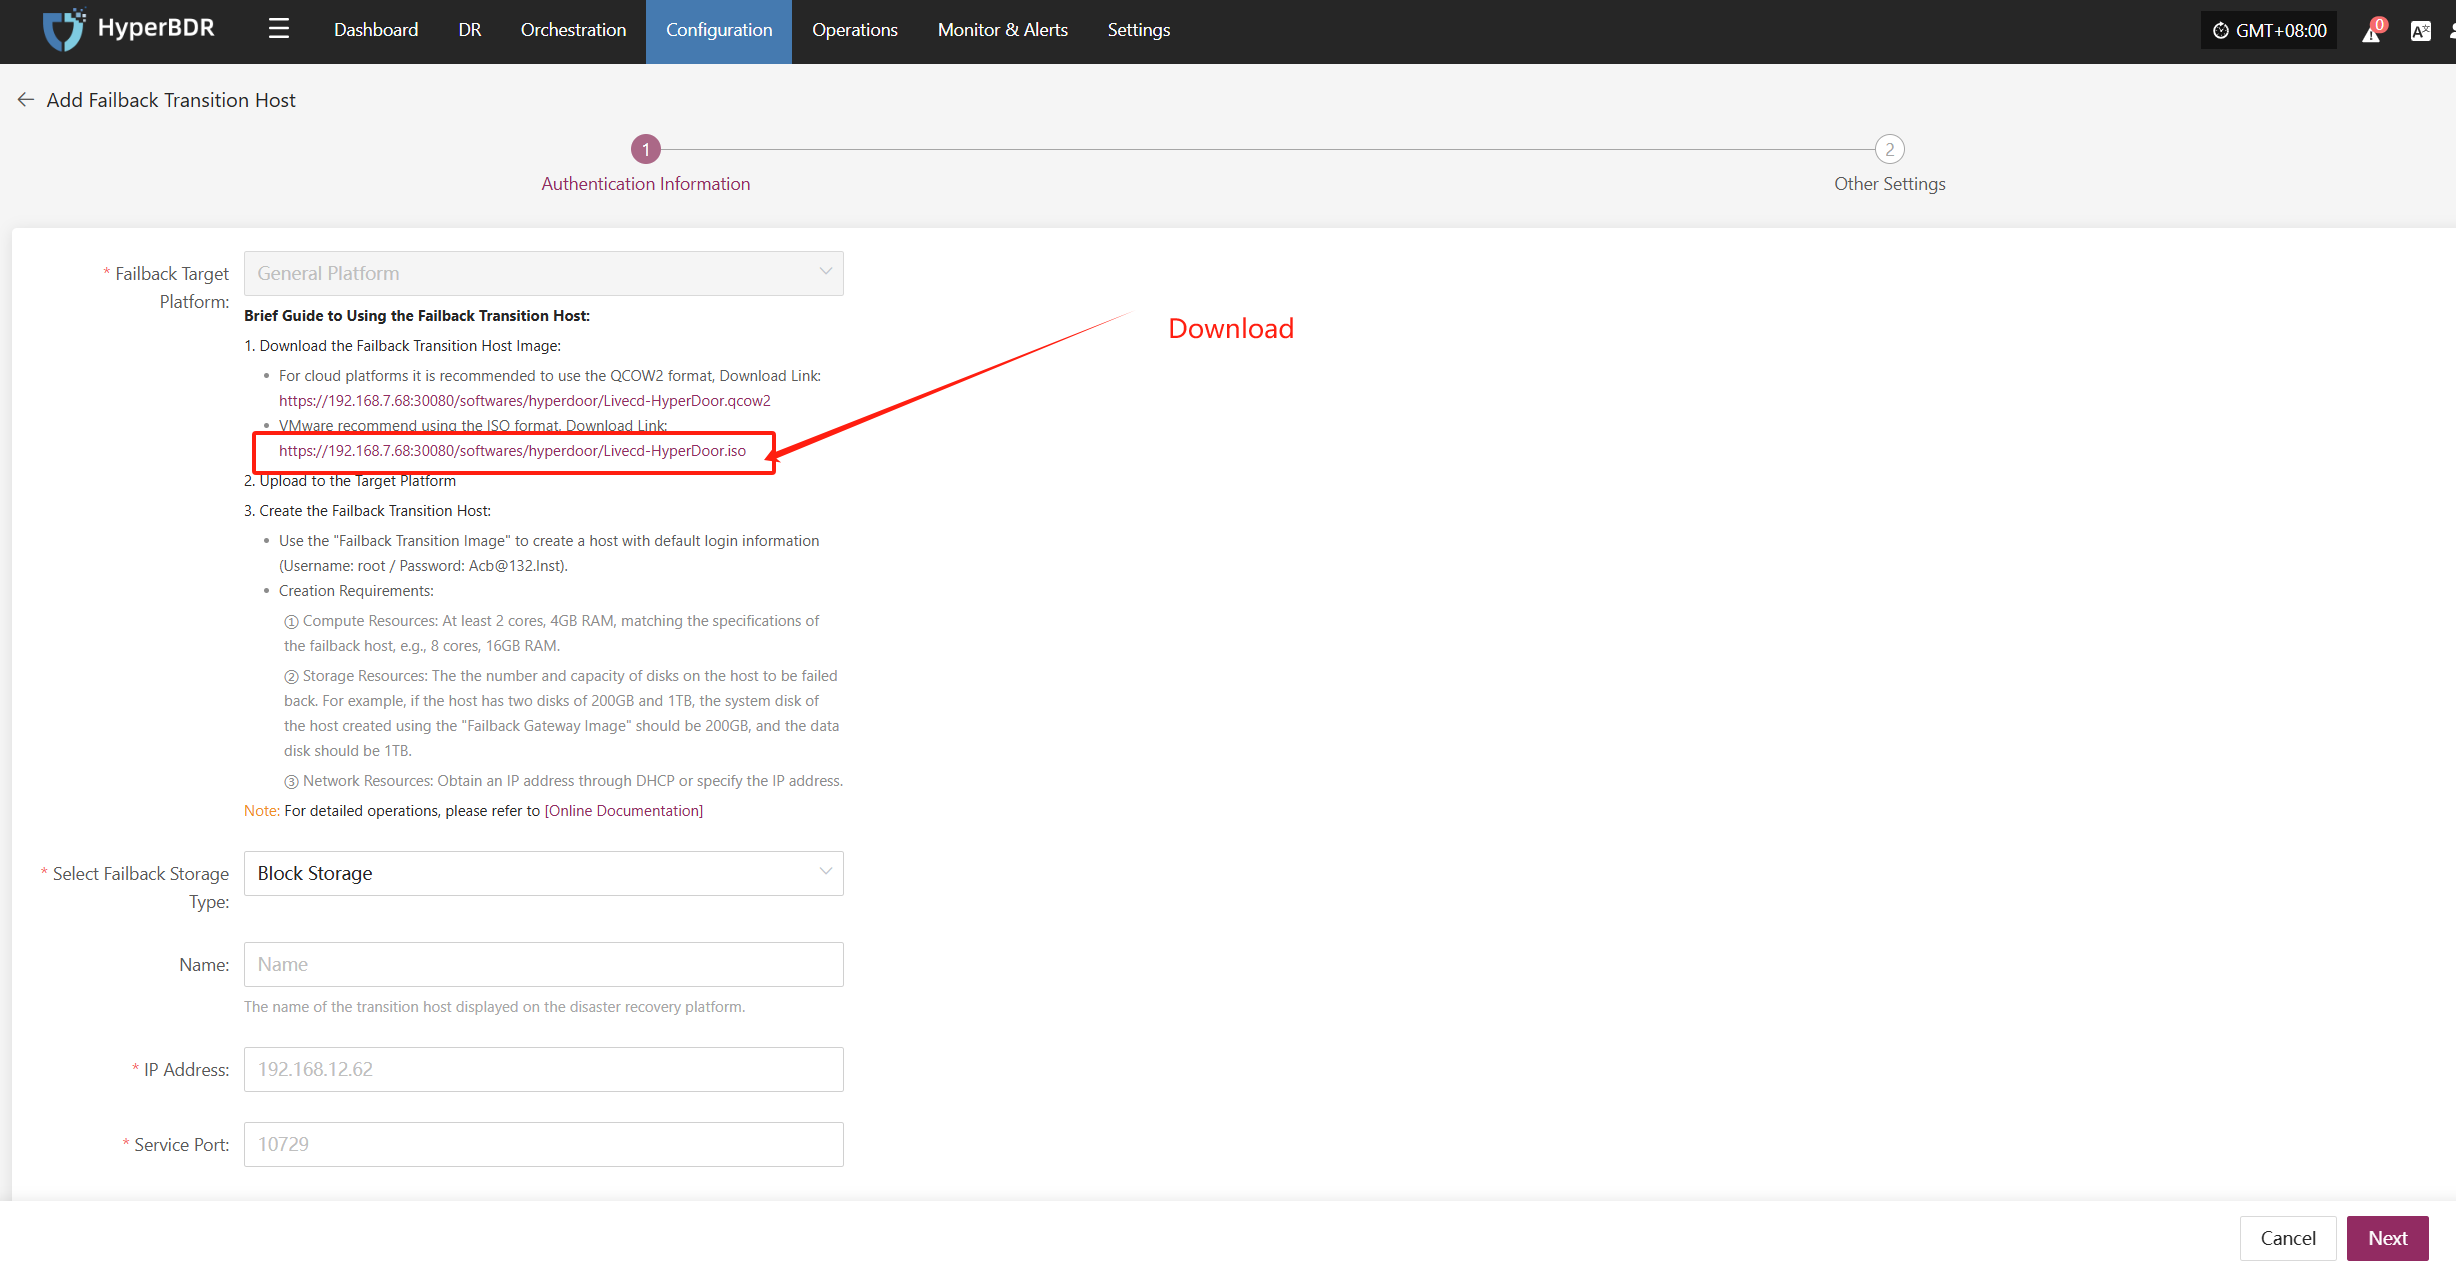
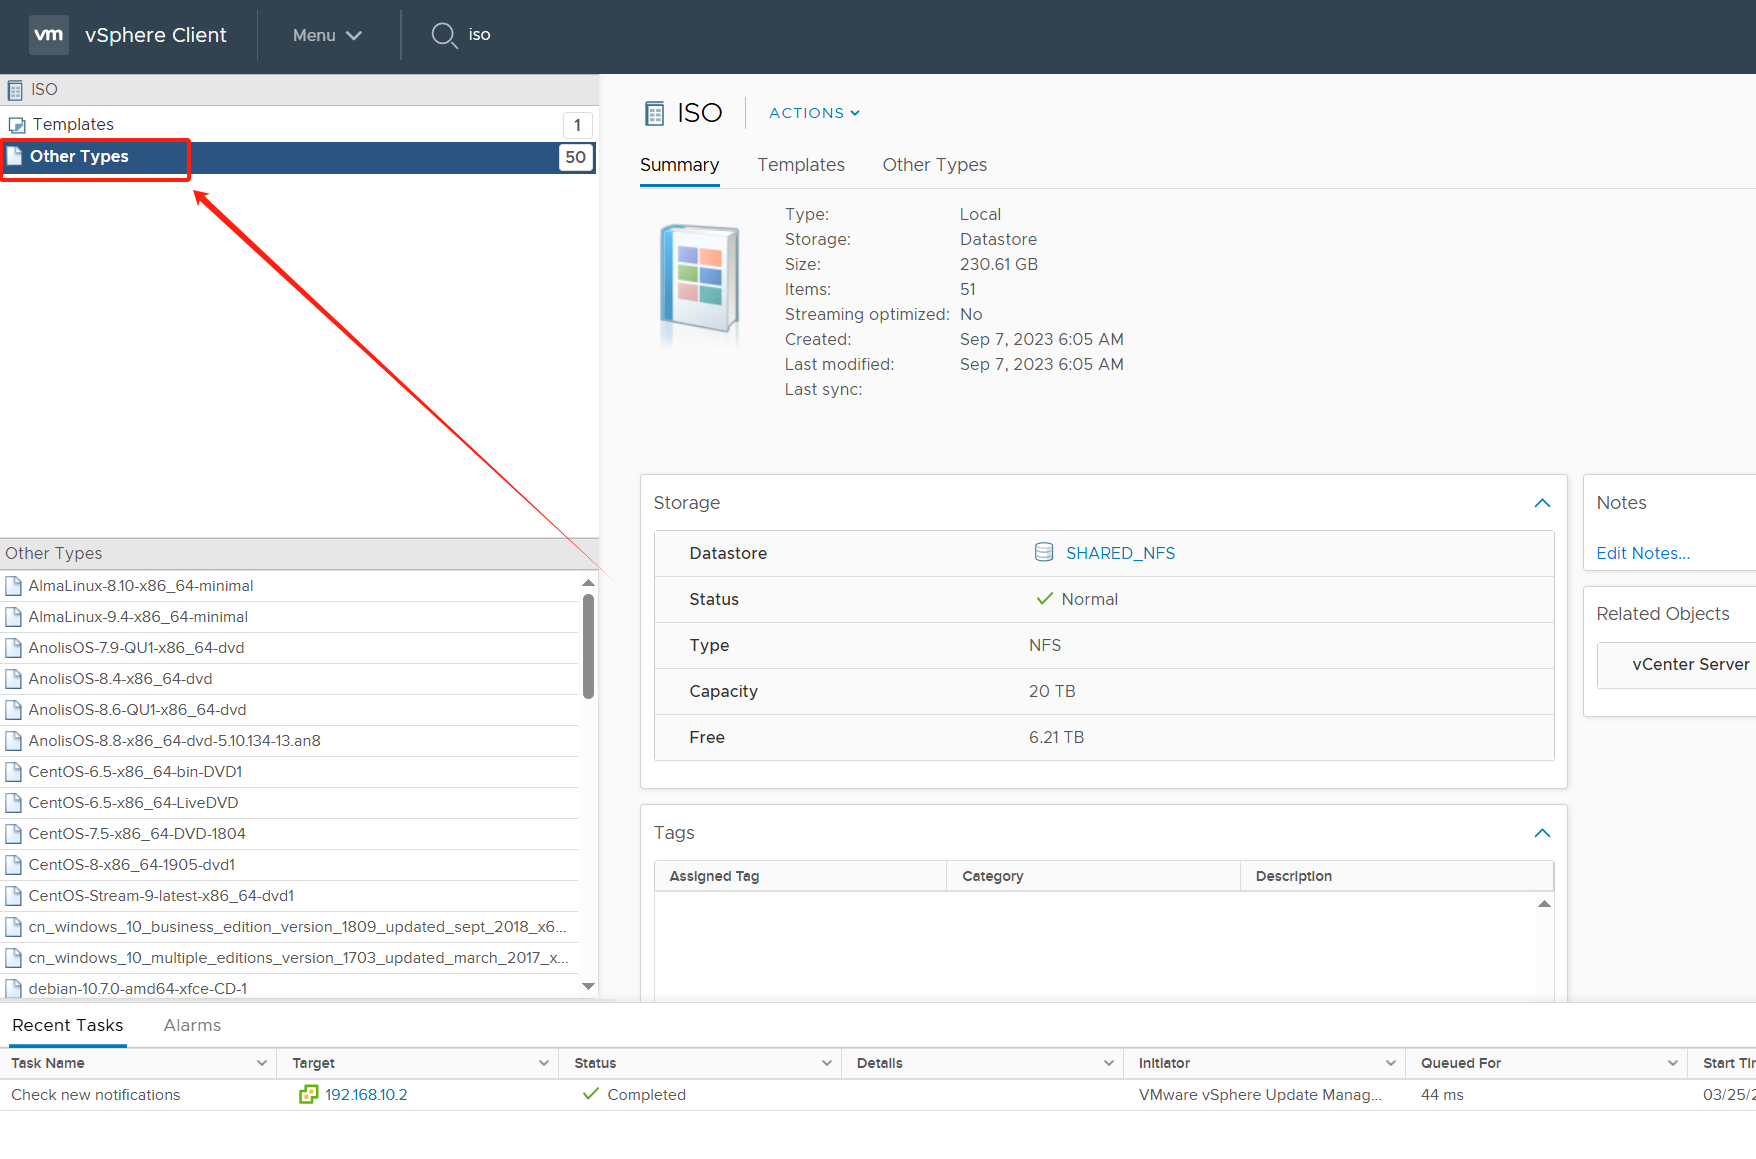
Upload to VMware cluster ISO library:
Go to the ISO content library and select Import Item
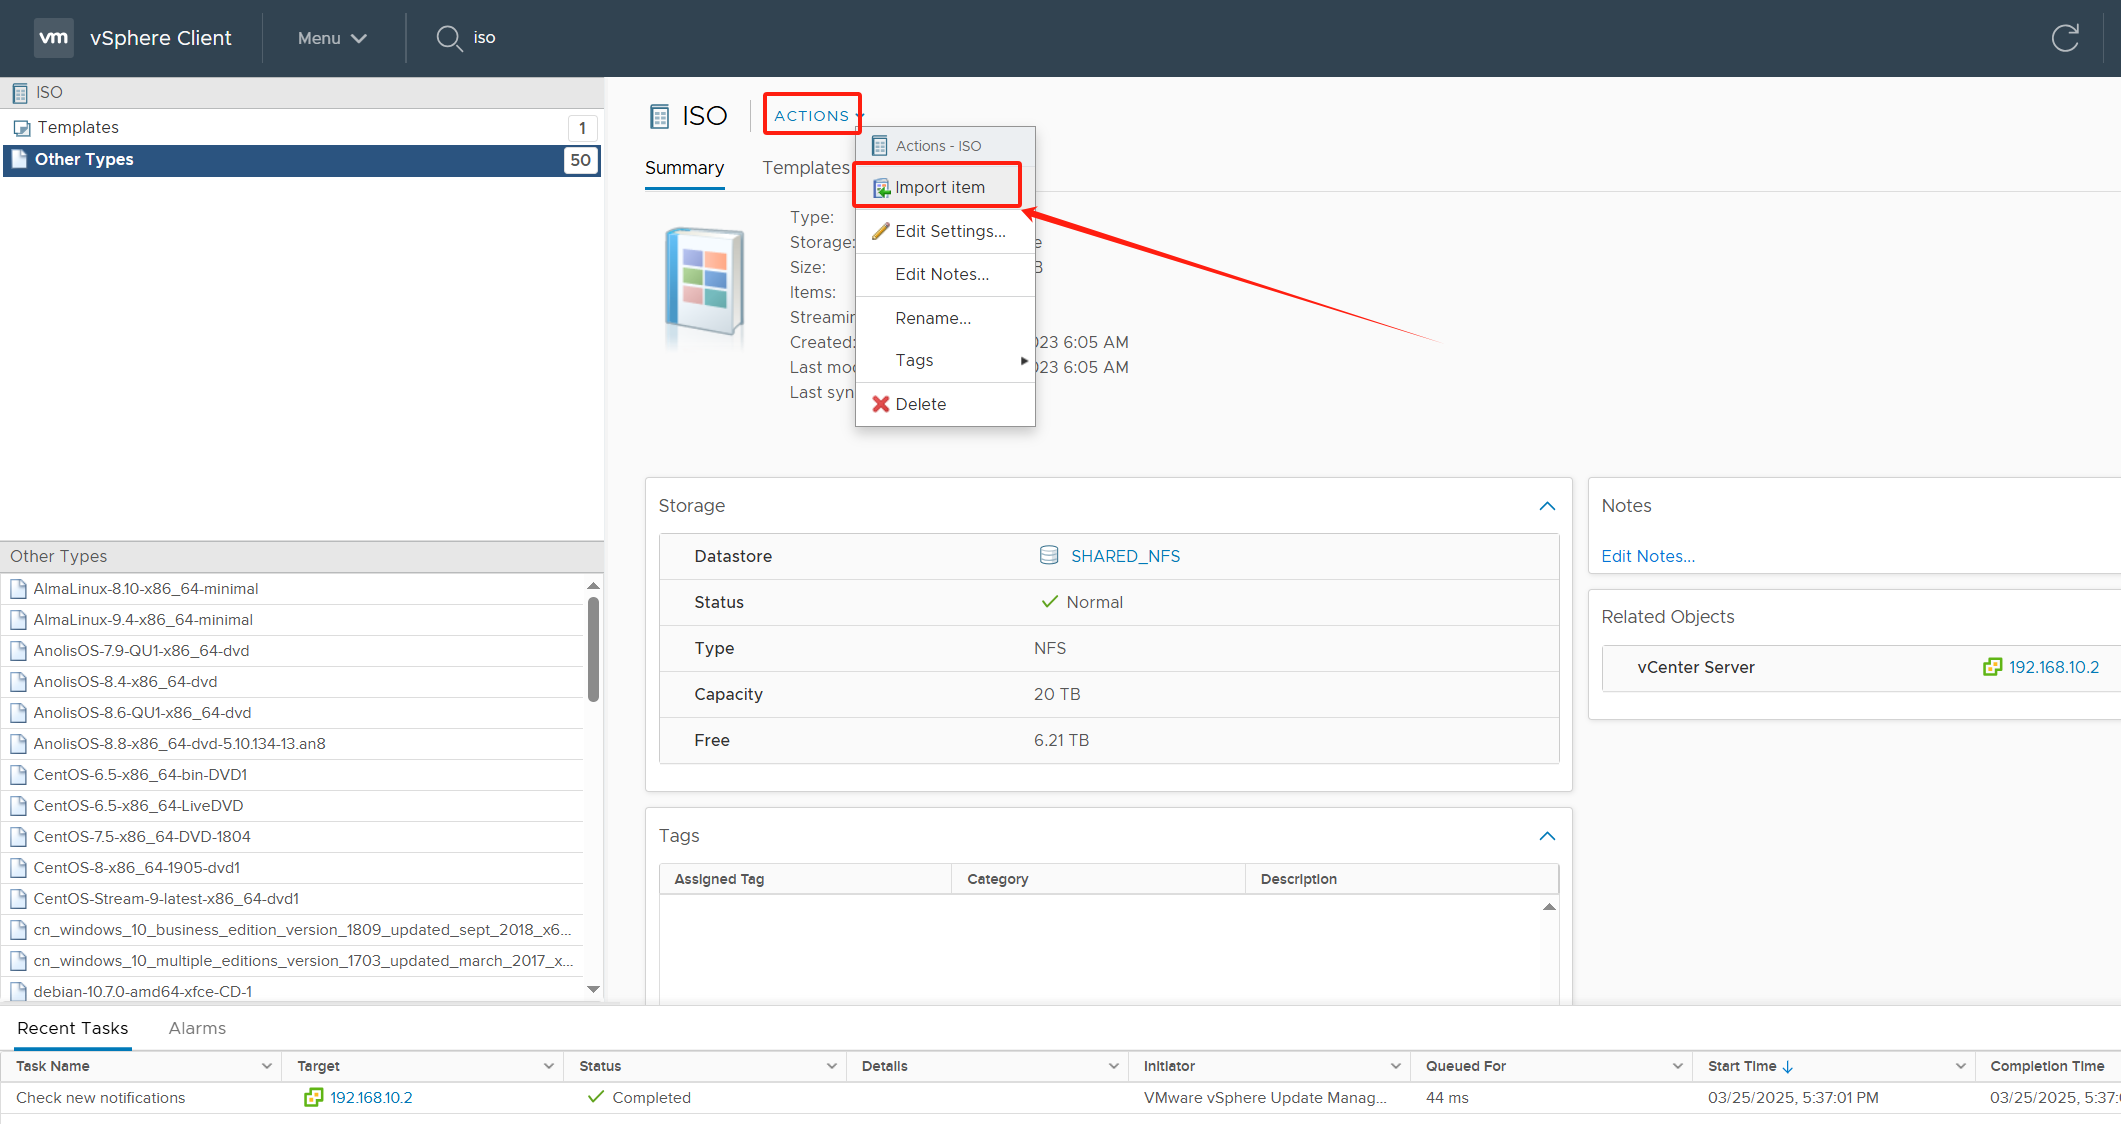
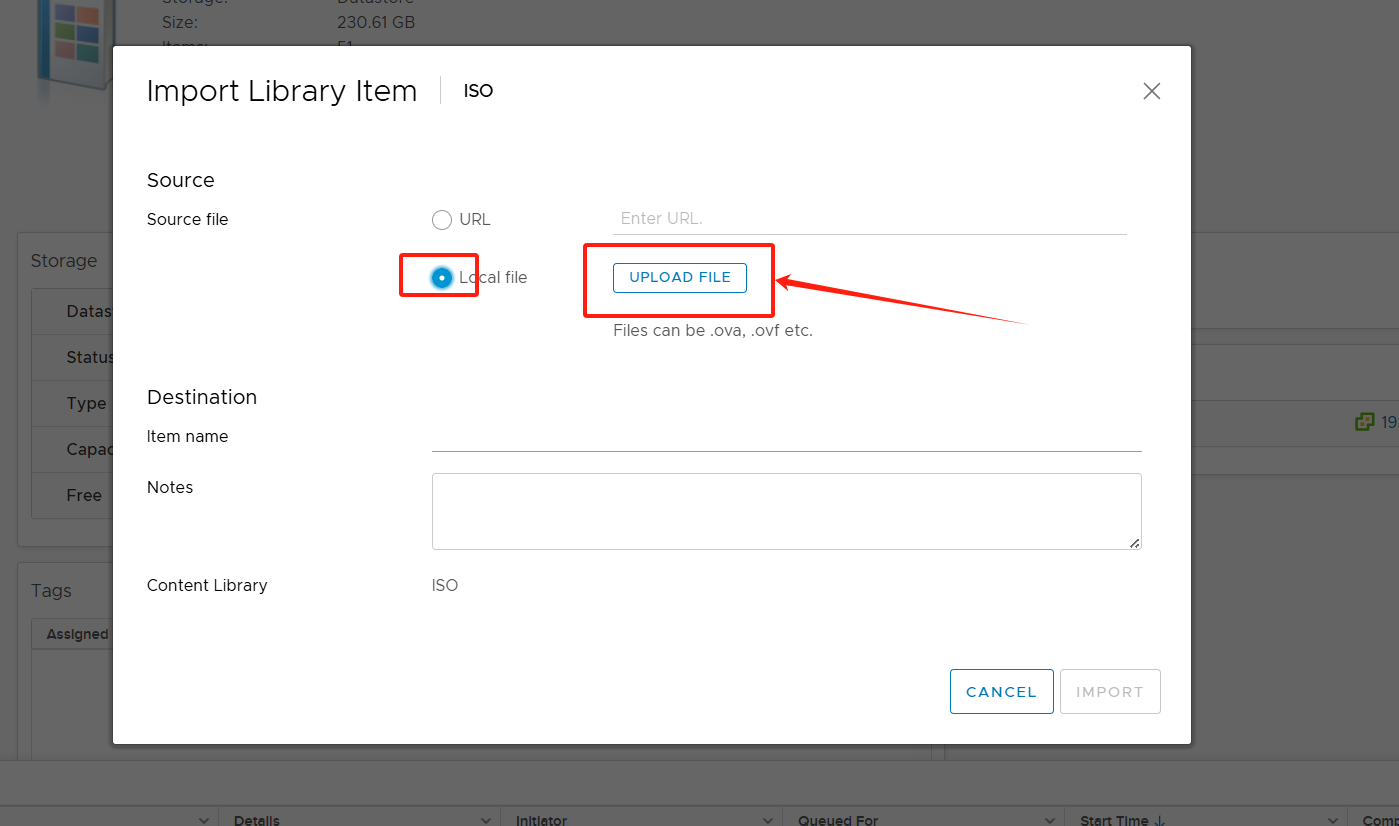
Select the file and click Import

Boot host using LiveCD mirroring
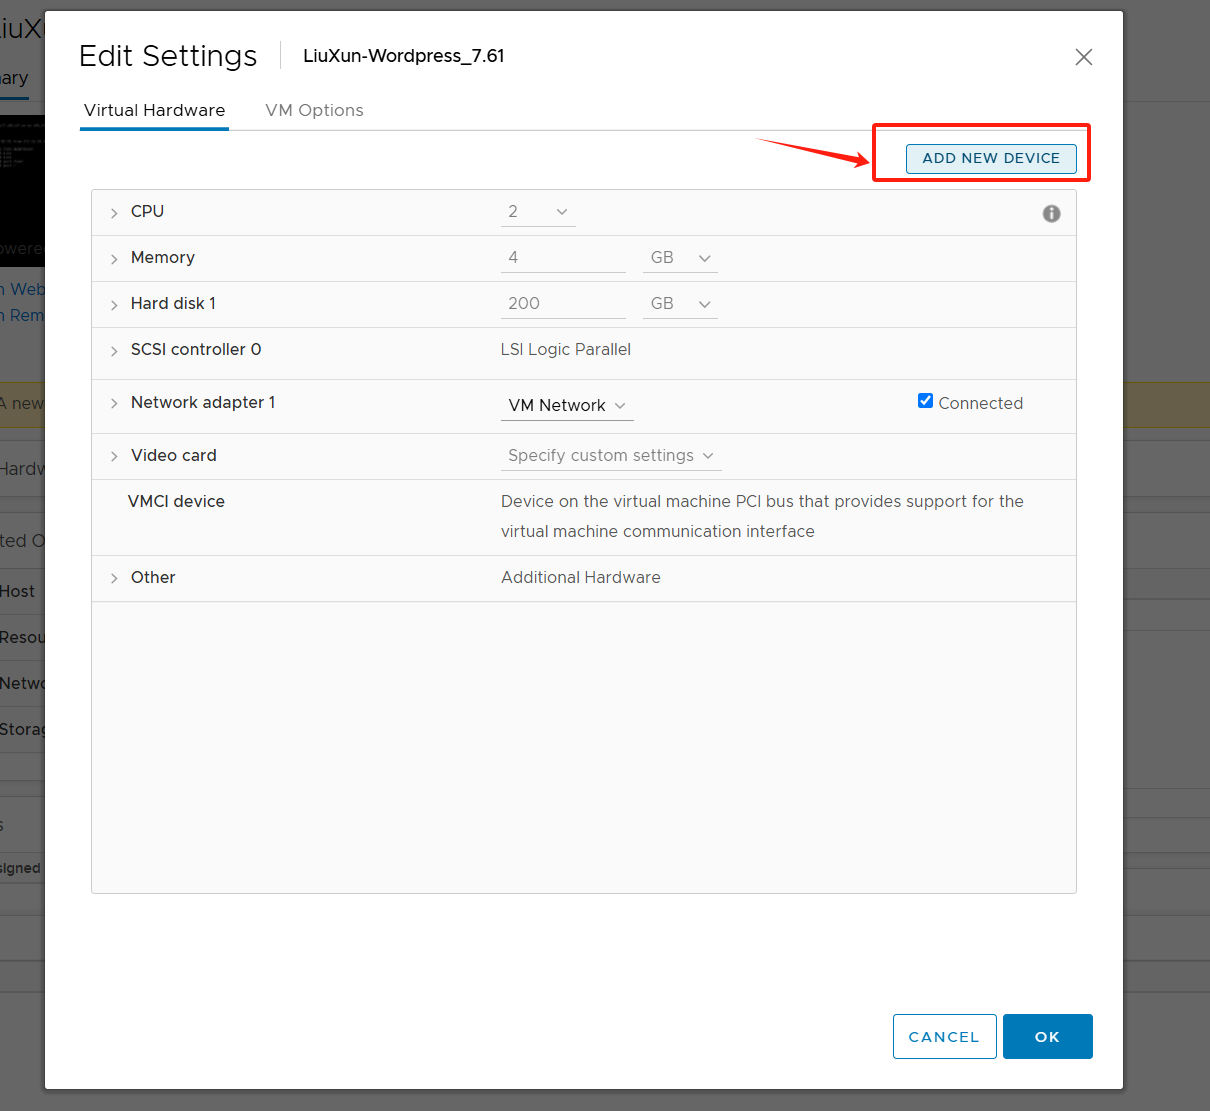
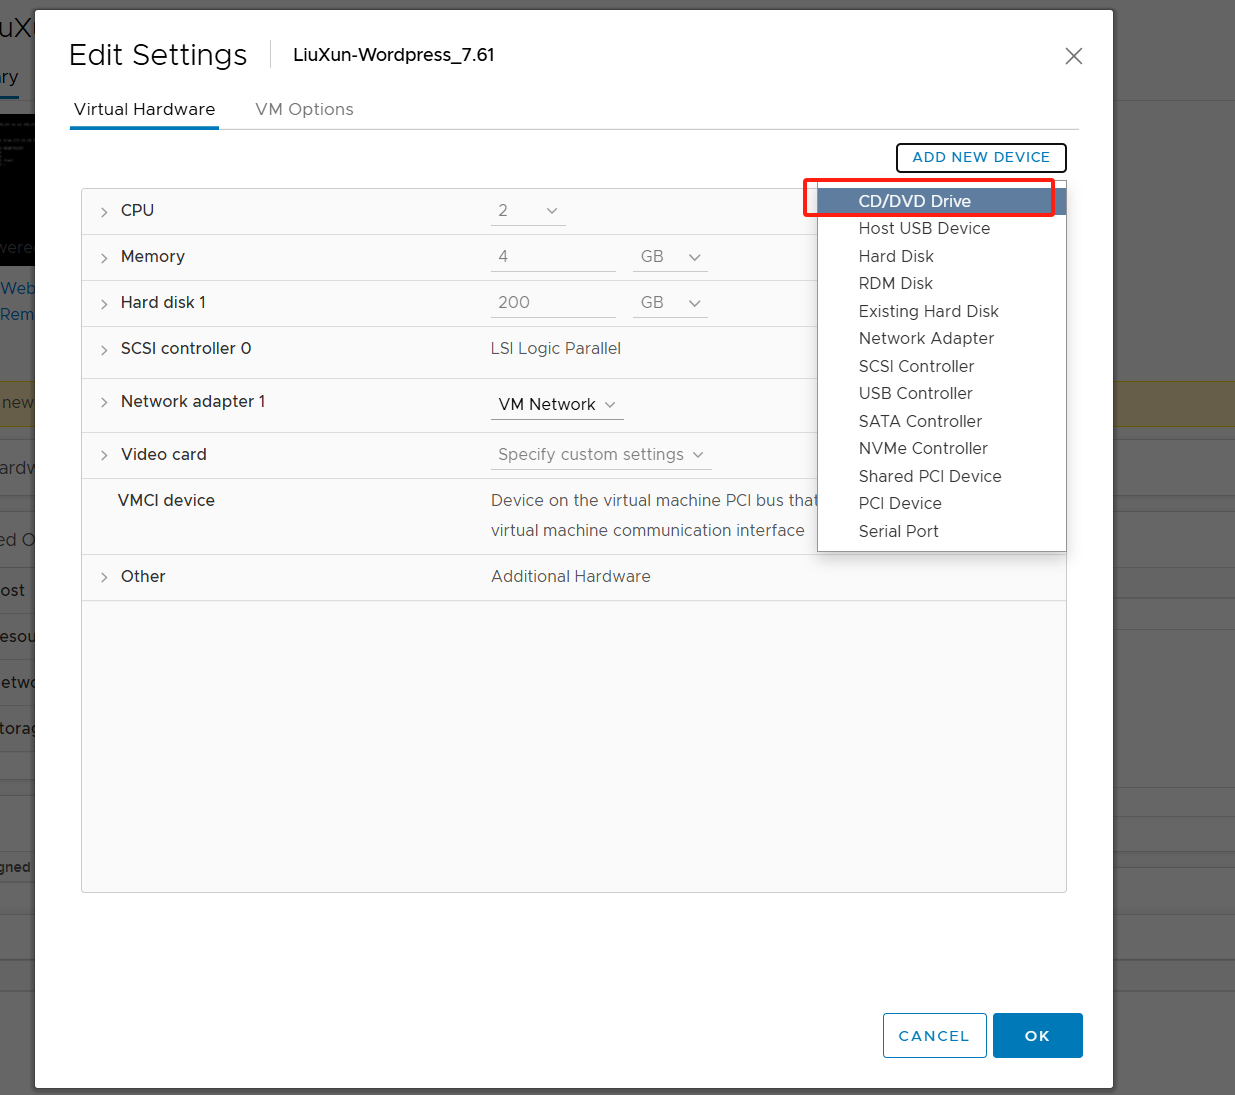
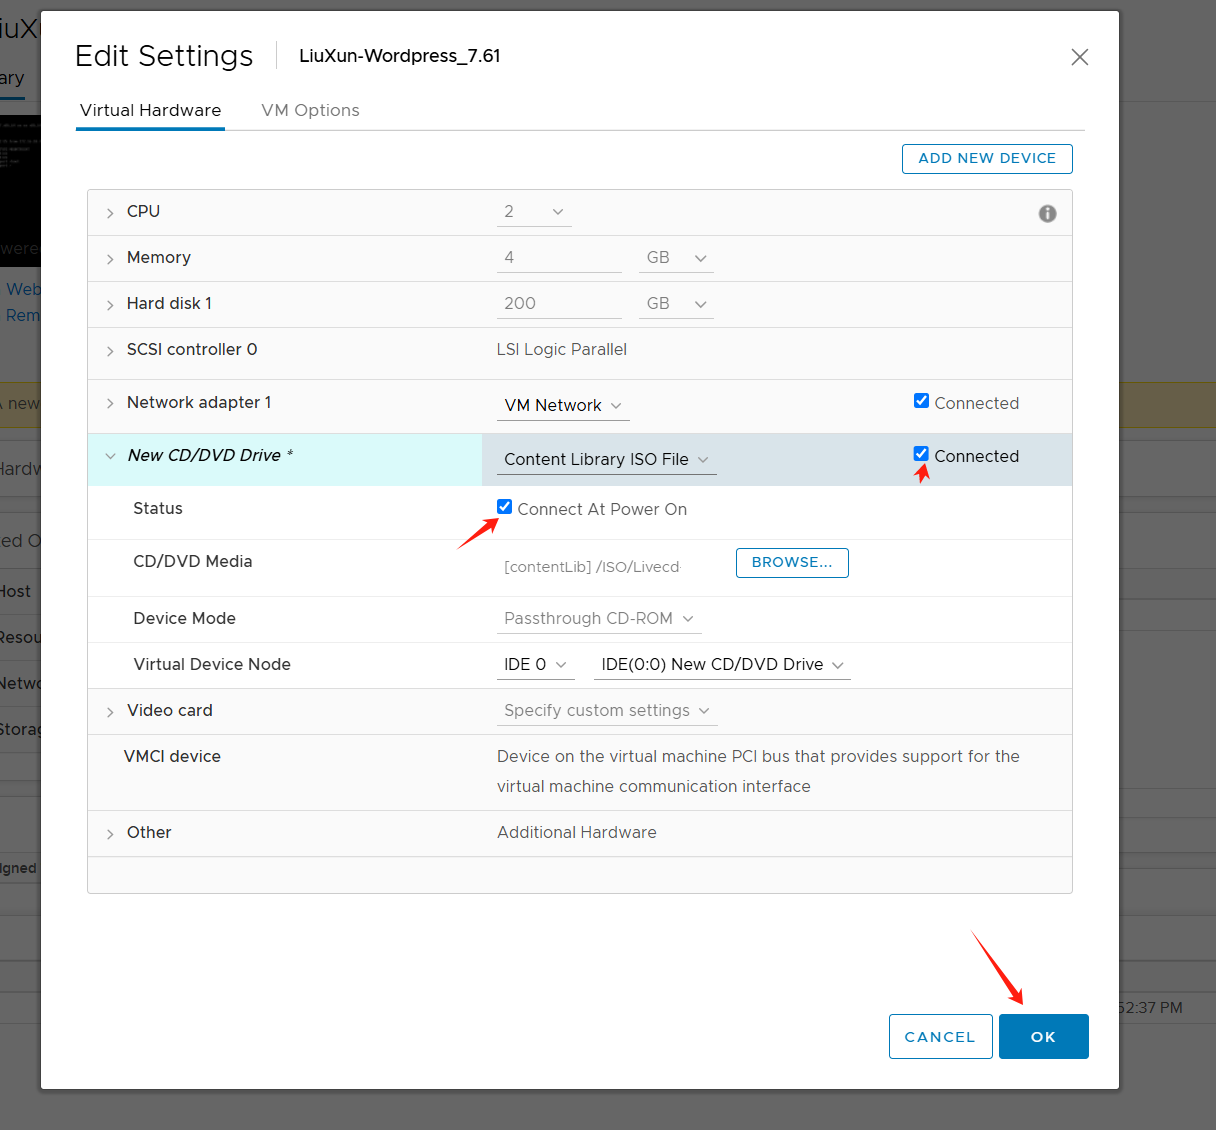
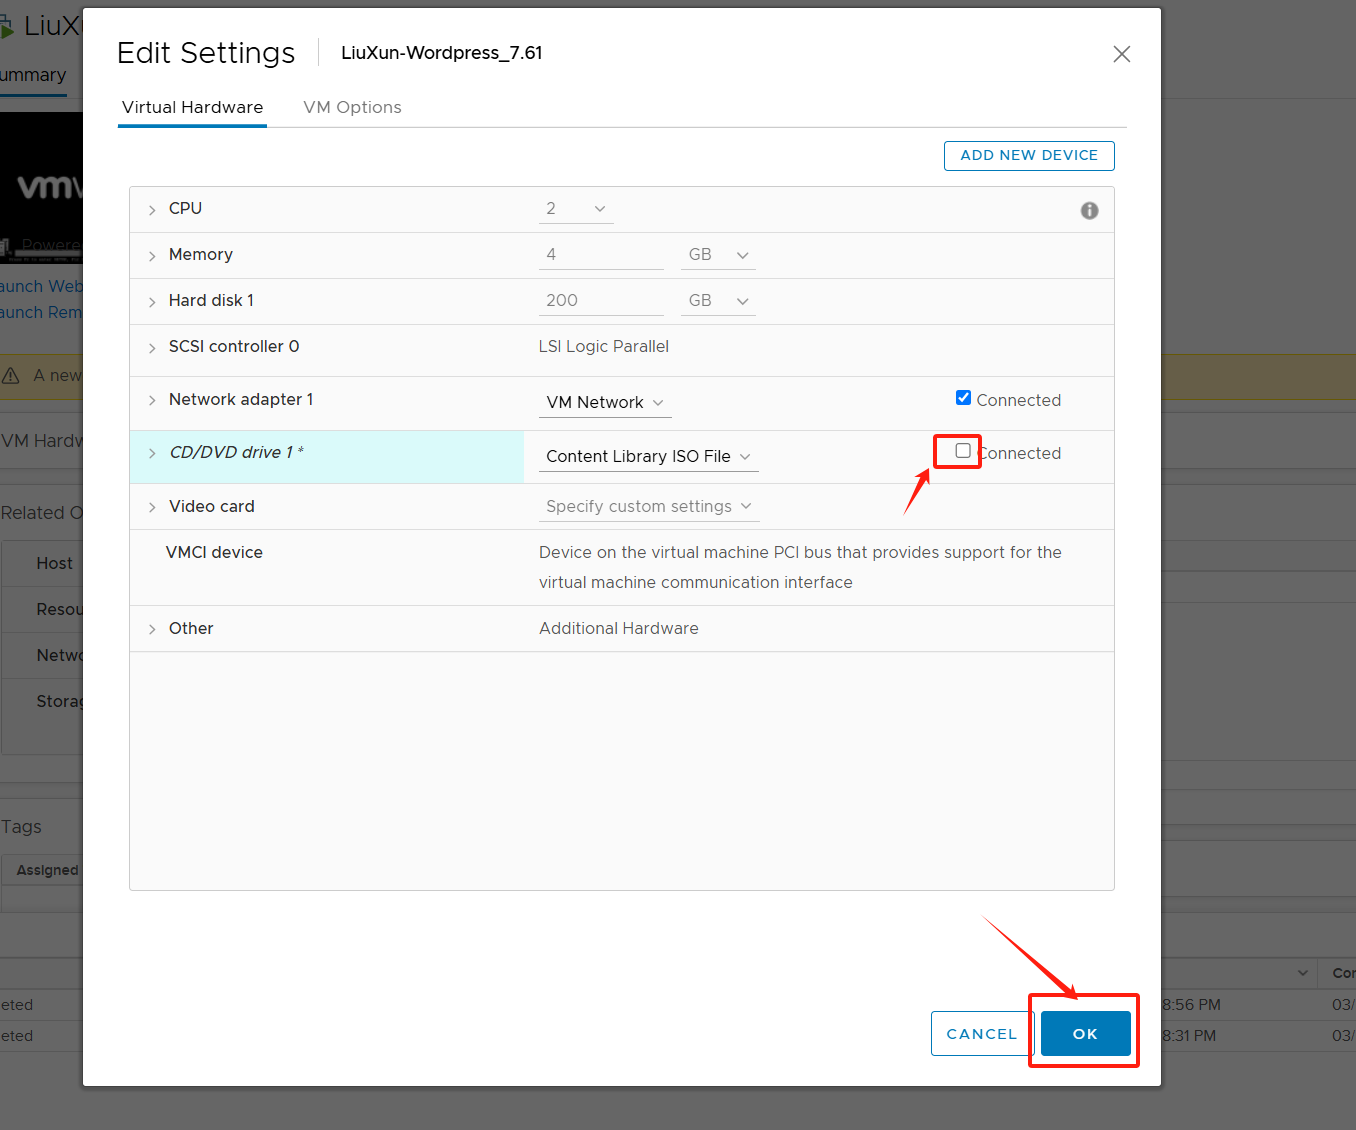
Turn off the host power and edit the settings.
Add CD/DVD drive device
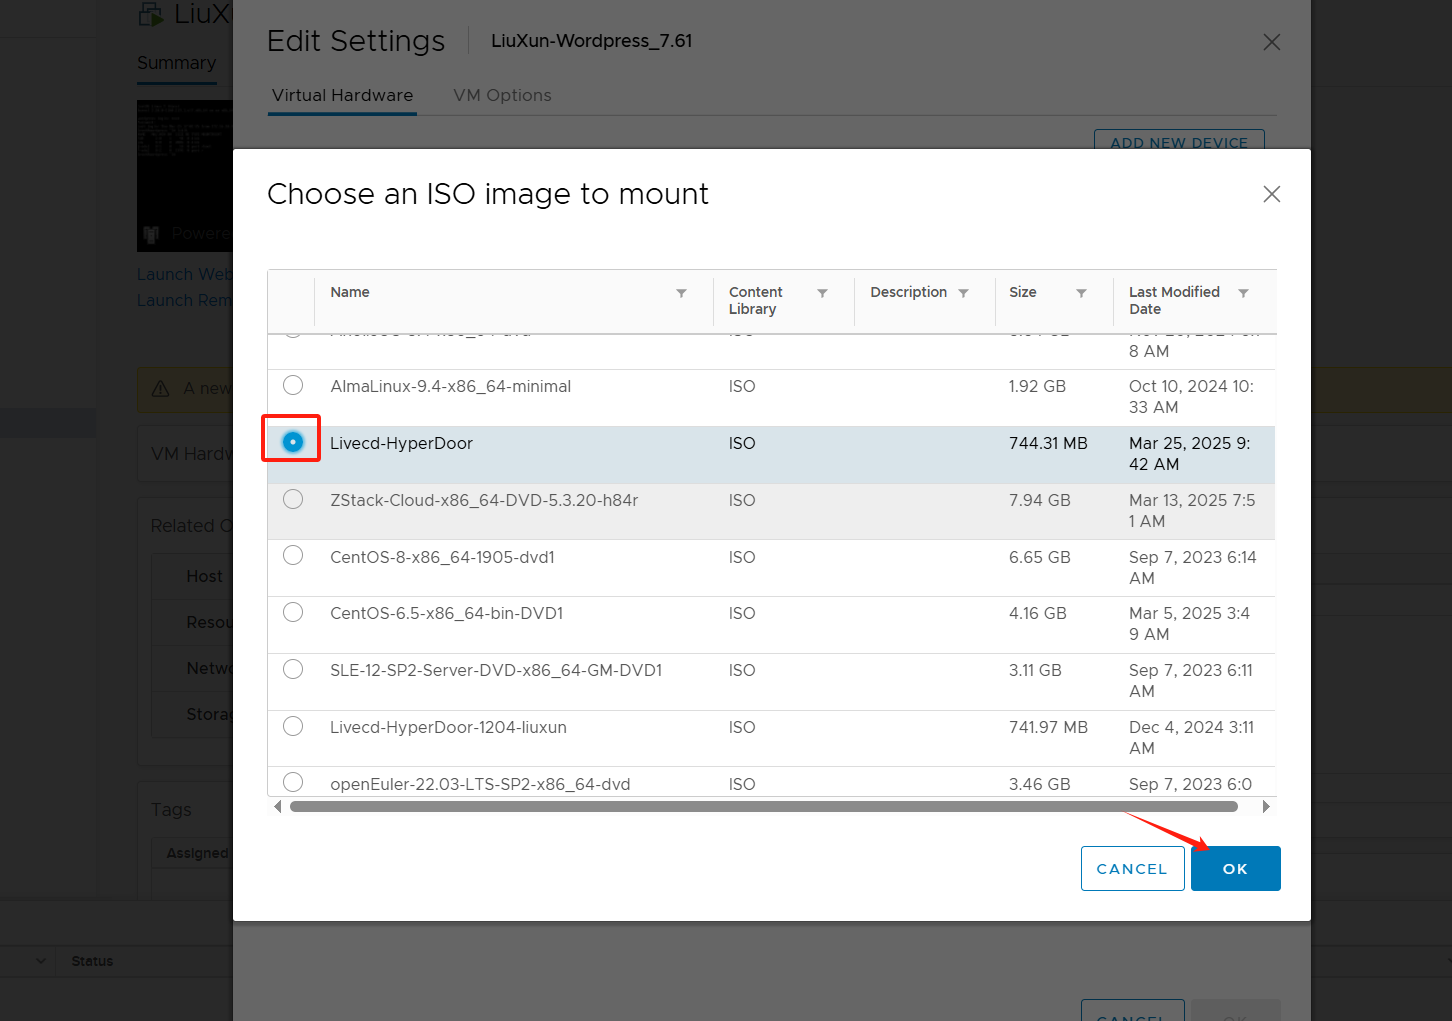
Select the uploaded ISO file

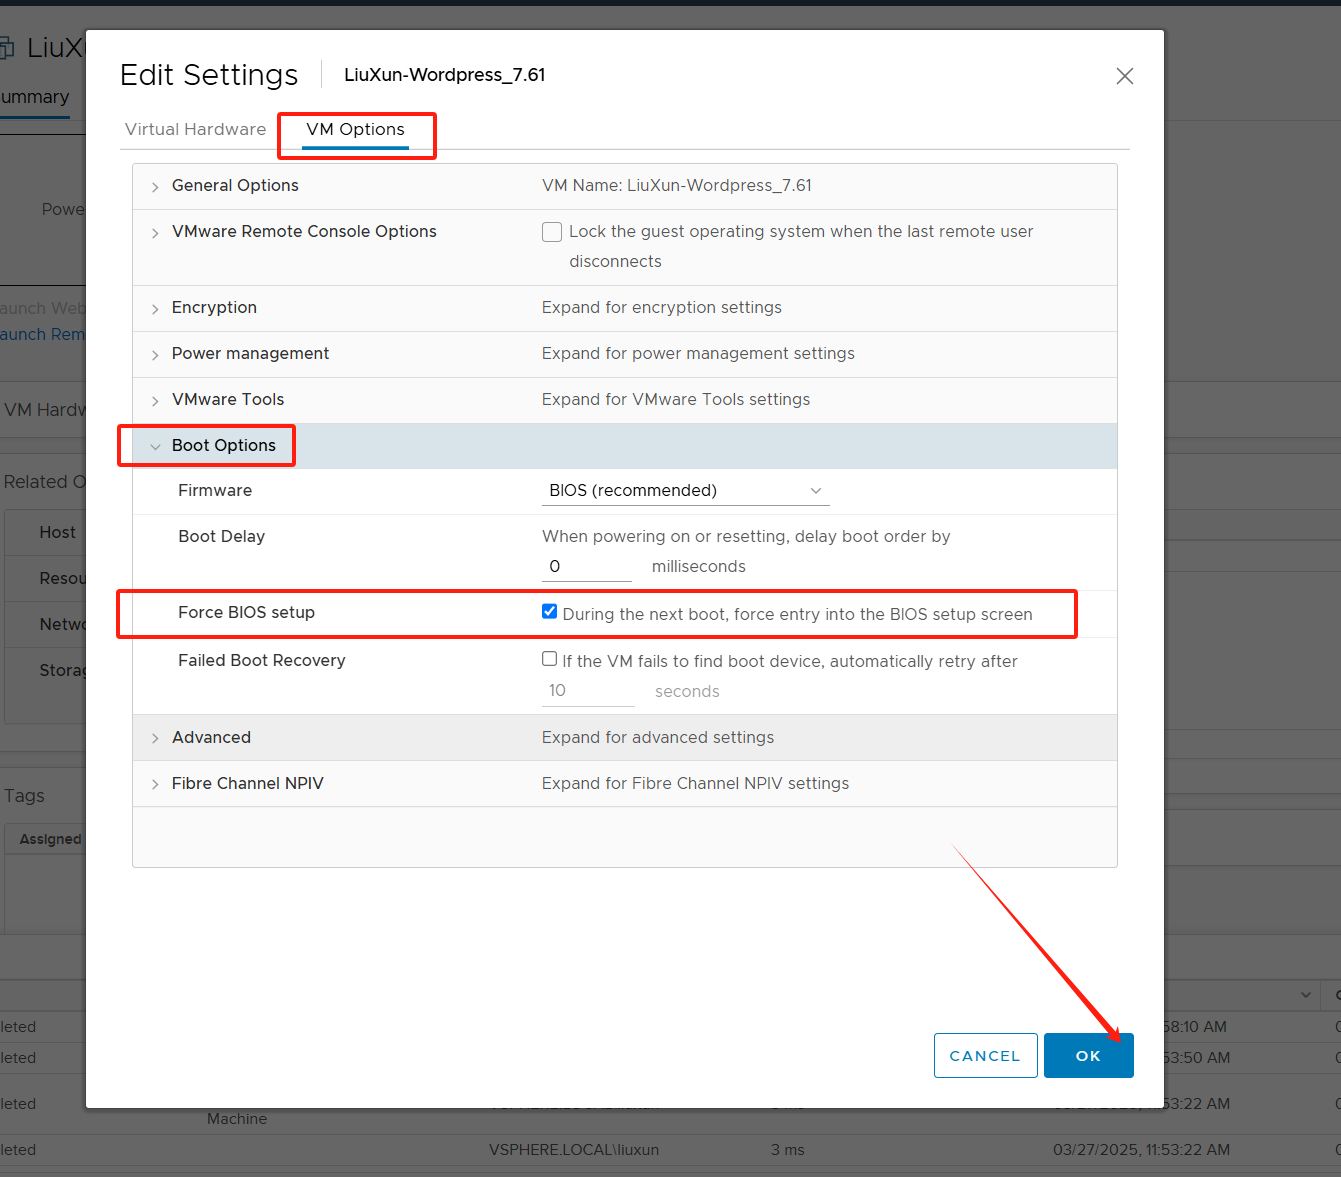
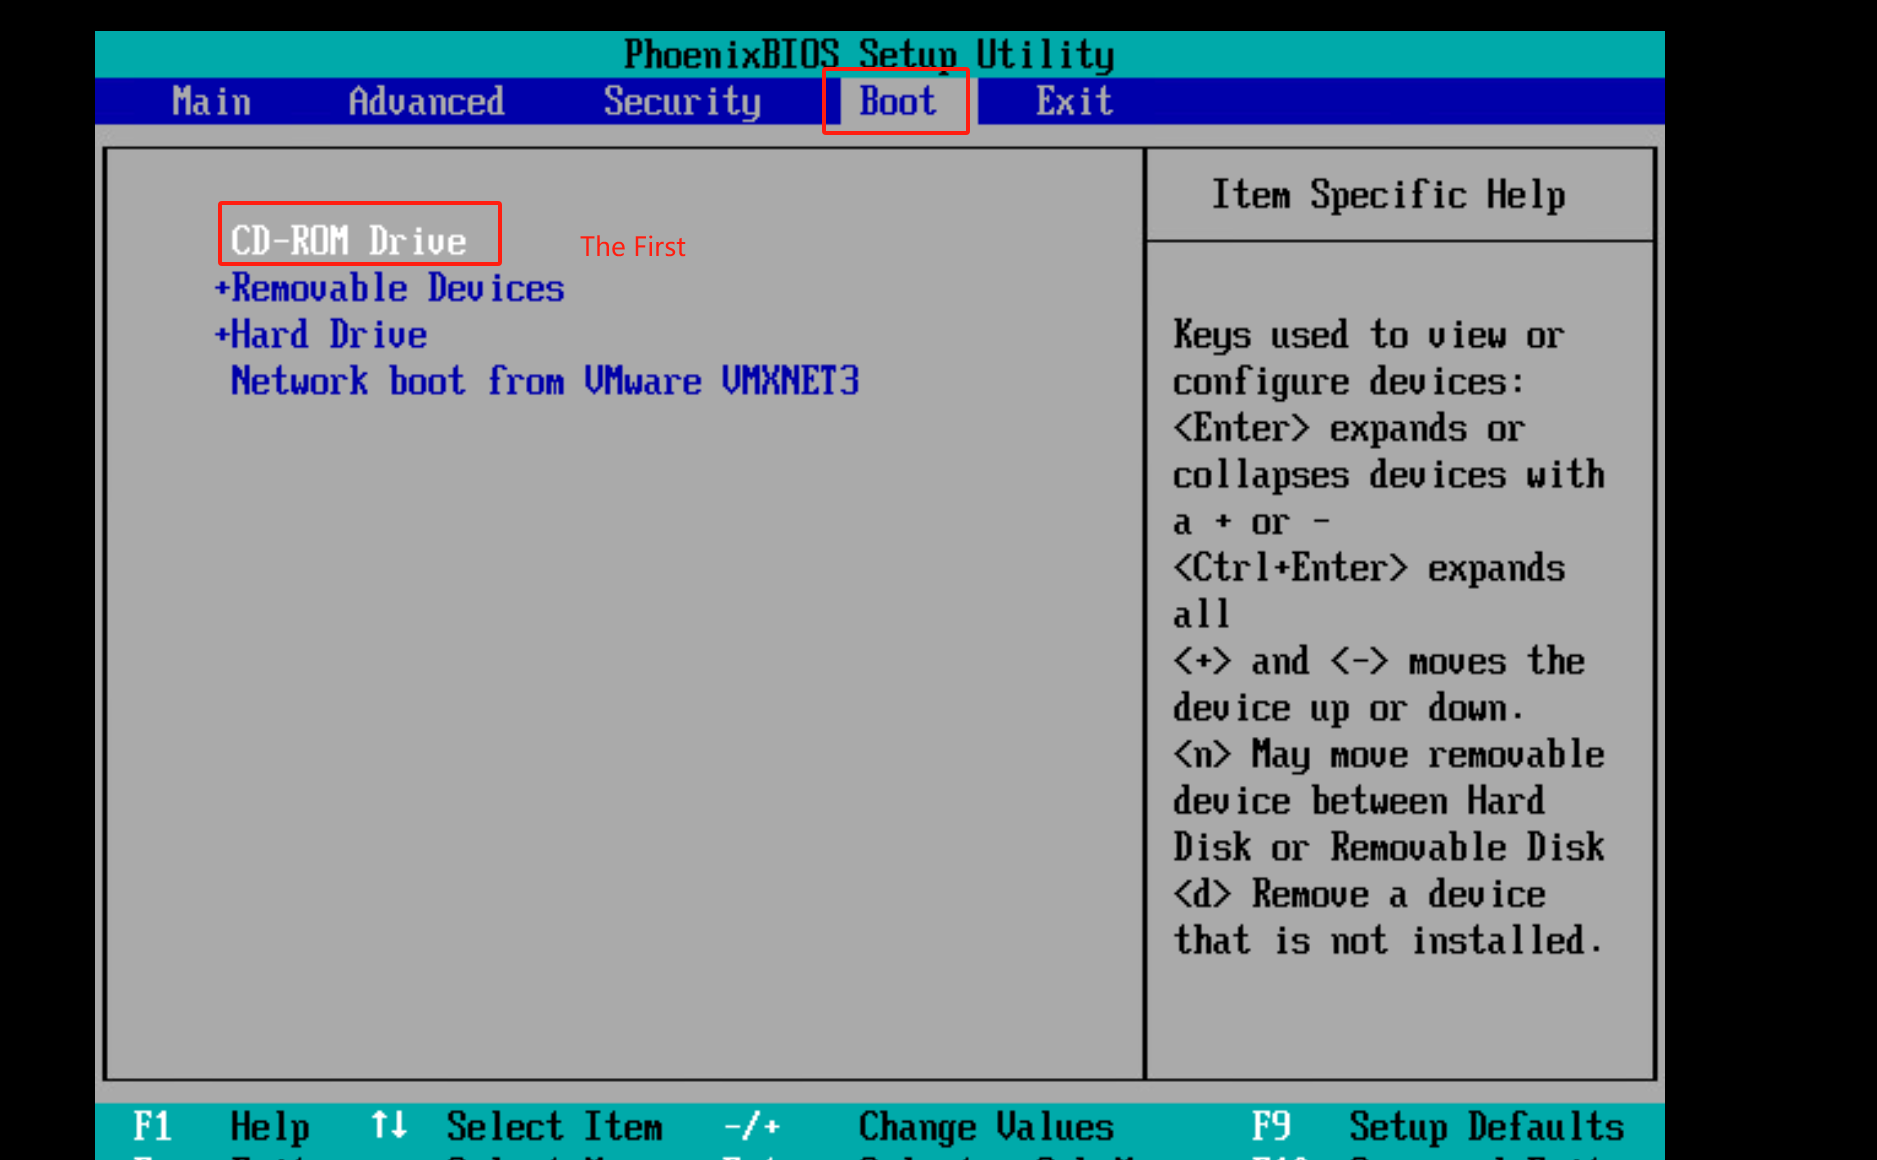
Configure the BIOS boot sequence and set the CD drive as the first boot item
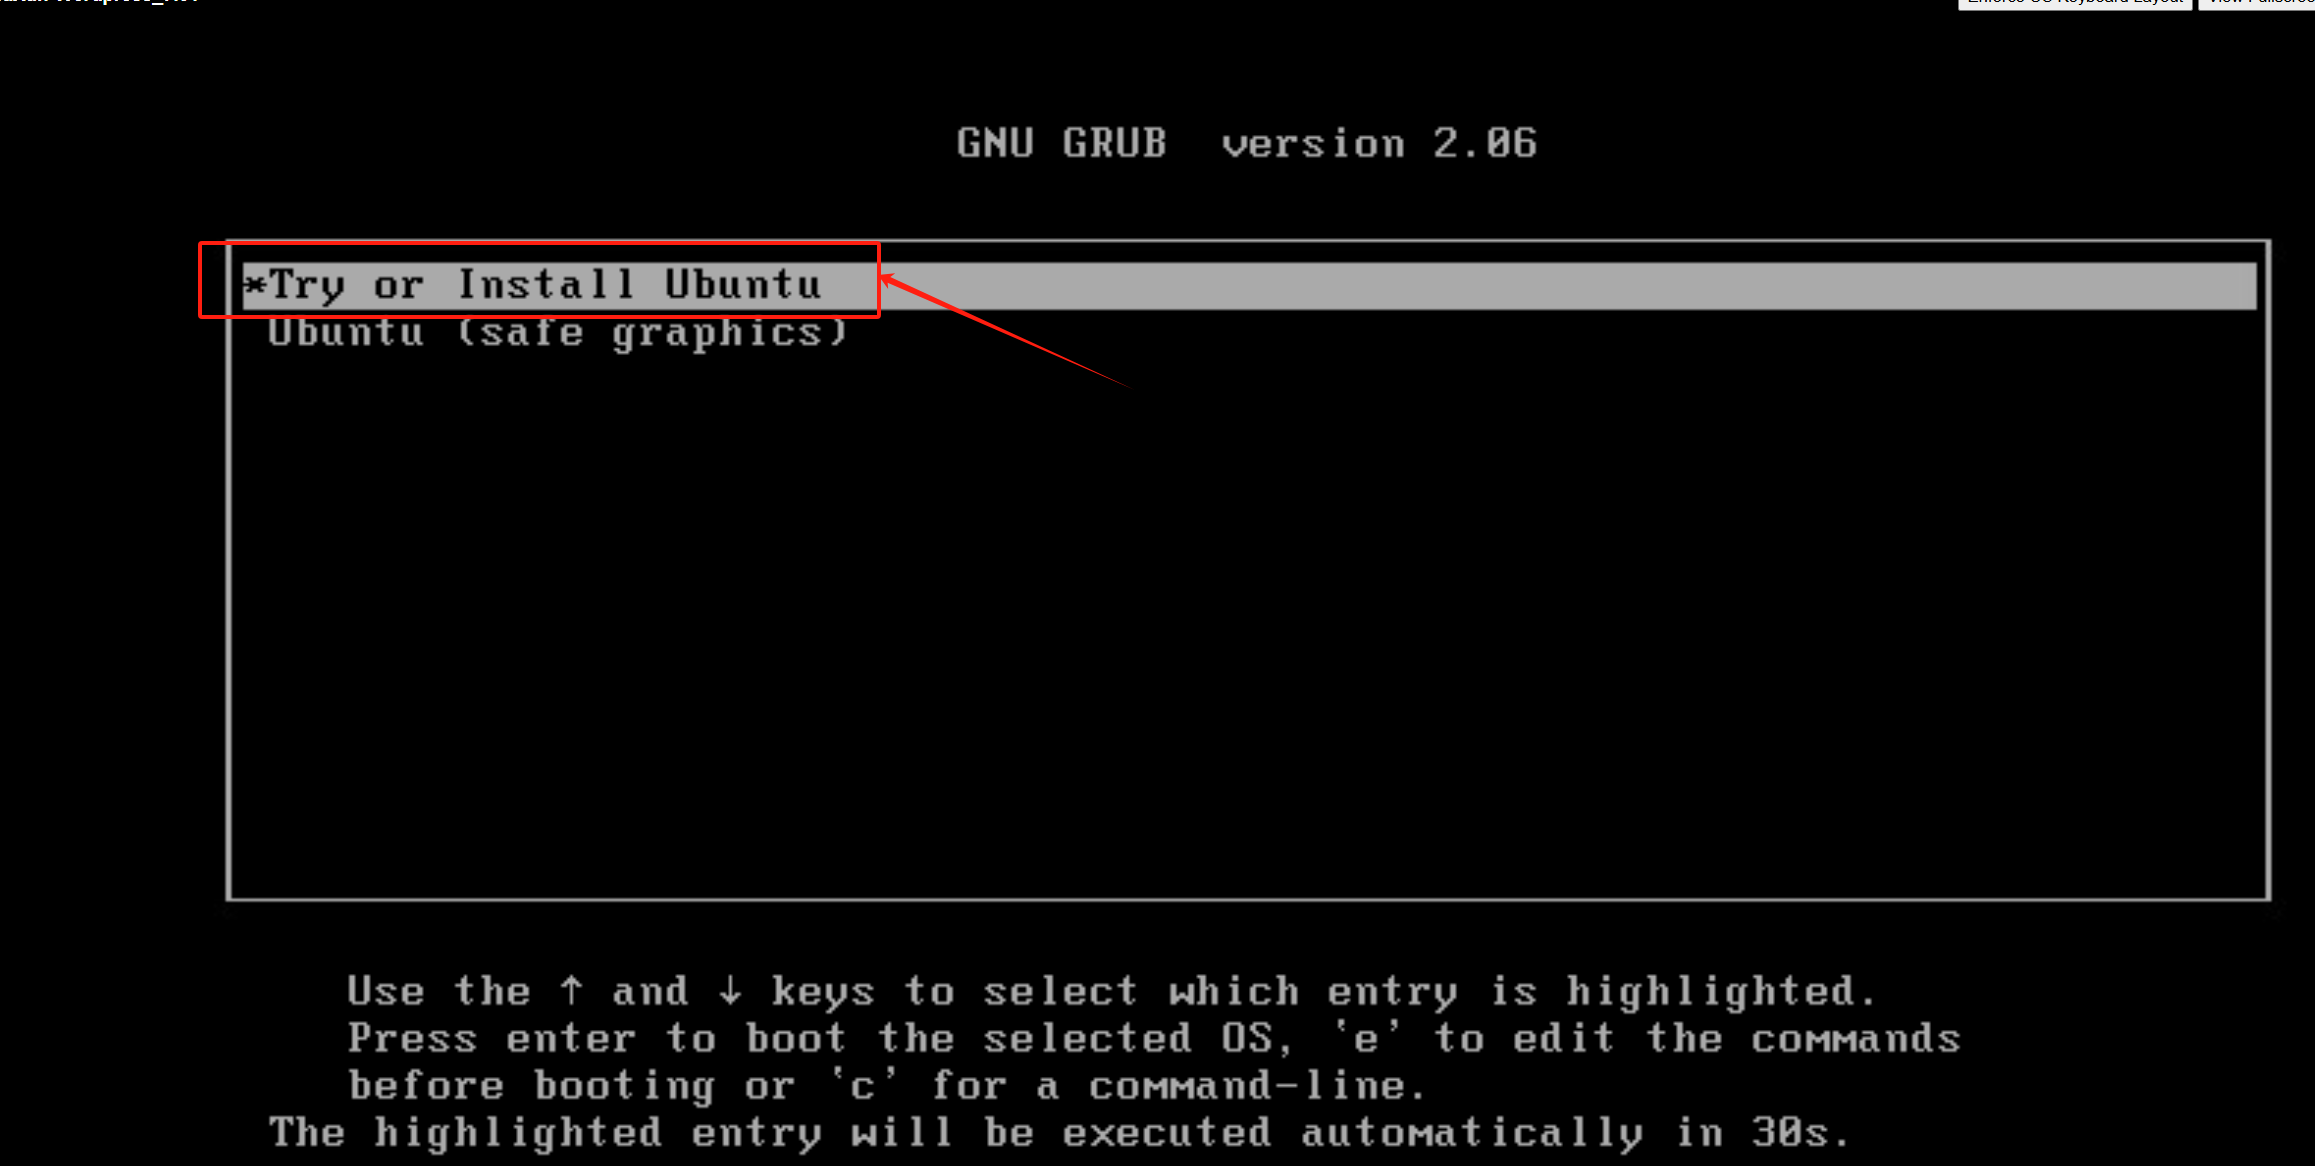
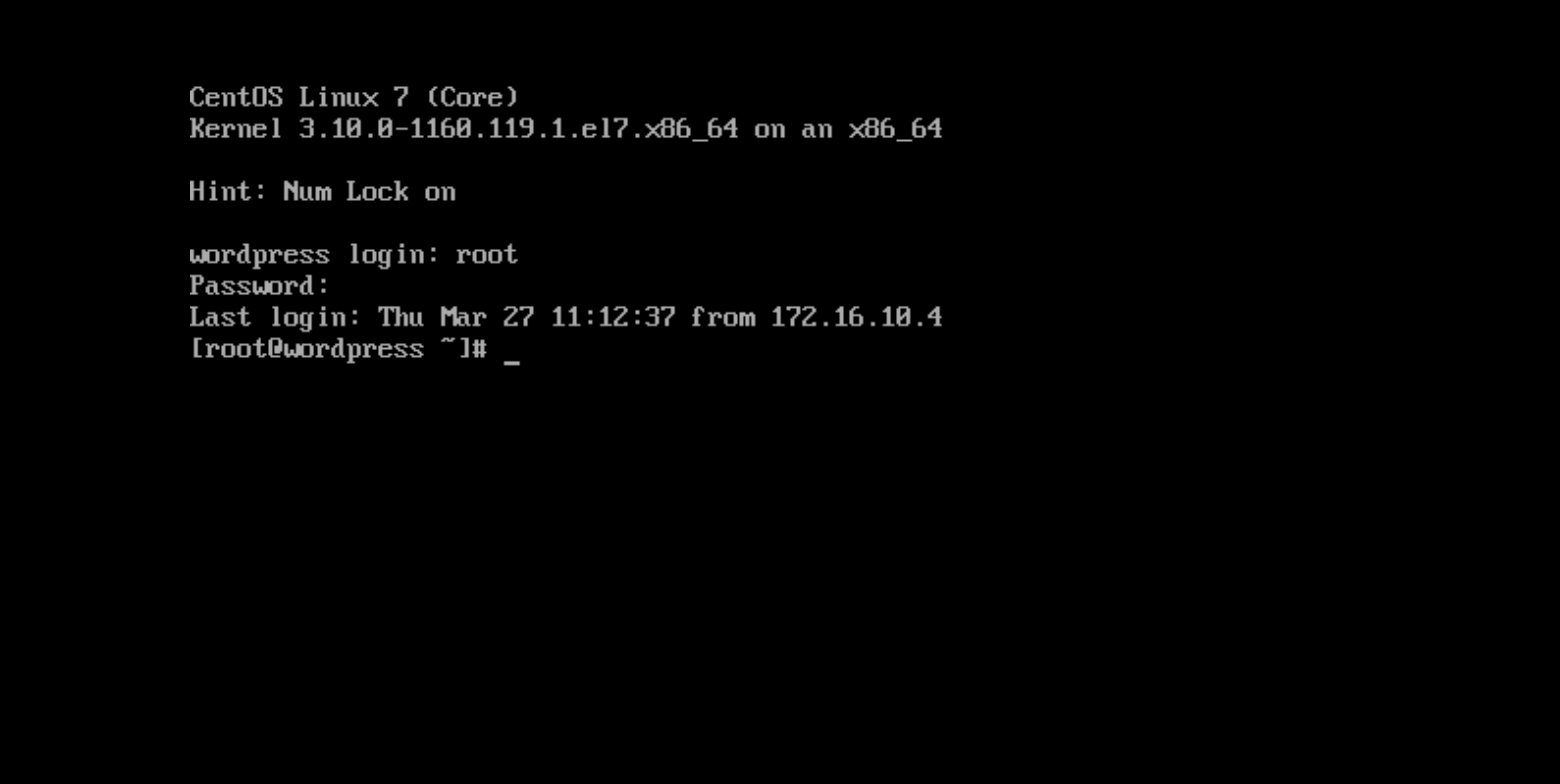
Start the host, select the CD-ROM boot , and enter the Ubuntu temporary system
After pressing "F10", click "Yes" in the dialog box that pops up.

Select "Try or Install Ubuntu" ,Then wait the host boot successful
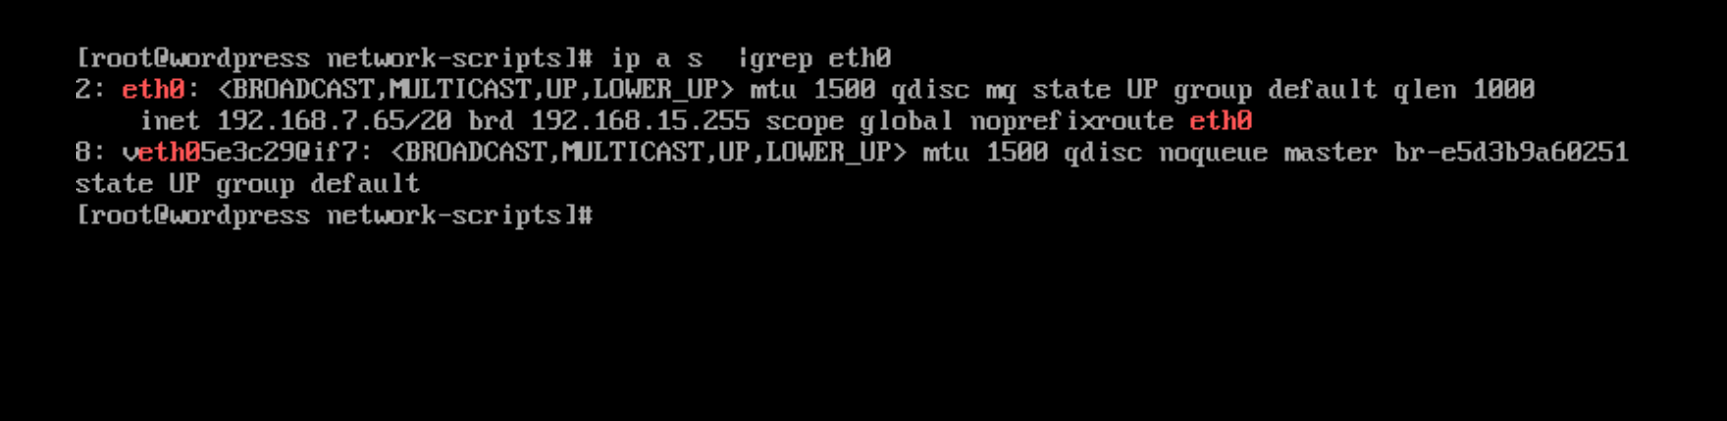
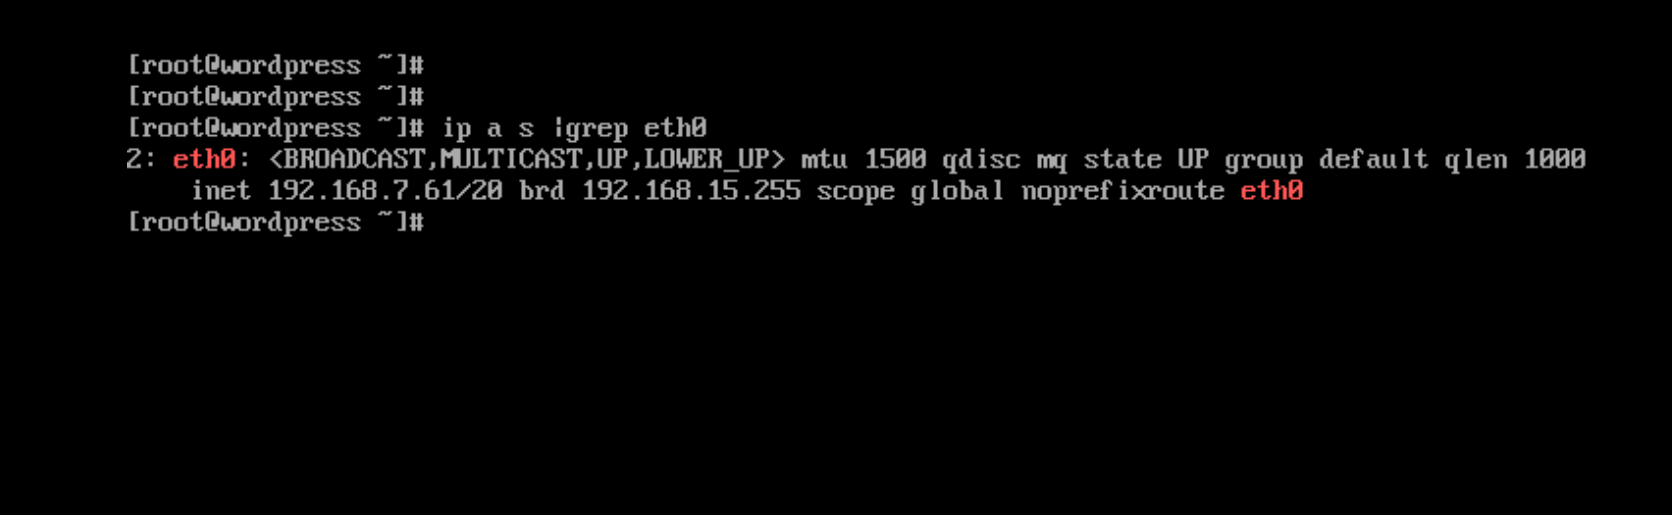
Note : After successful startup, you need to manually configure the IP Address (such as 192.168.7.61 ) to be consistent with the VMware original host IP.
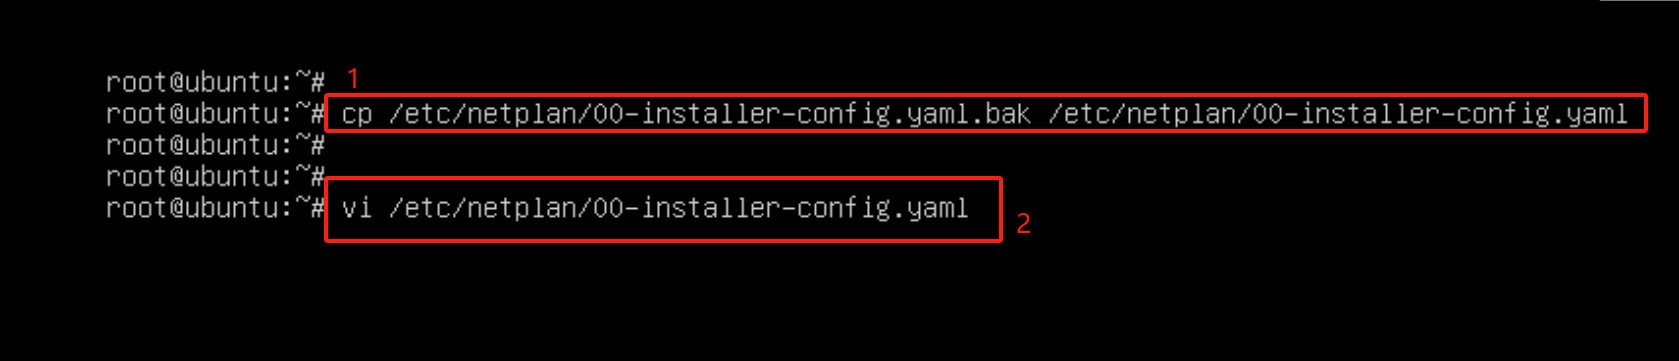
Configure IP Address Operation Command:
cp /etc/netplan/00-installer-config.yaml.bak /etc/netplan/00-installer-config.yaml vi /etc/netplan/00-installer-config.yaml
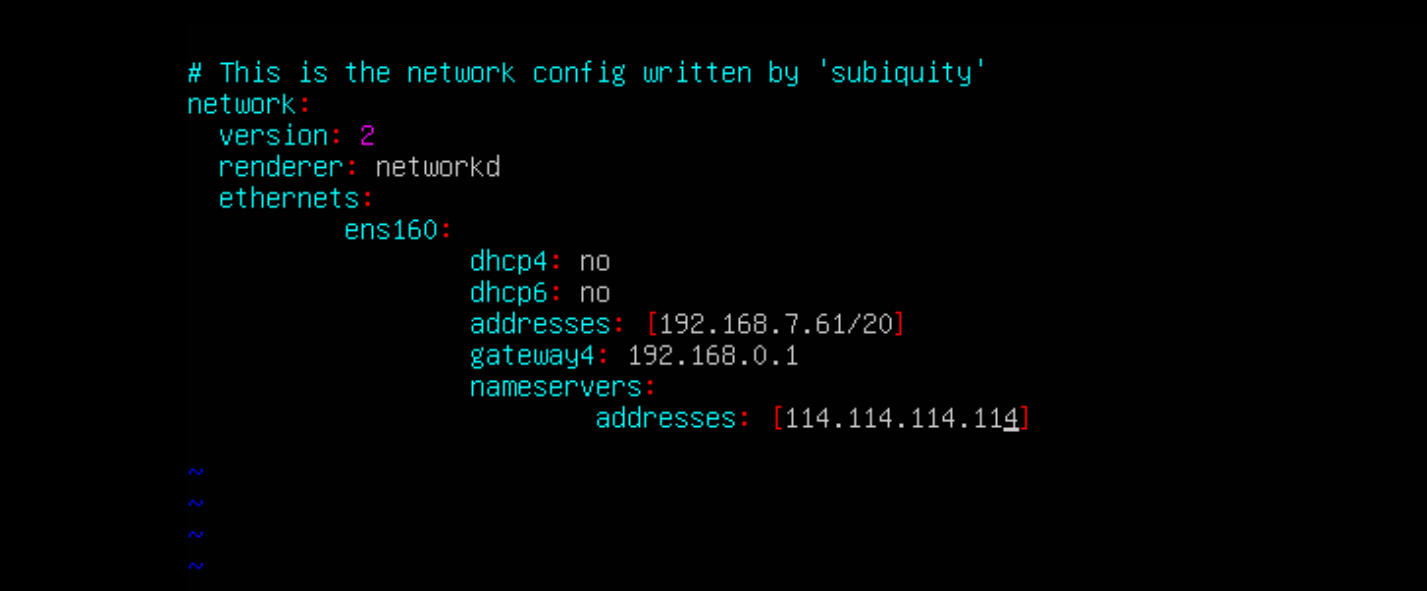
After the configuration is complete, save and exit.
Execute the command to restart the network interface card operation.
netplan apply
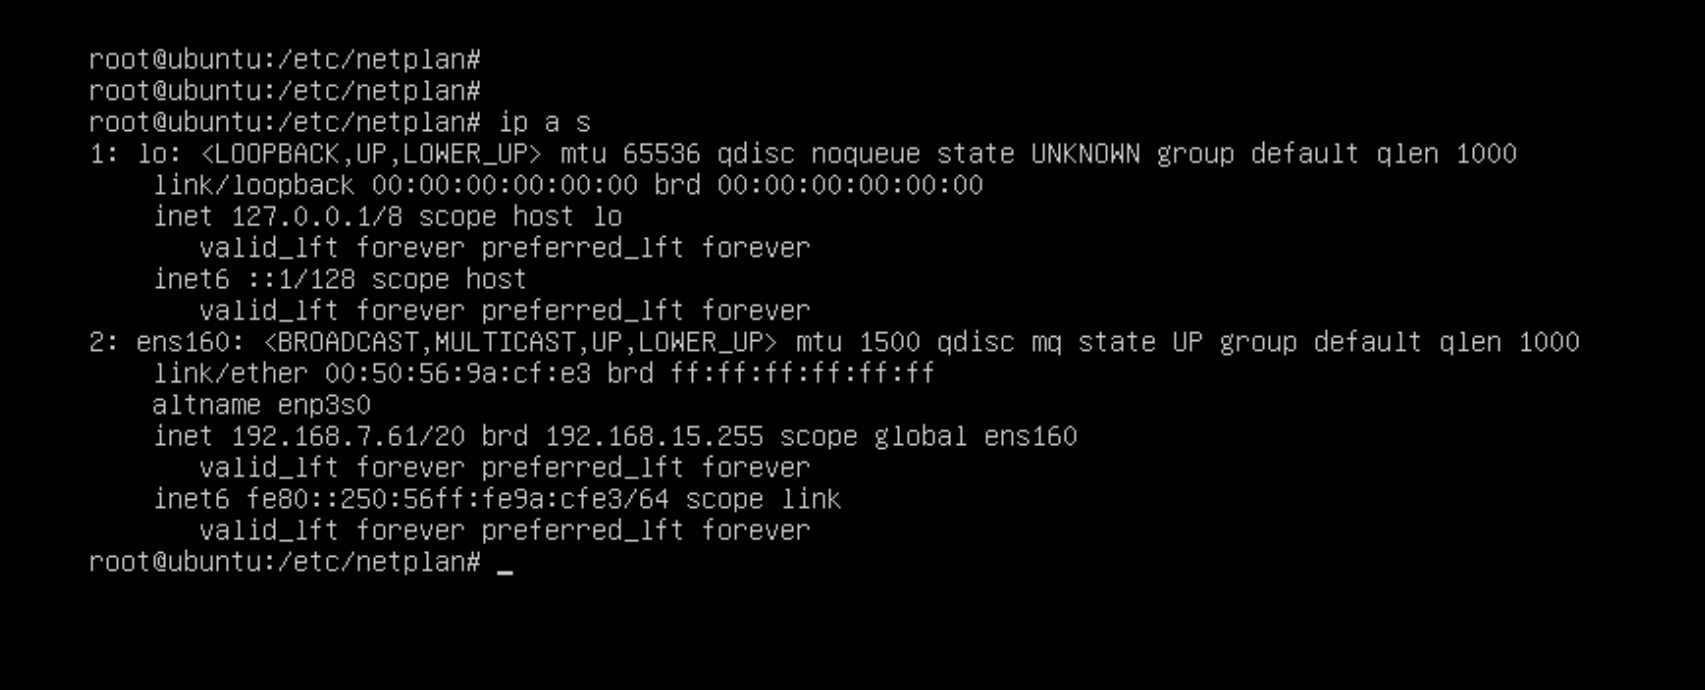
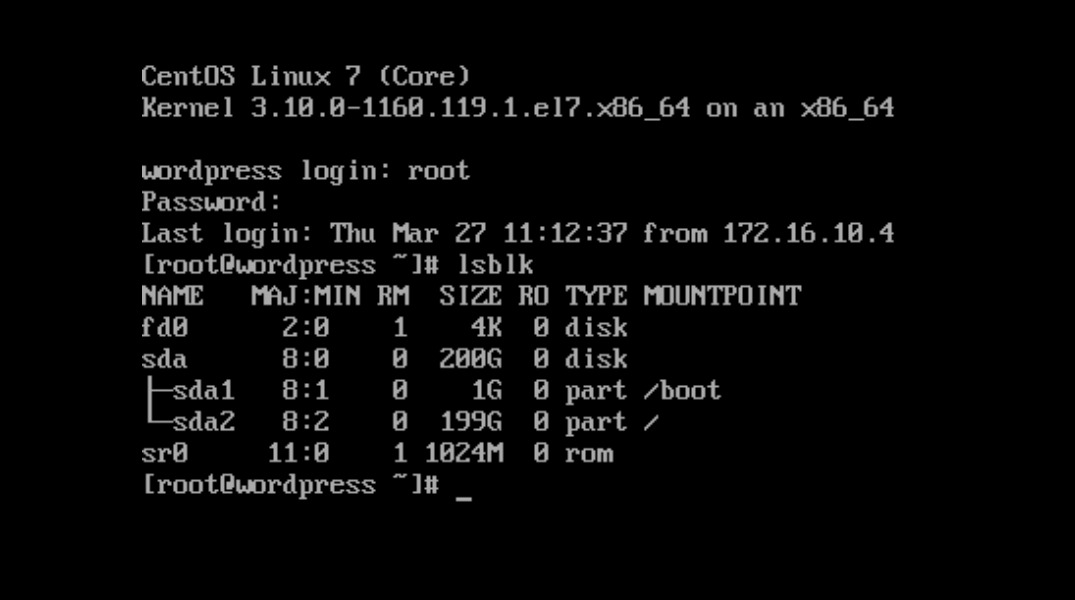
Command to view IP:
ip a s
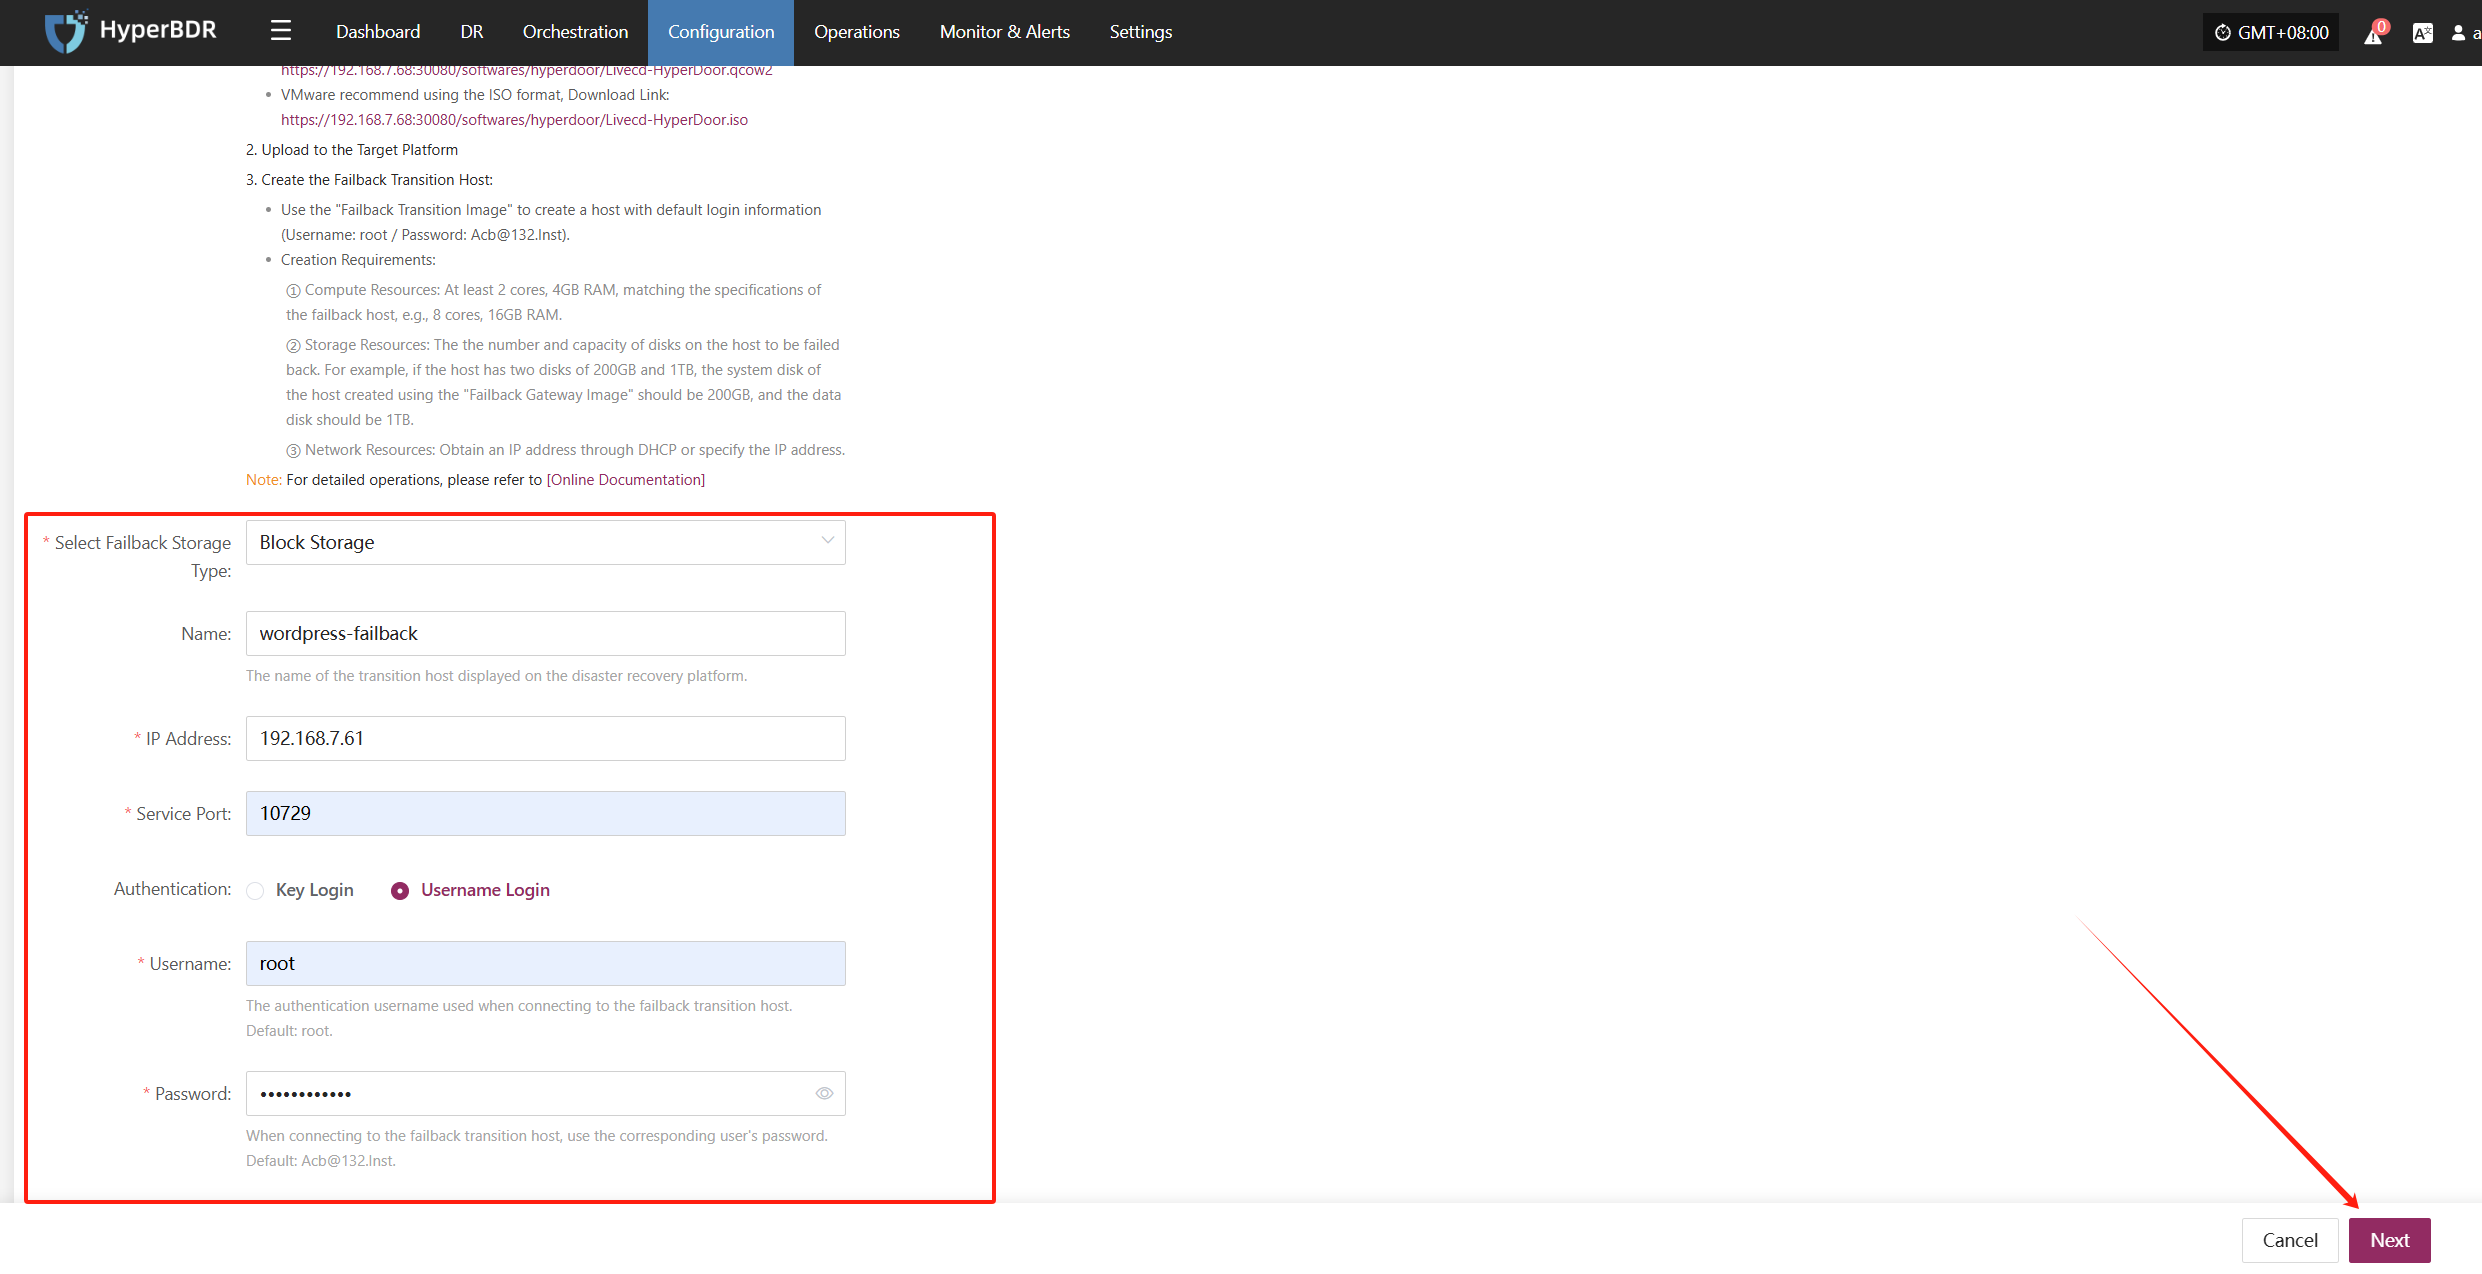
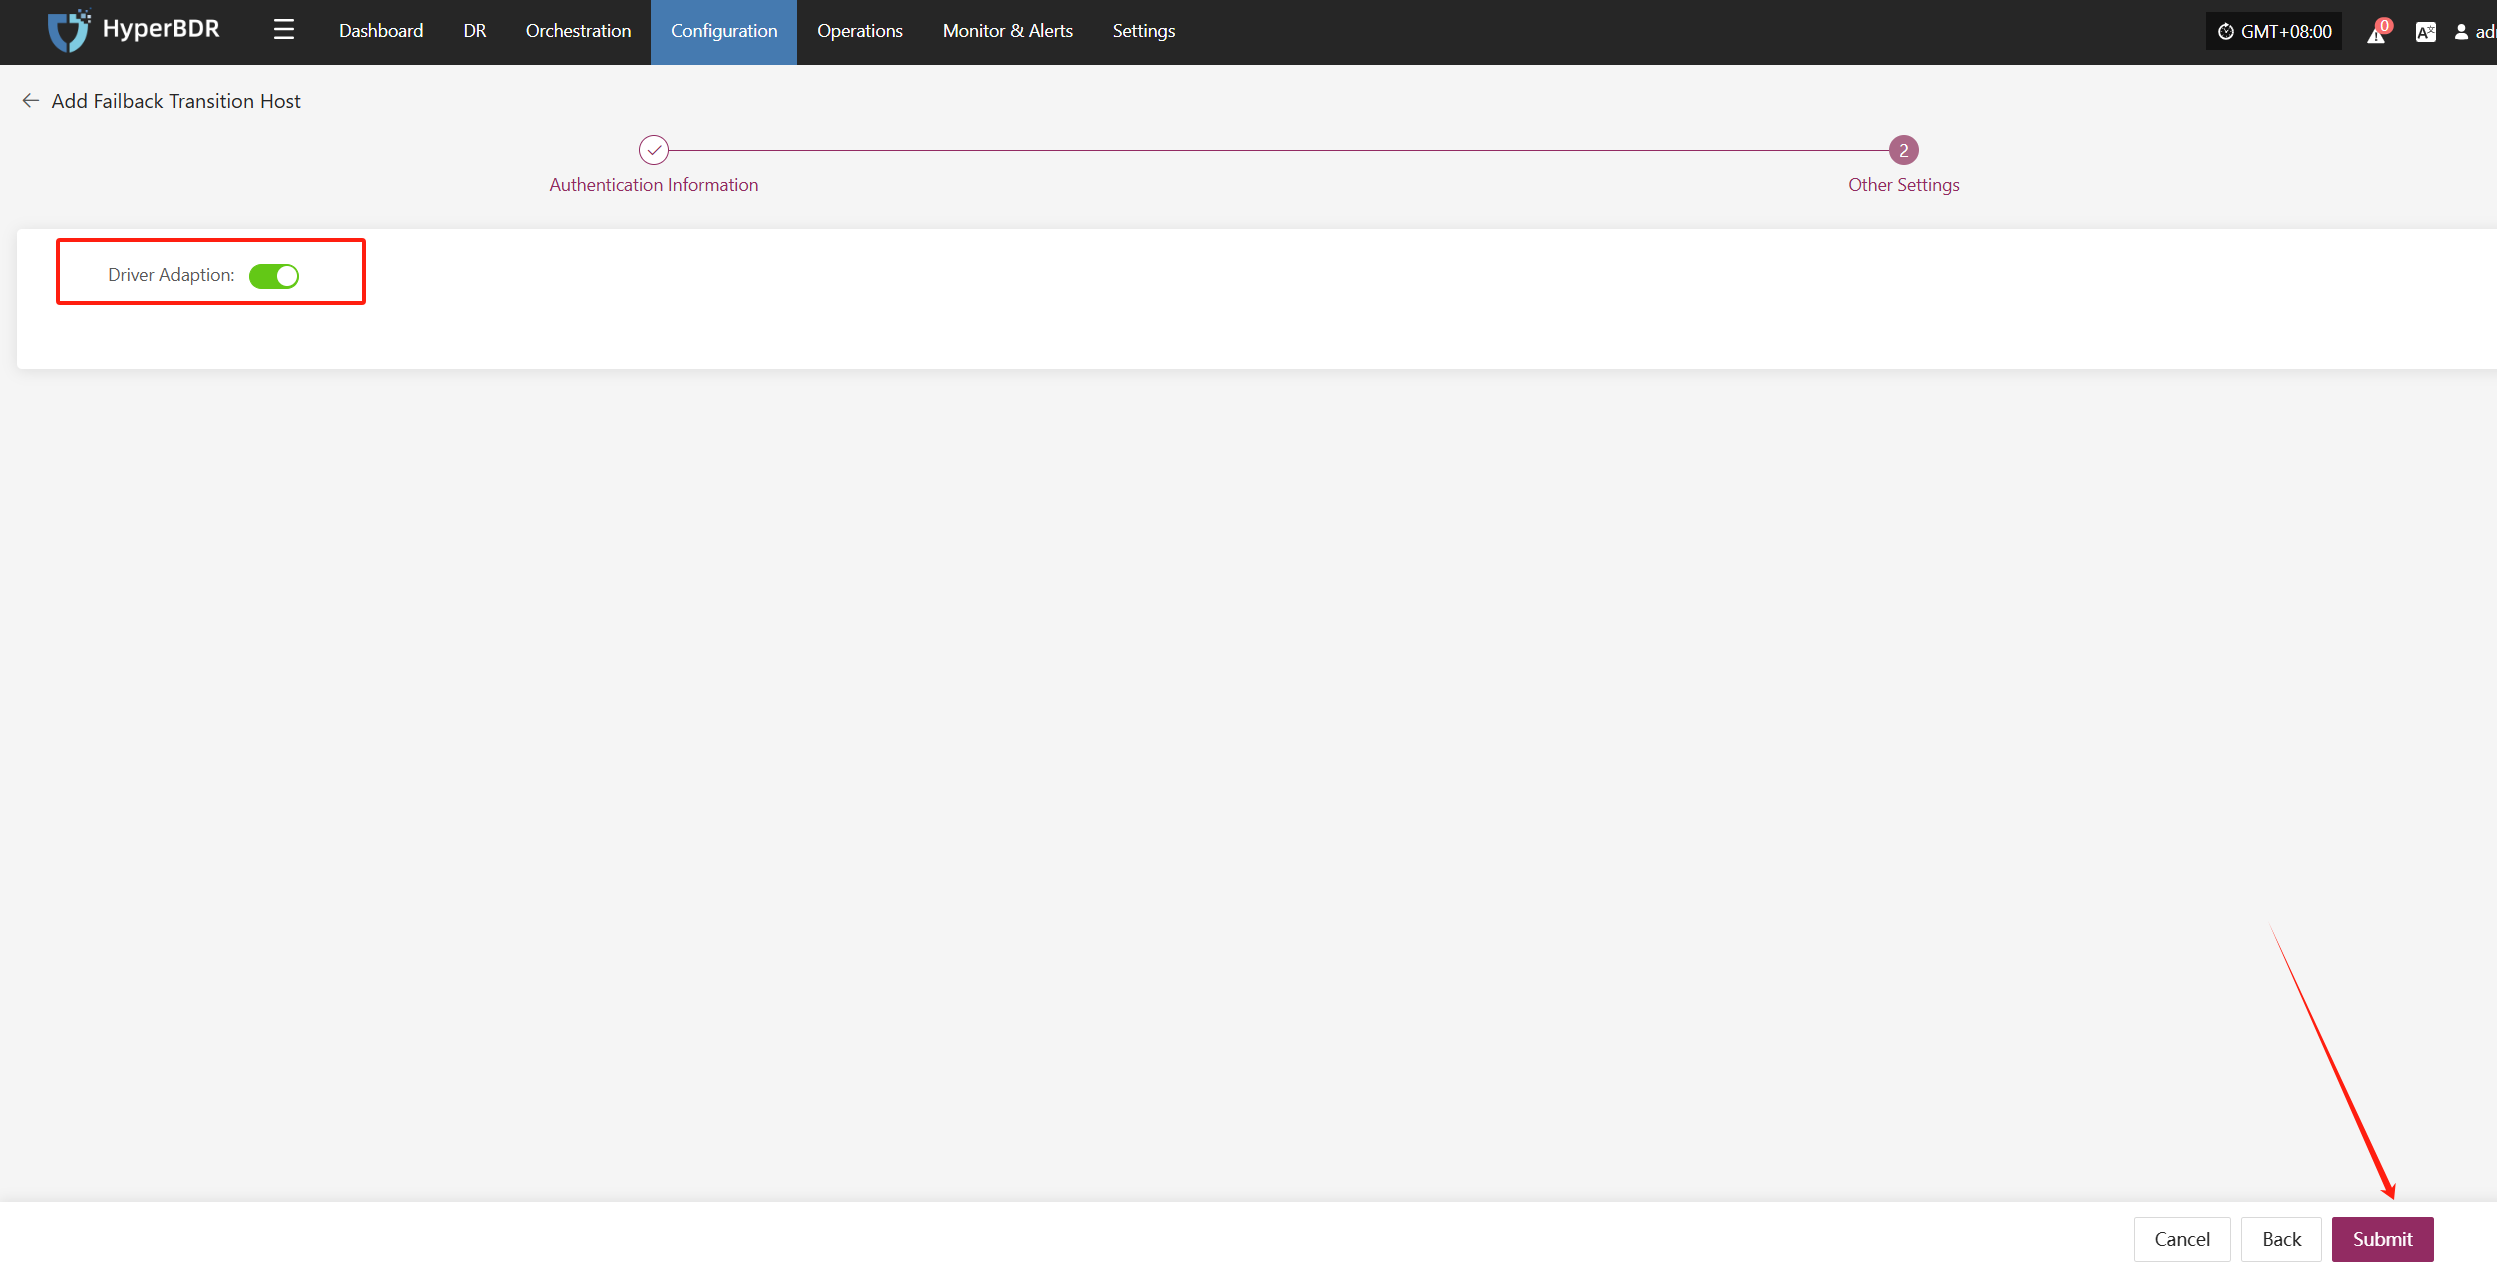
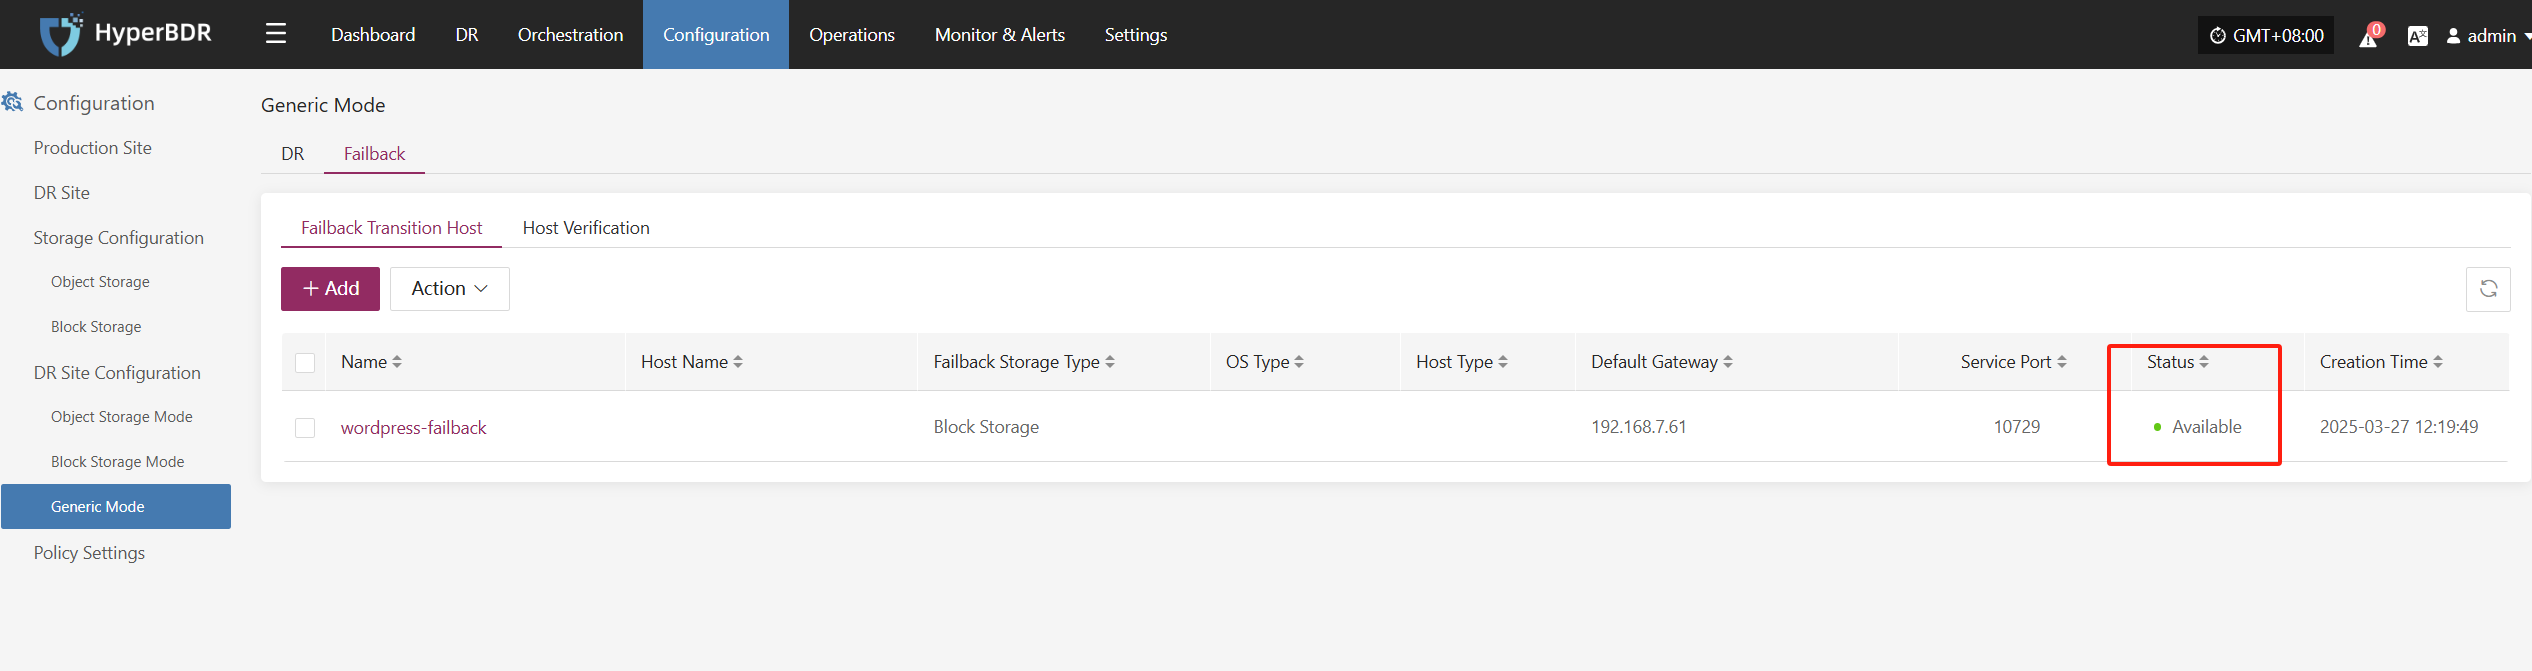
Add a failback transition host in the DR console
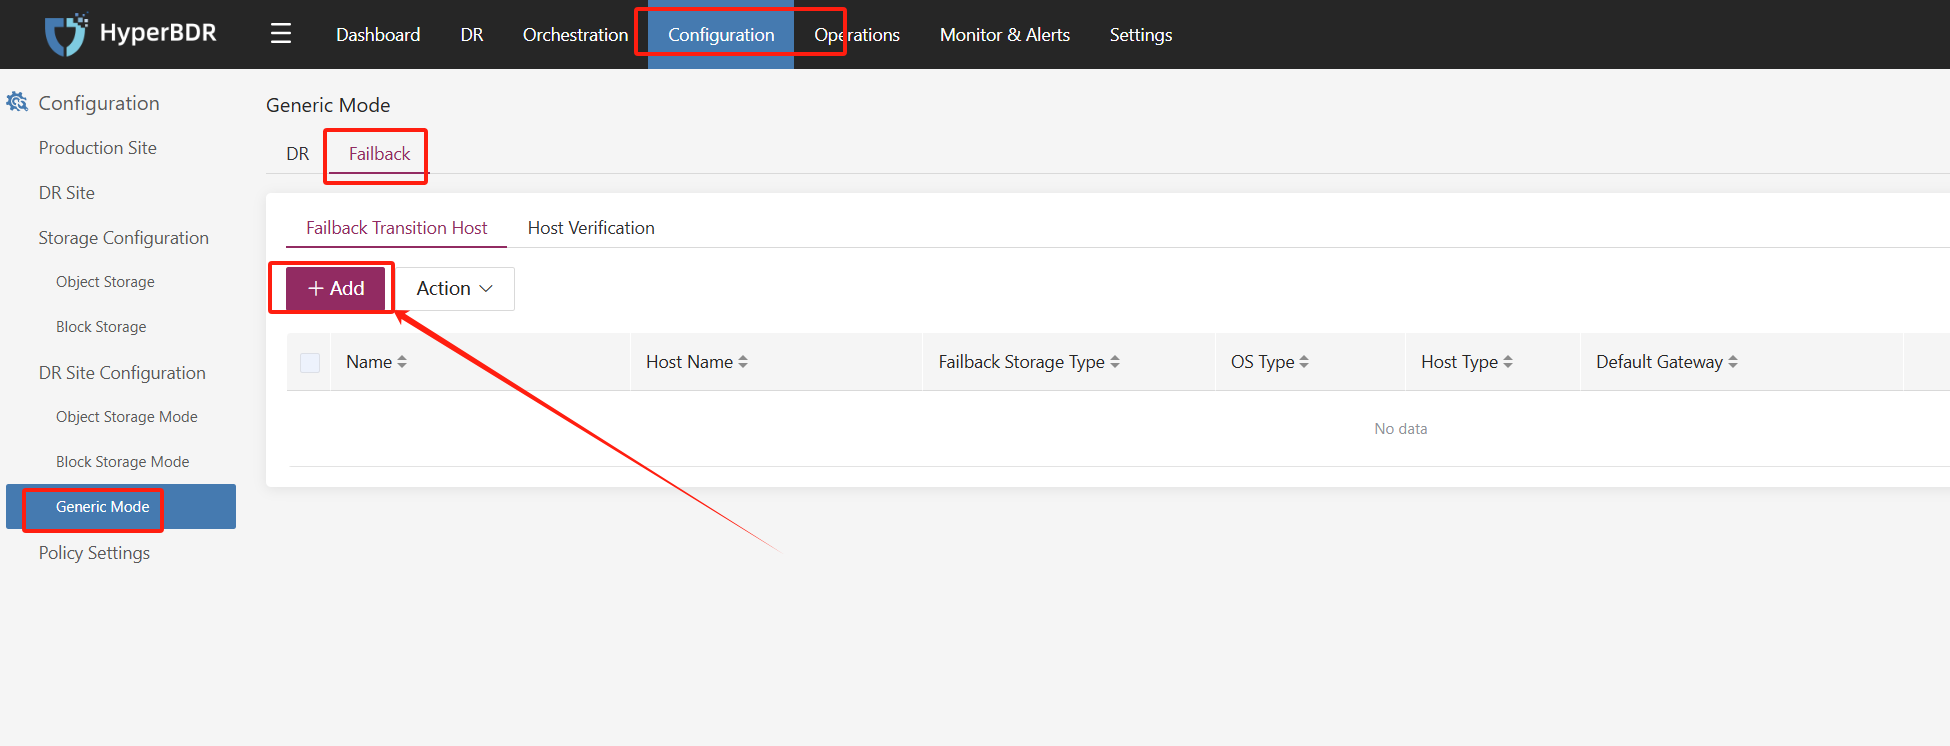
Enter the host information (default password: Acb@132.Inst ) and click Next
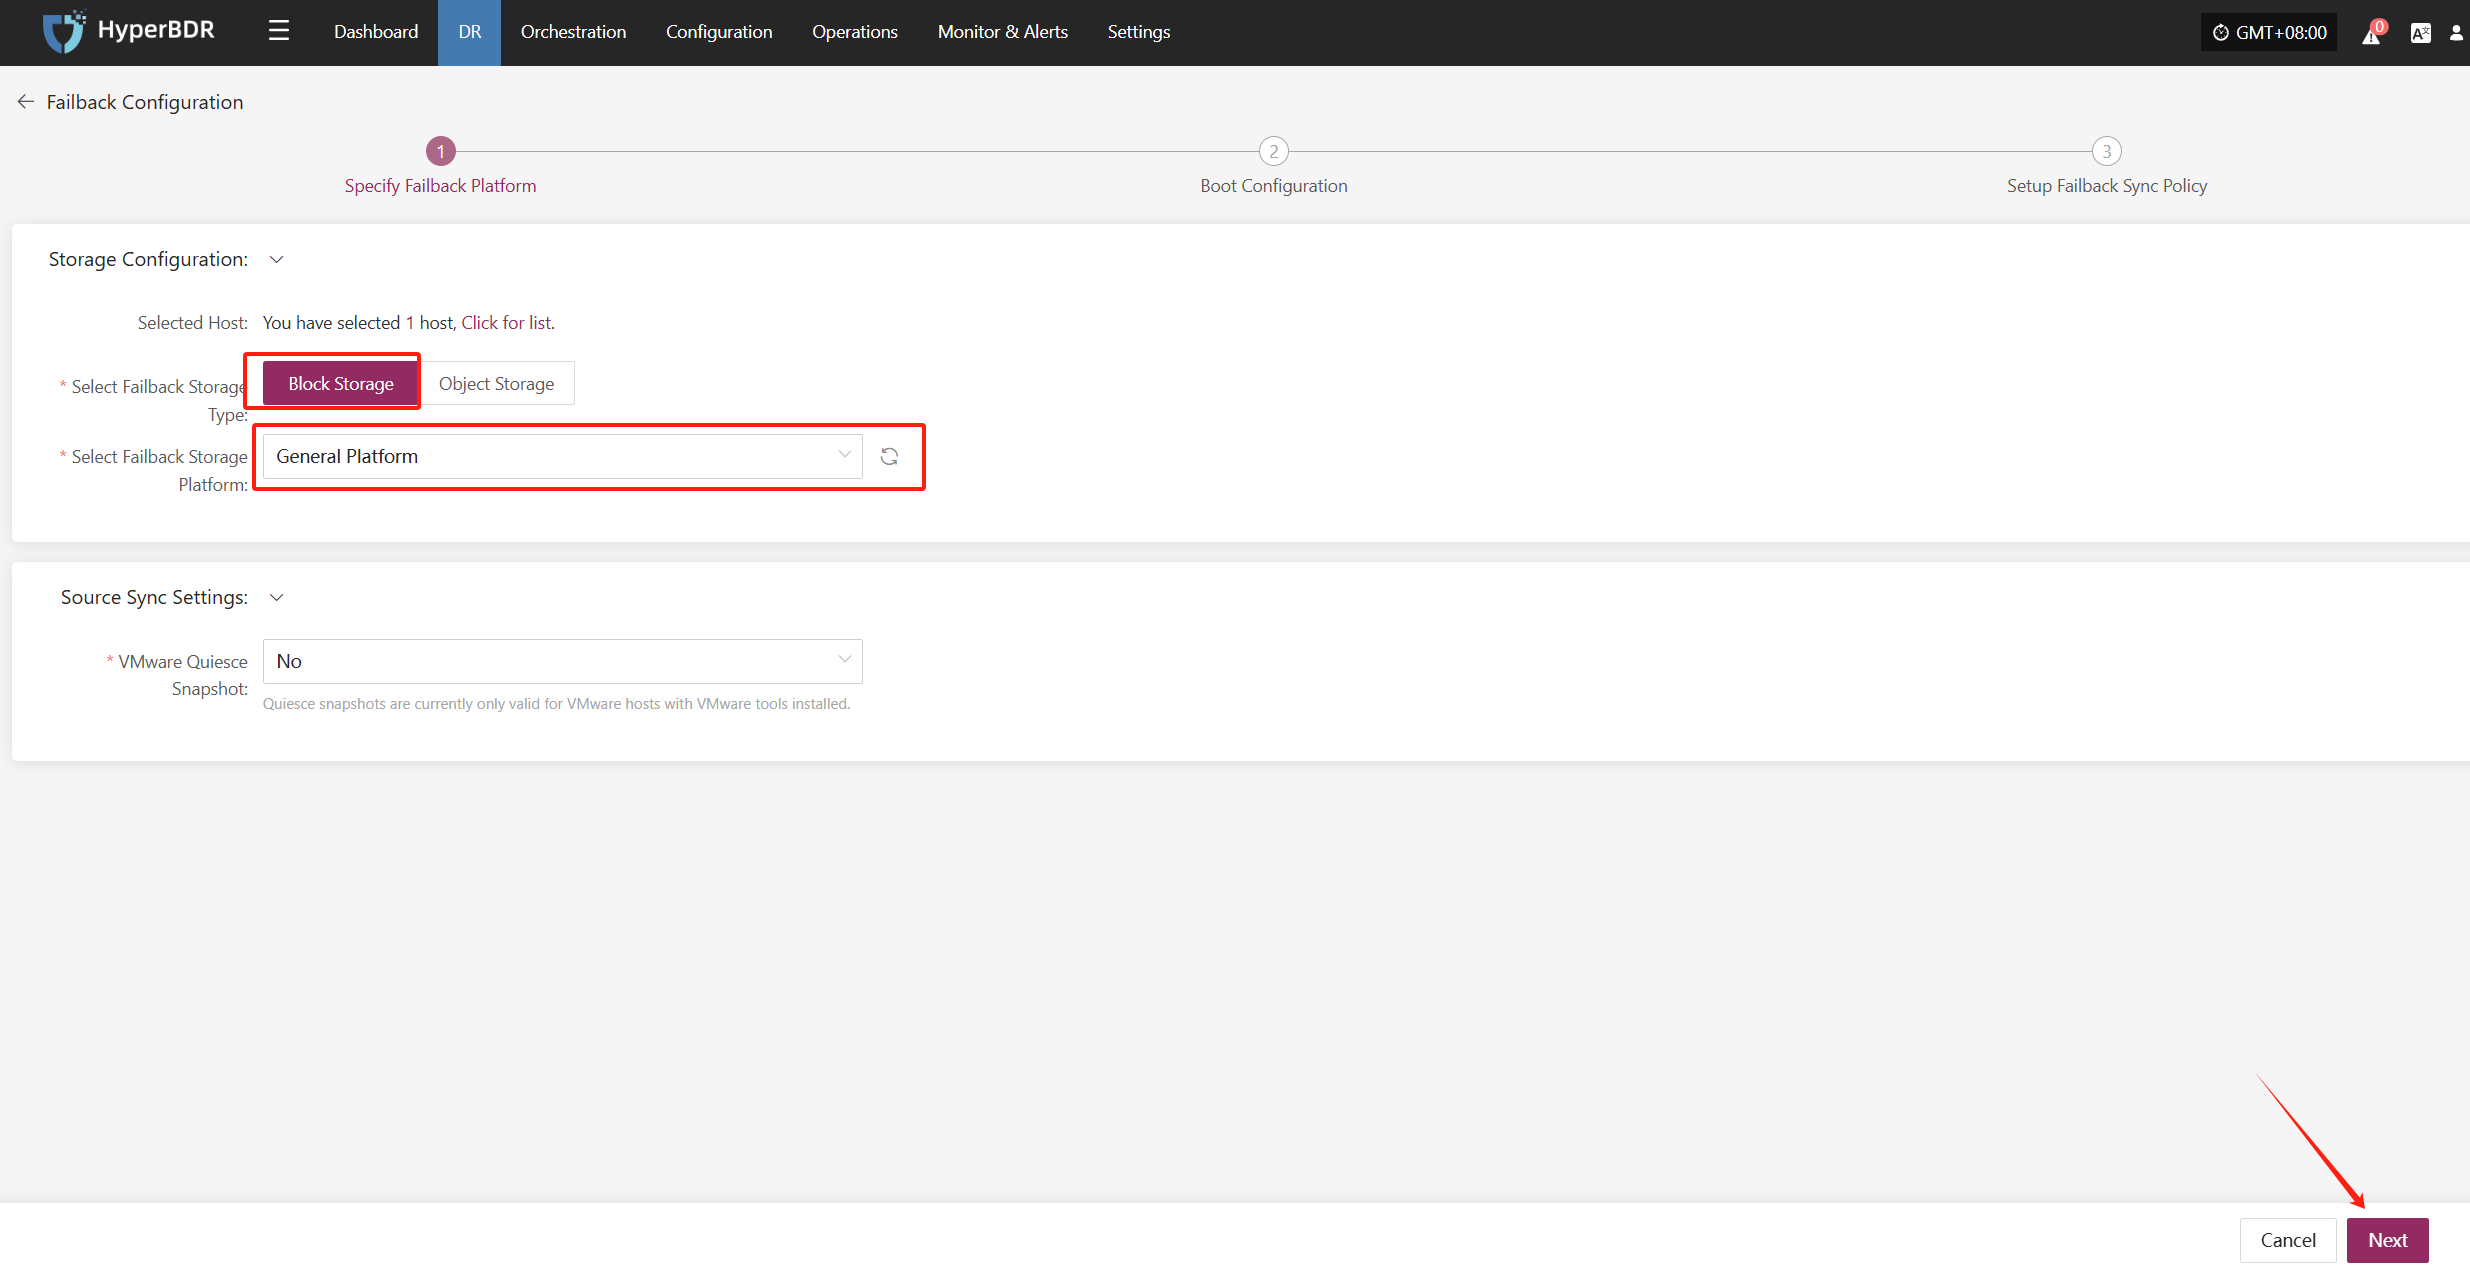
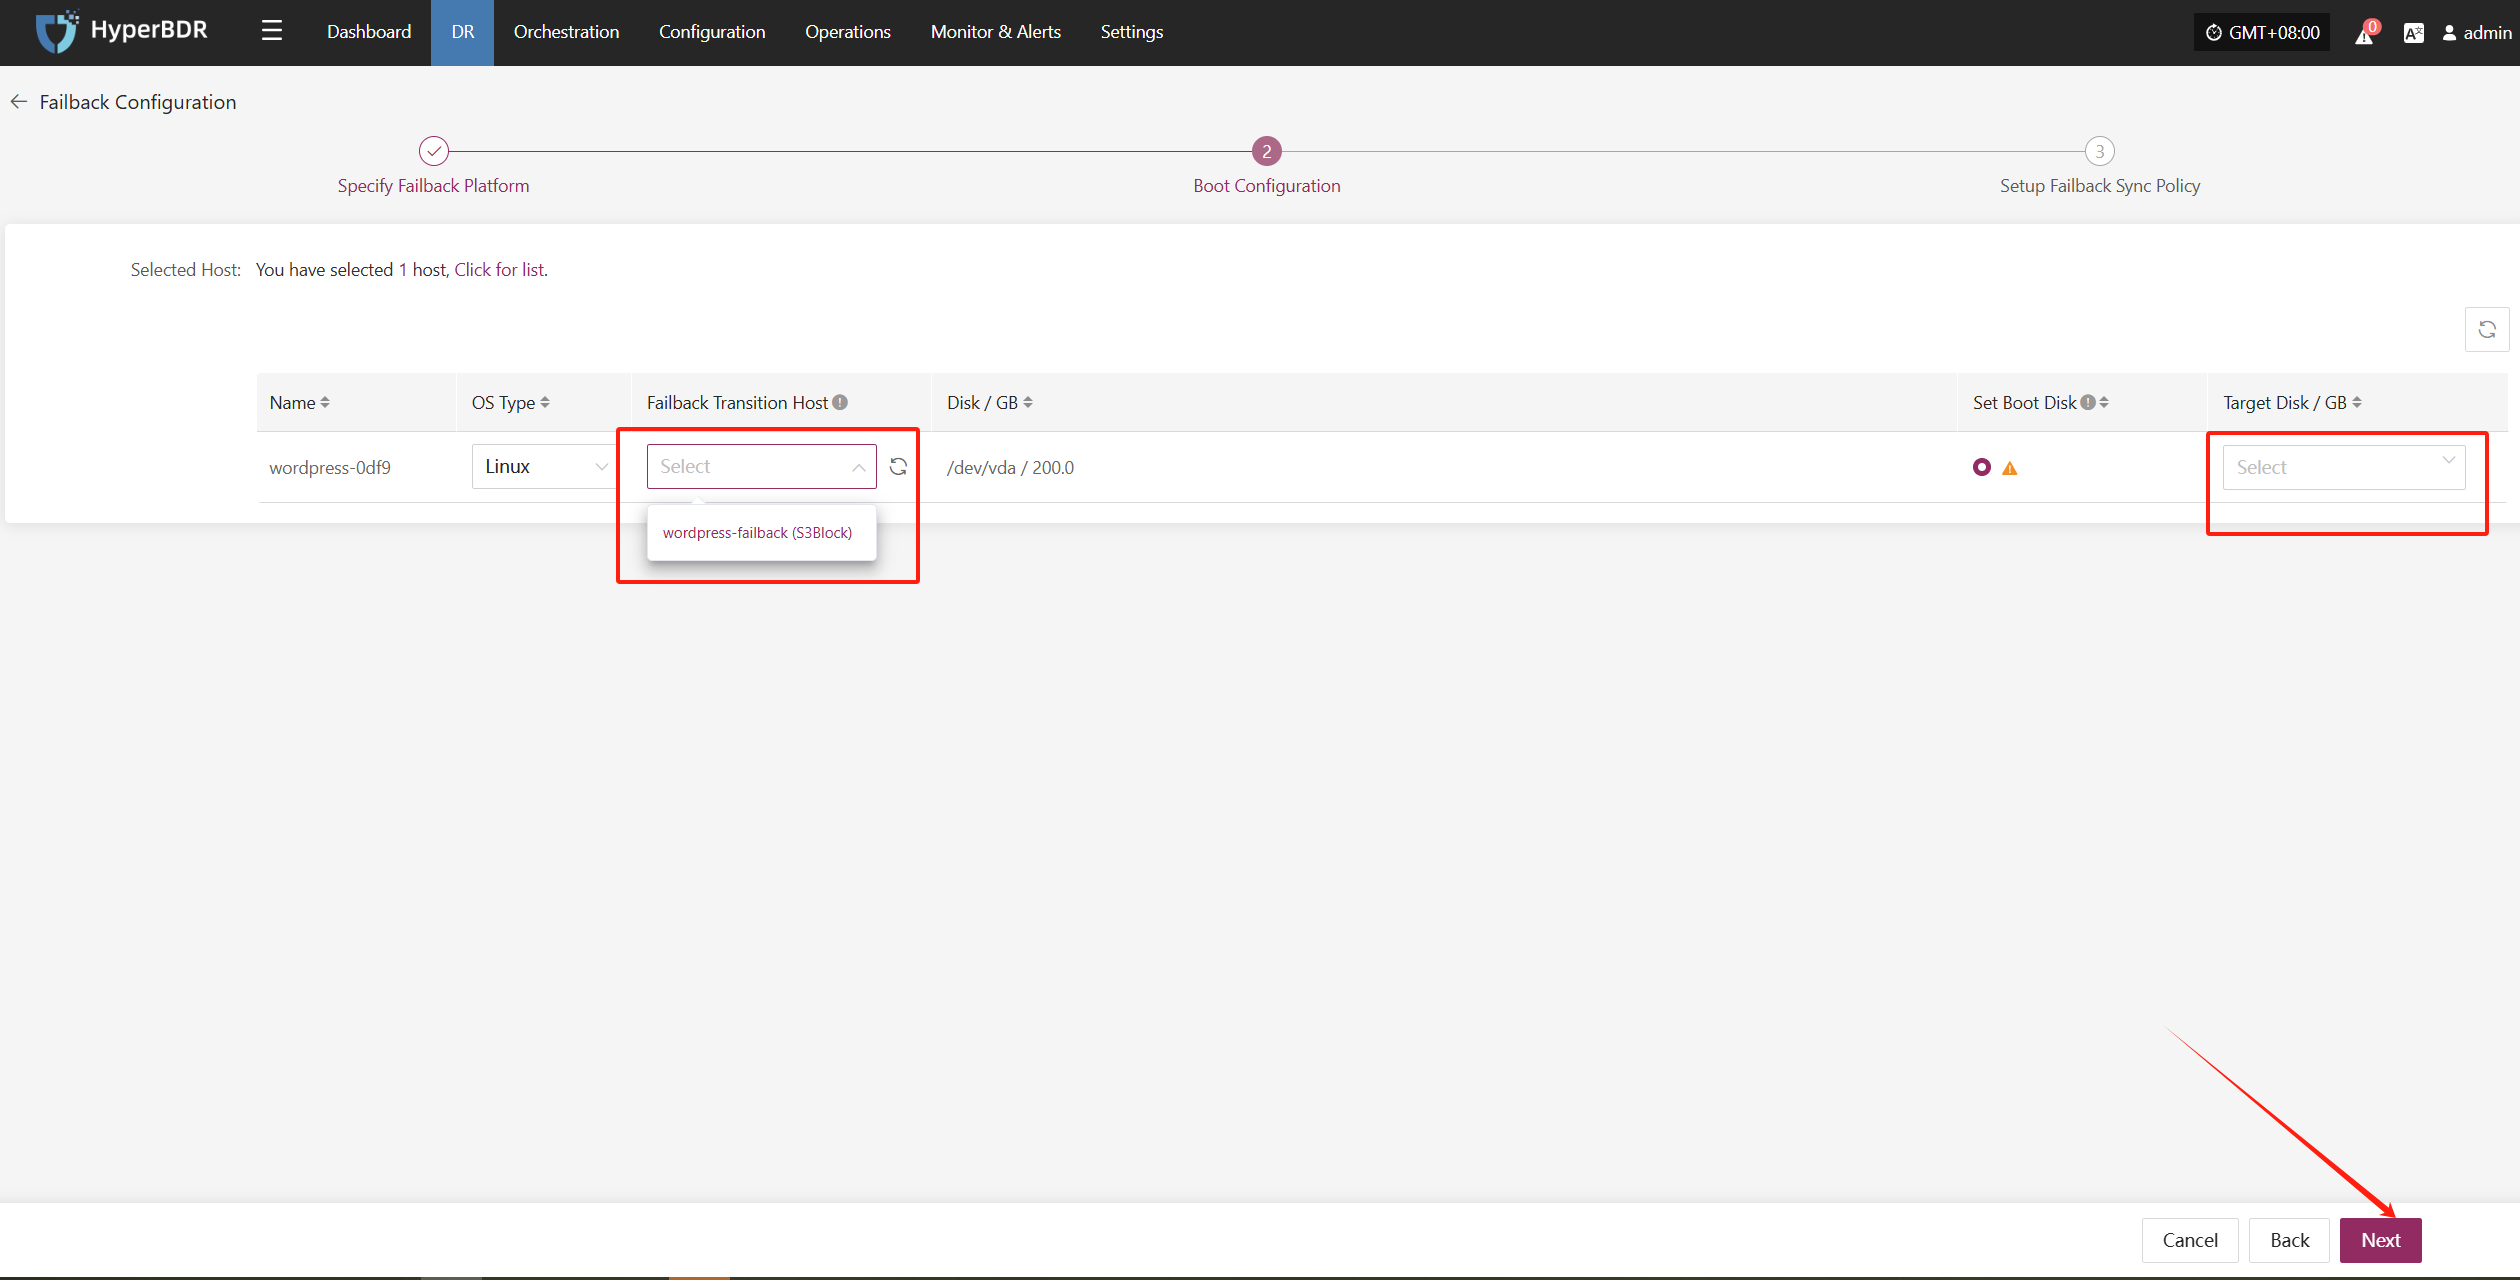
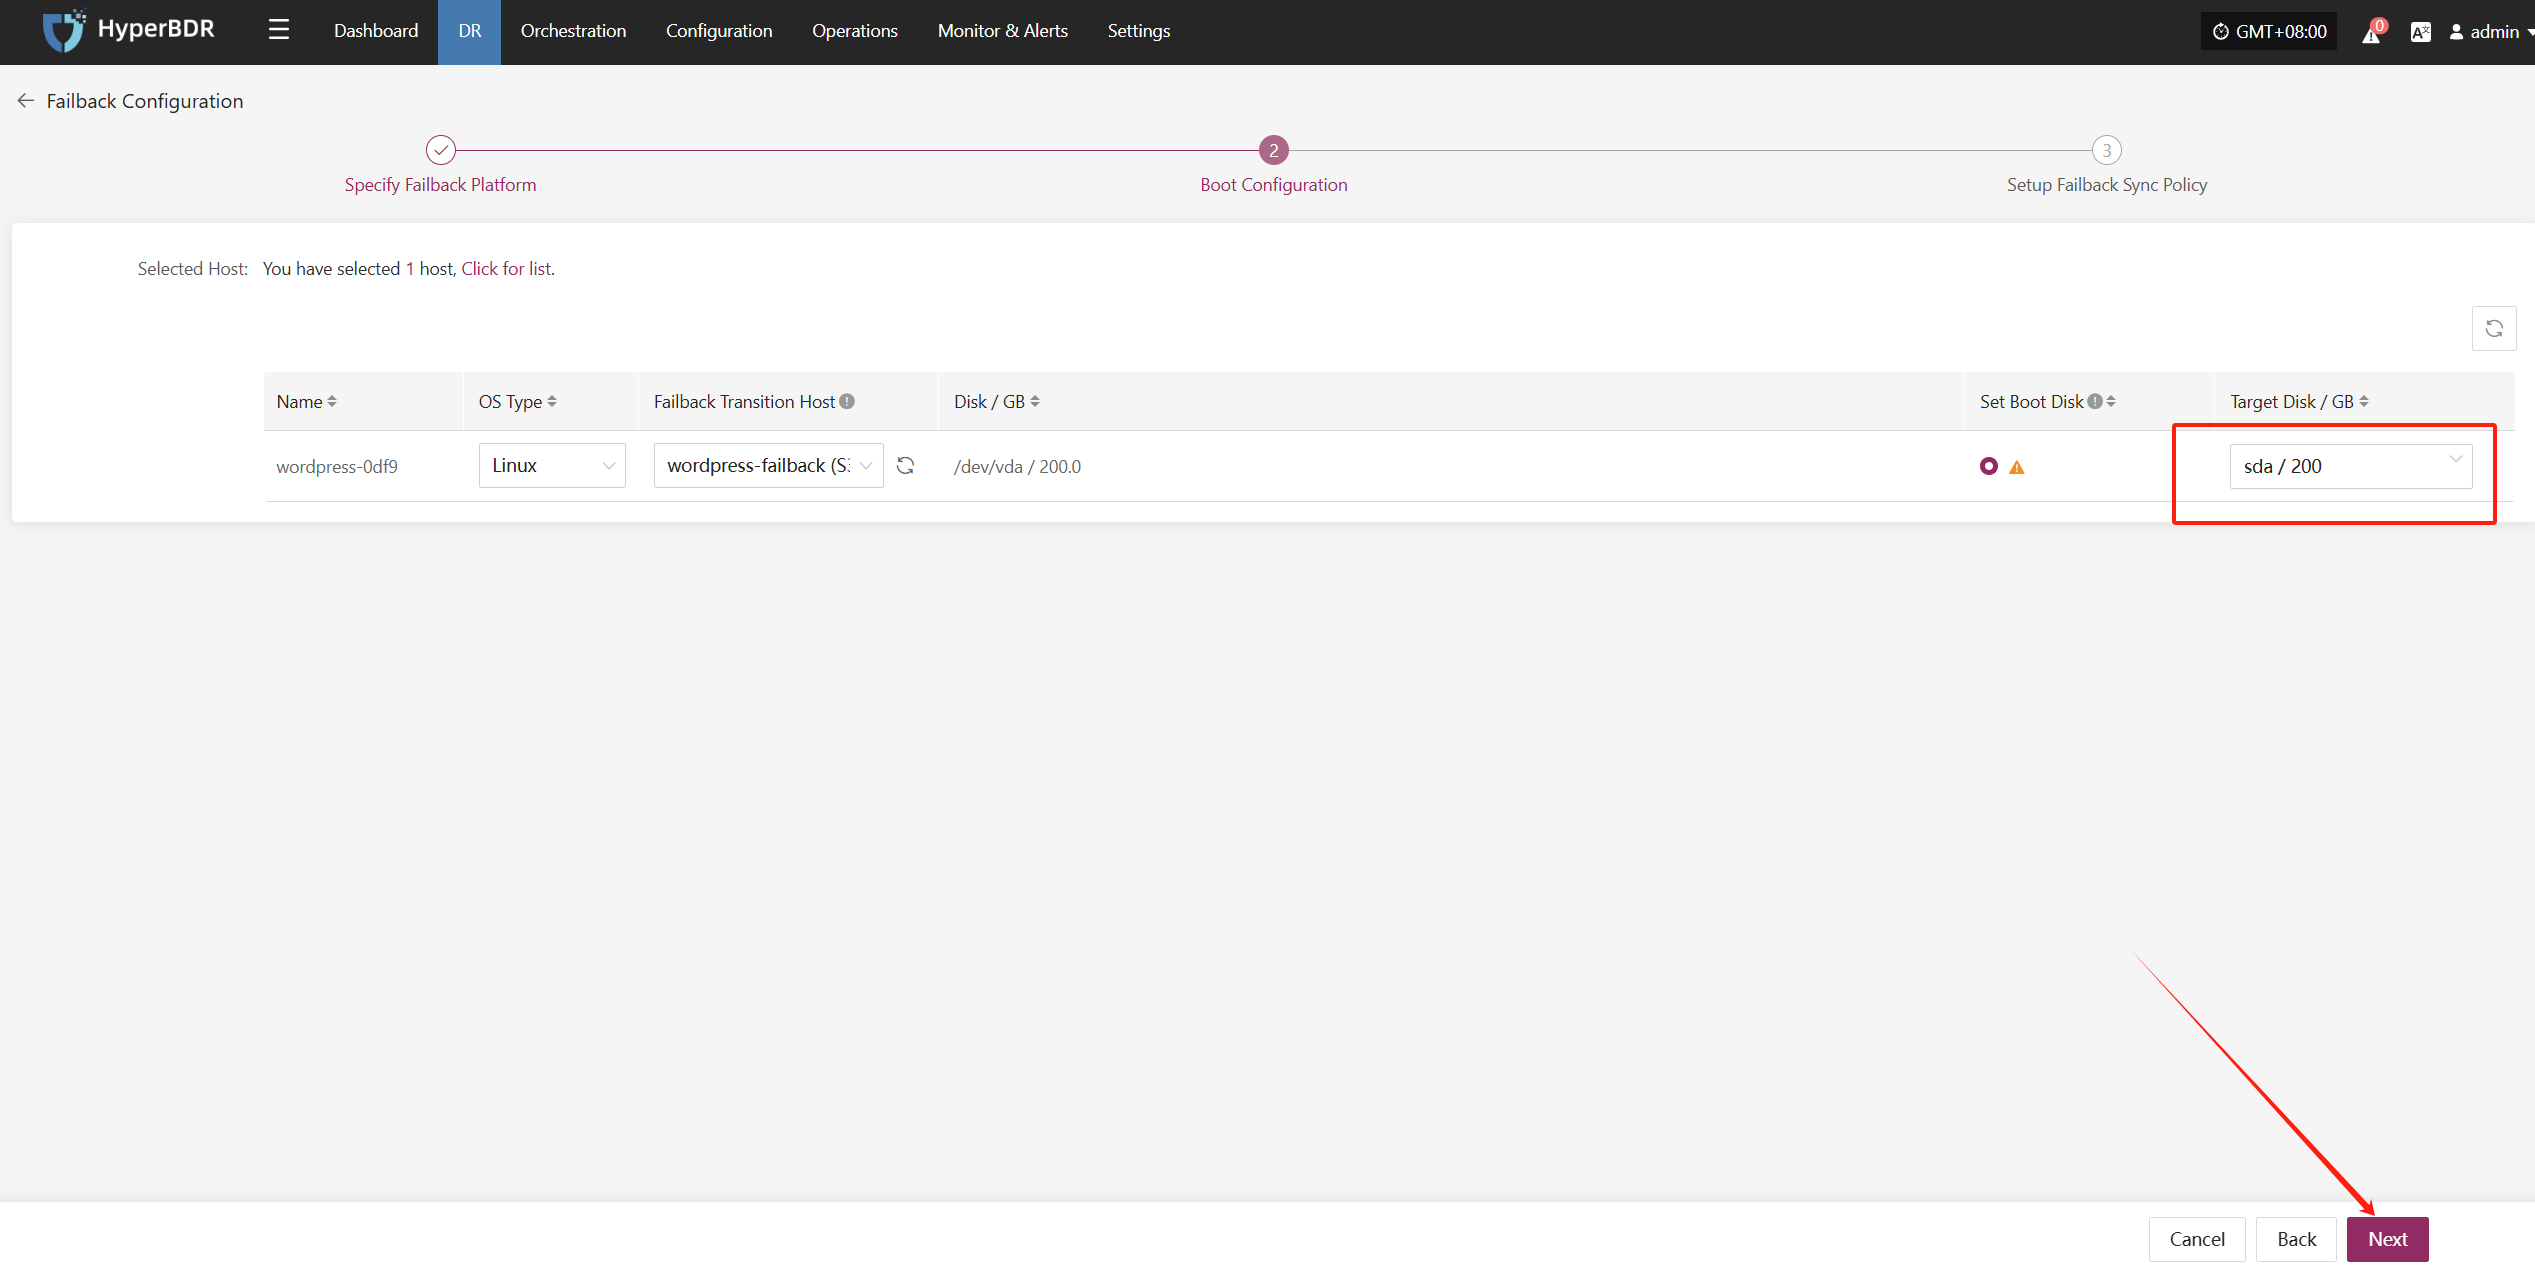
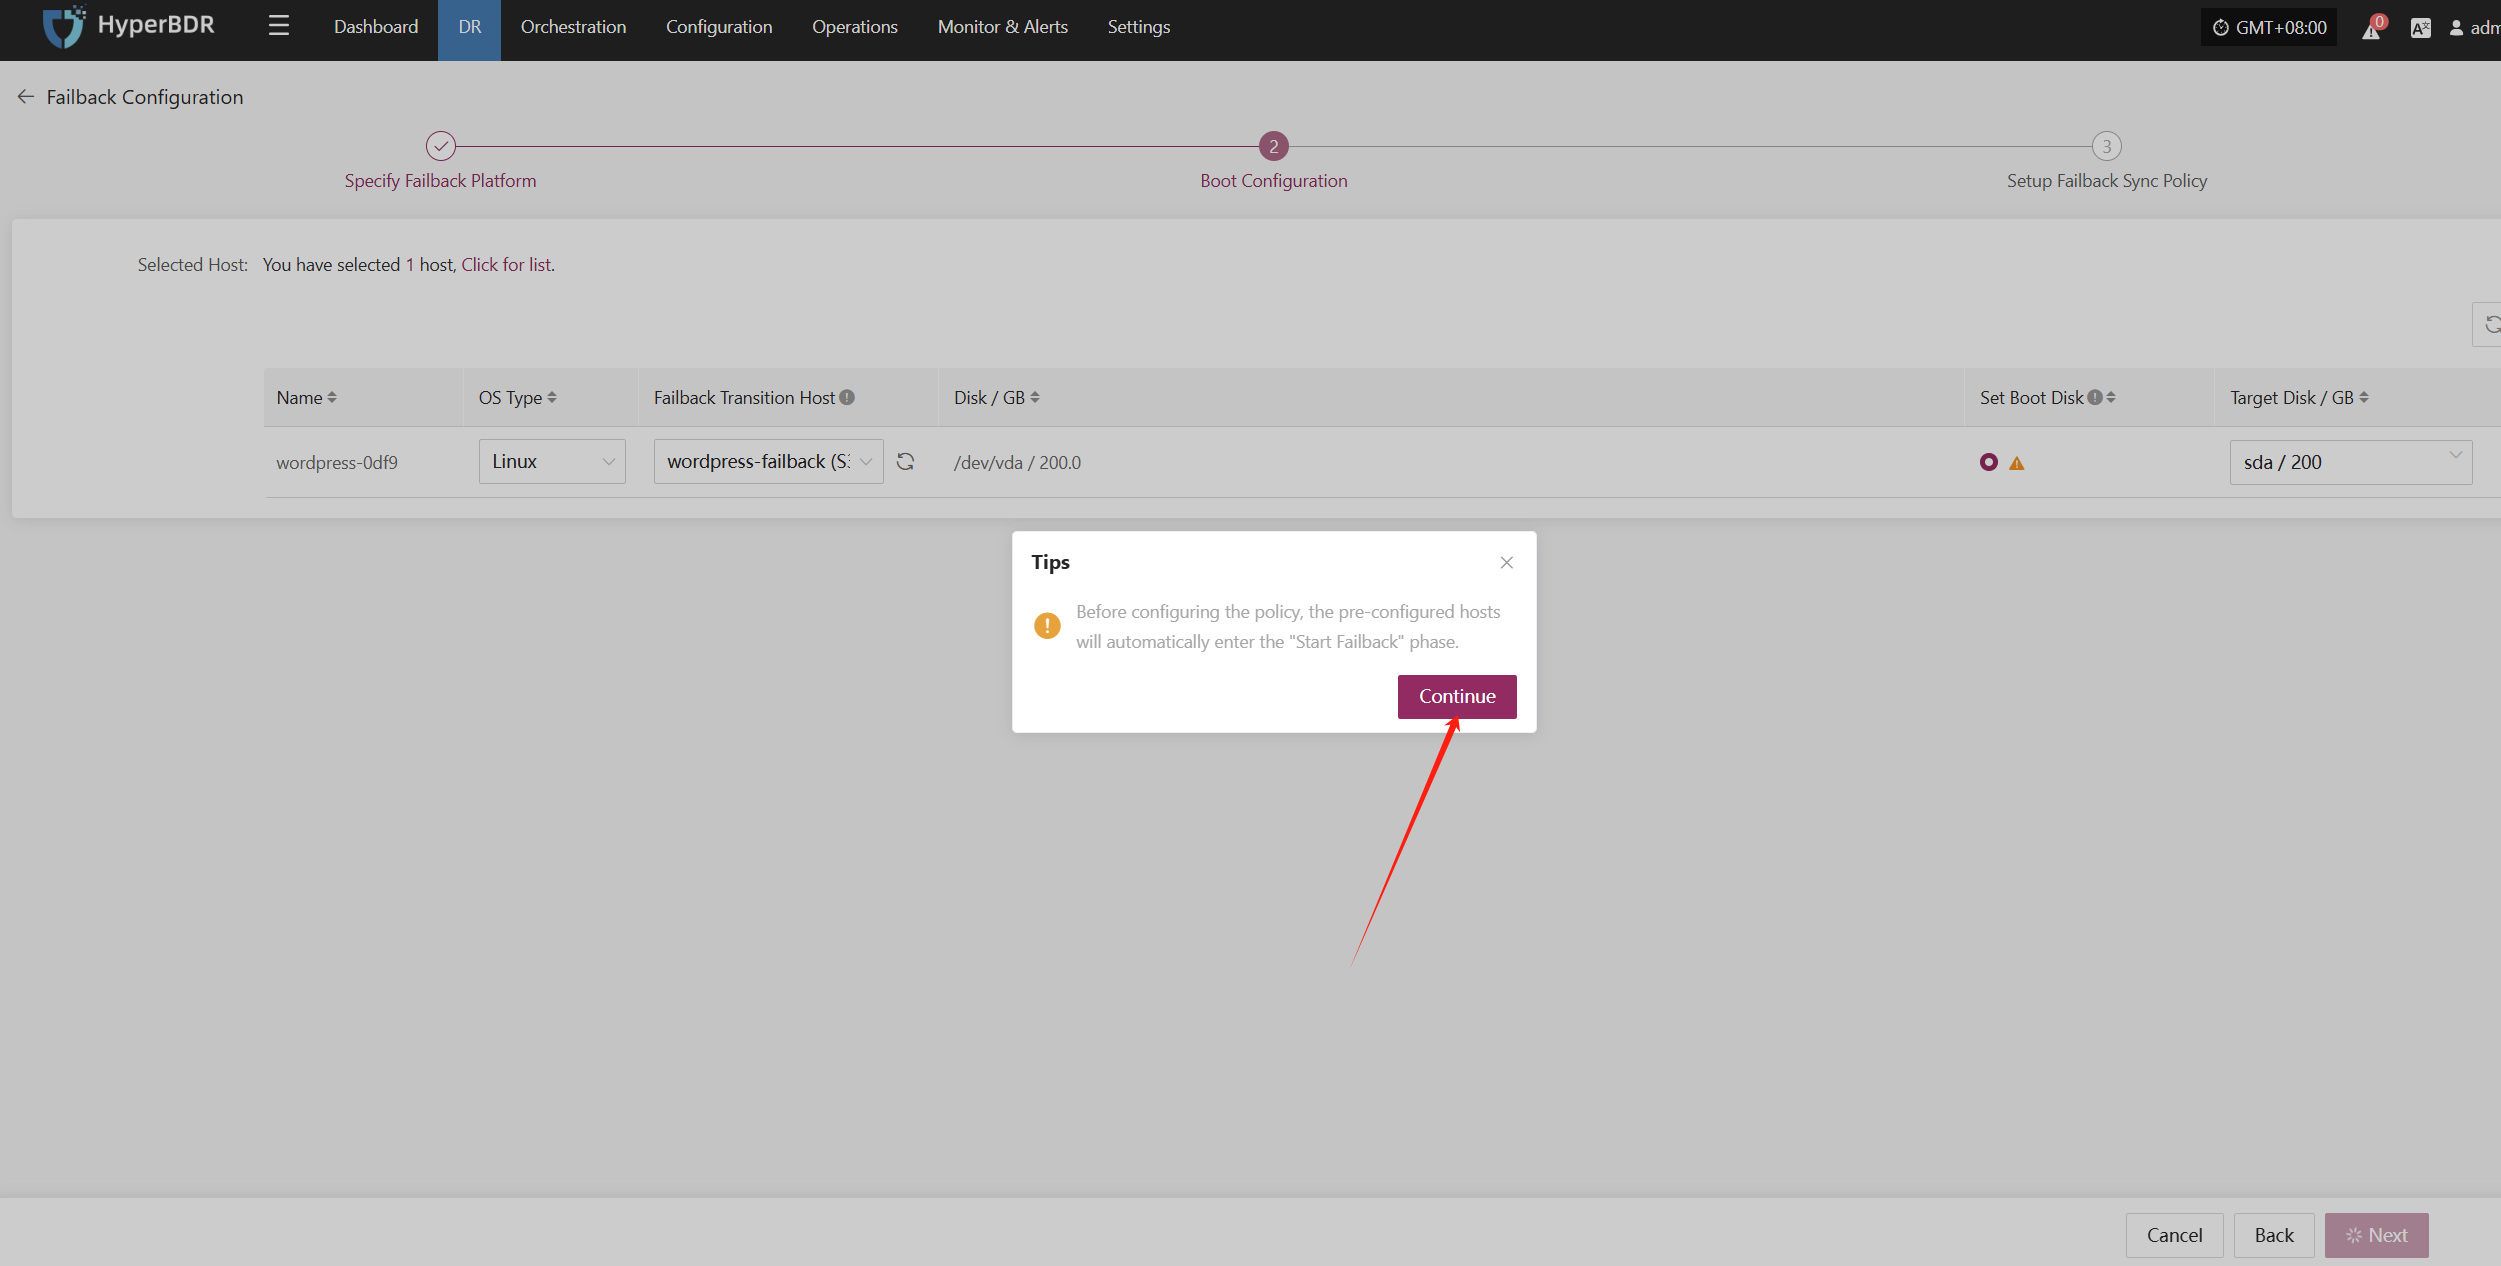
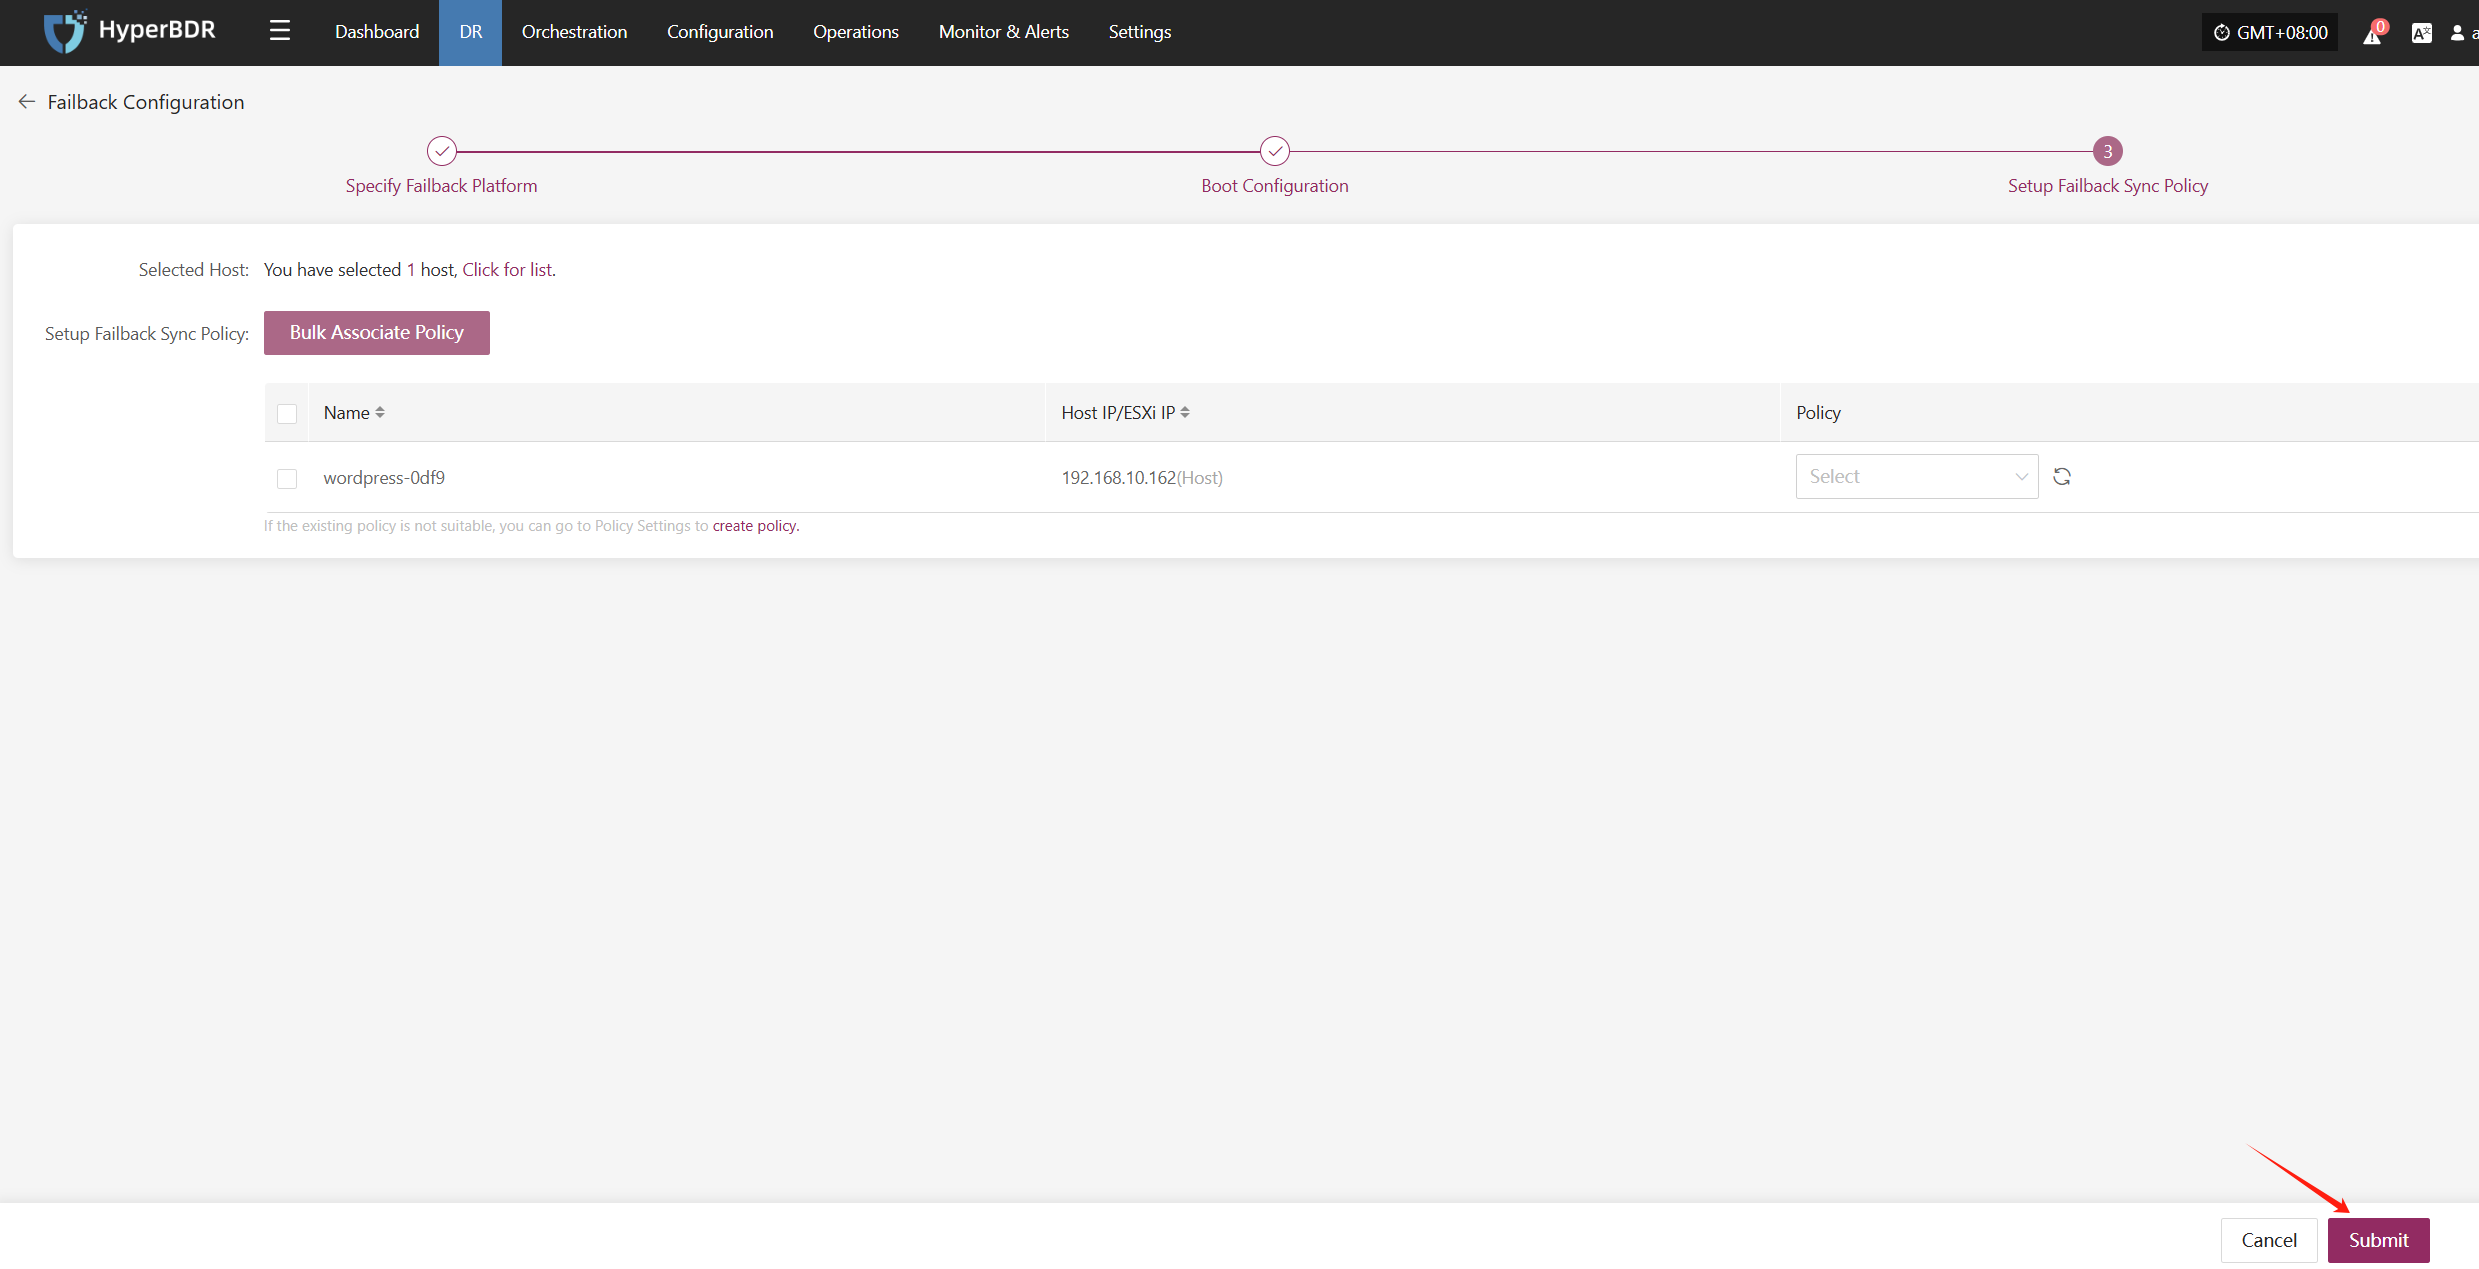
Configuring disaster recovery failback parameters
Enter the "Setup failback"interface and follow the instructions to complete the configuration
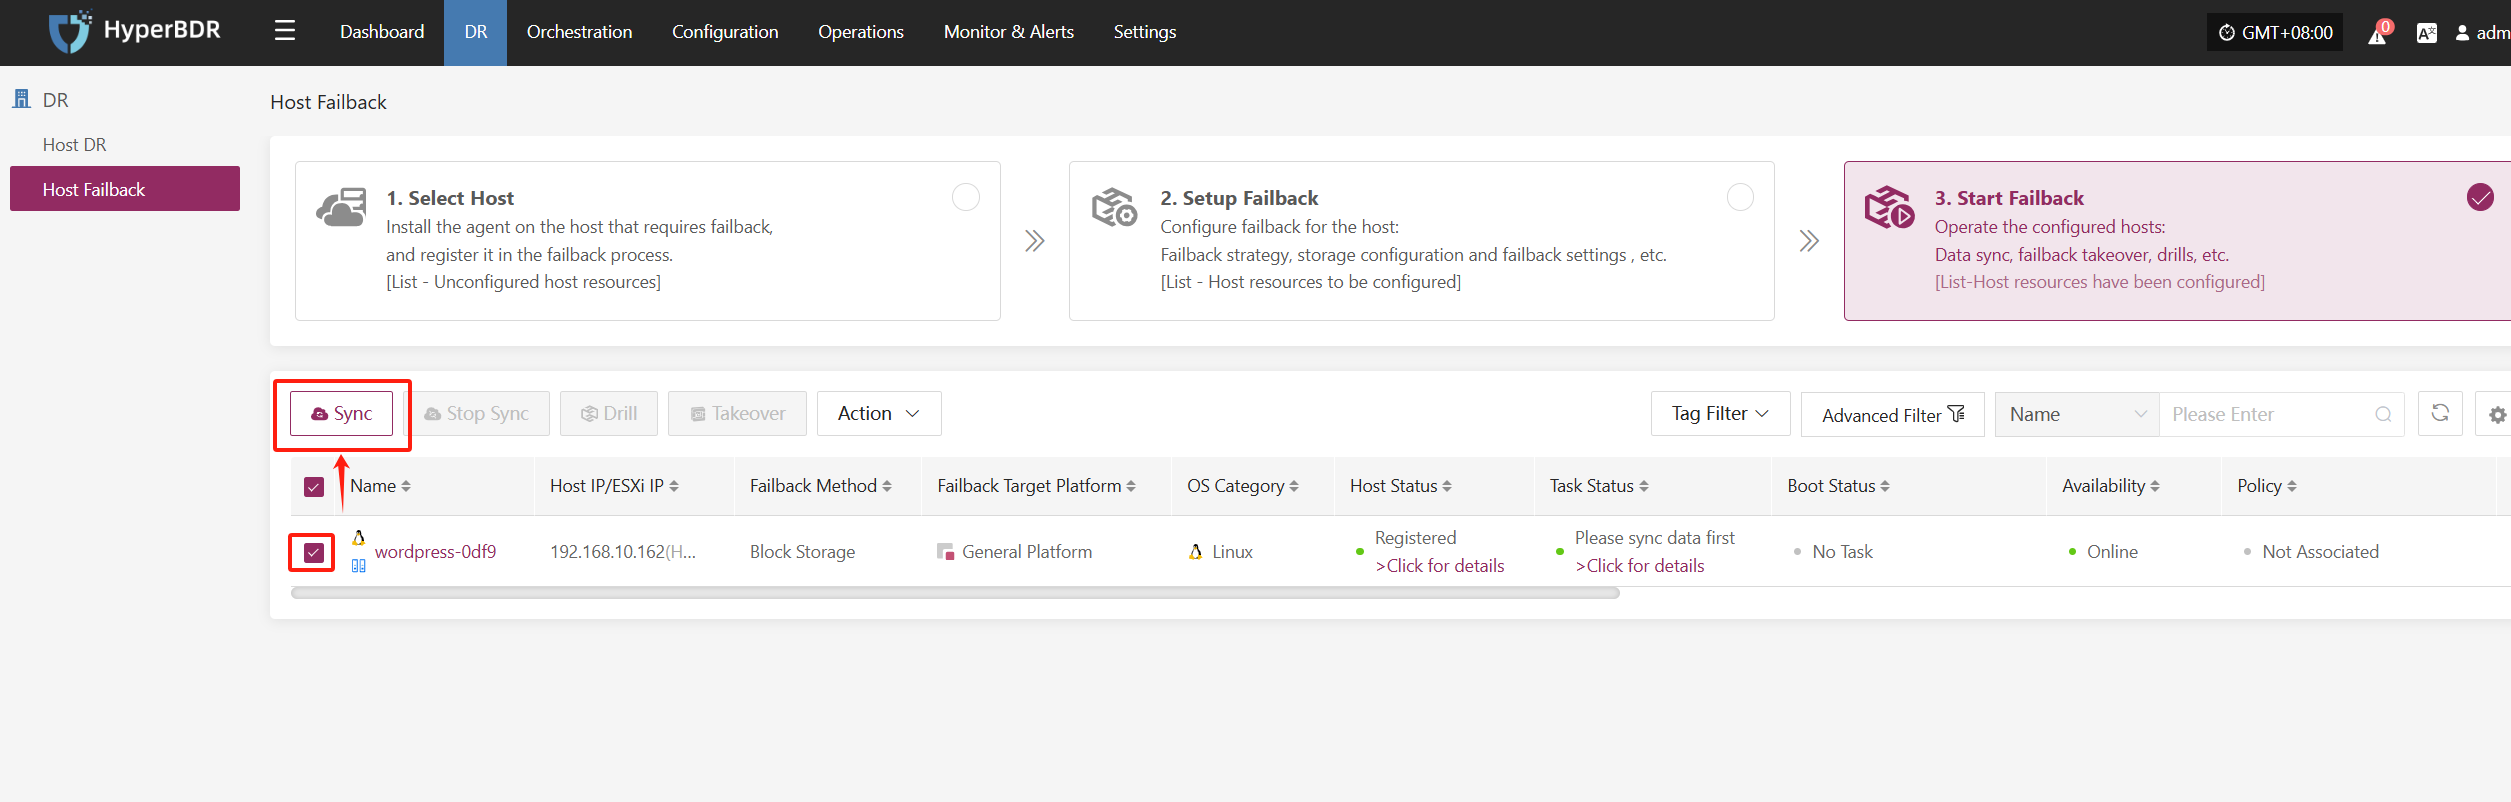
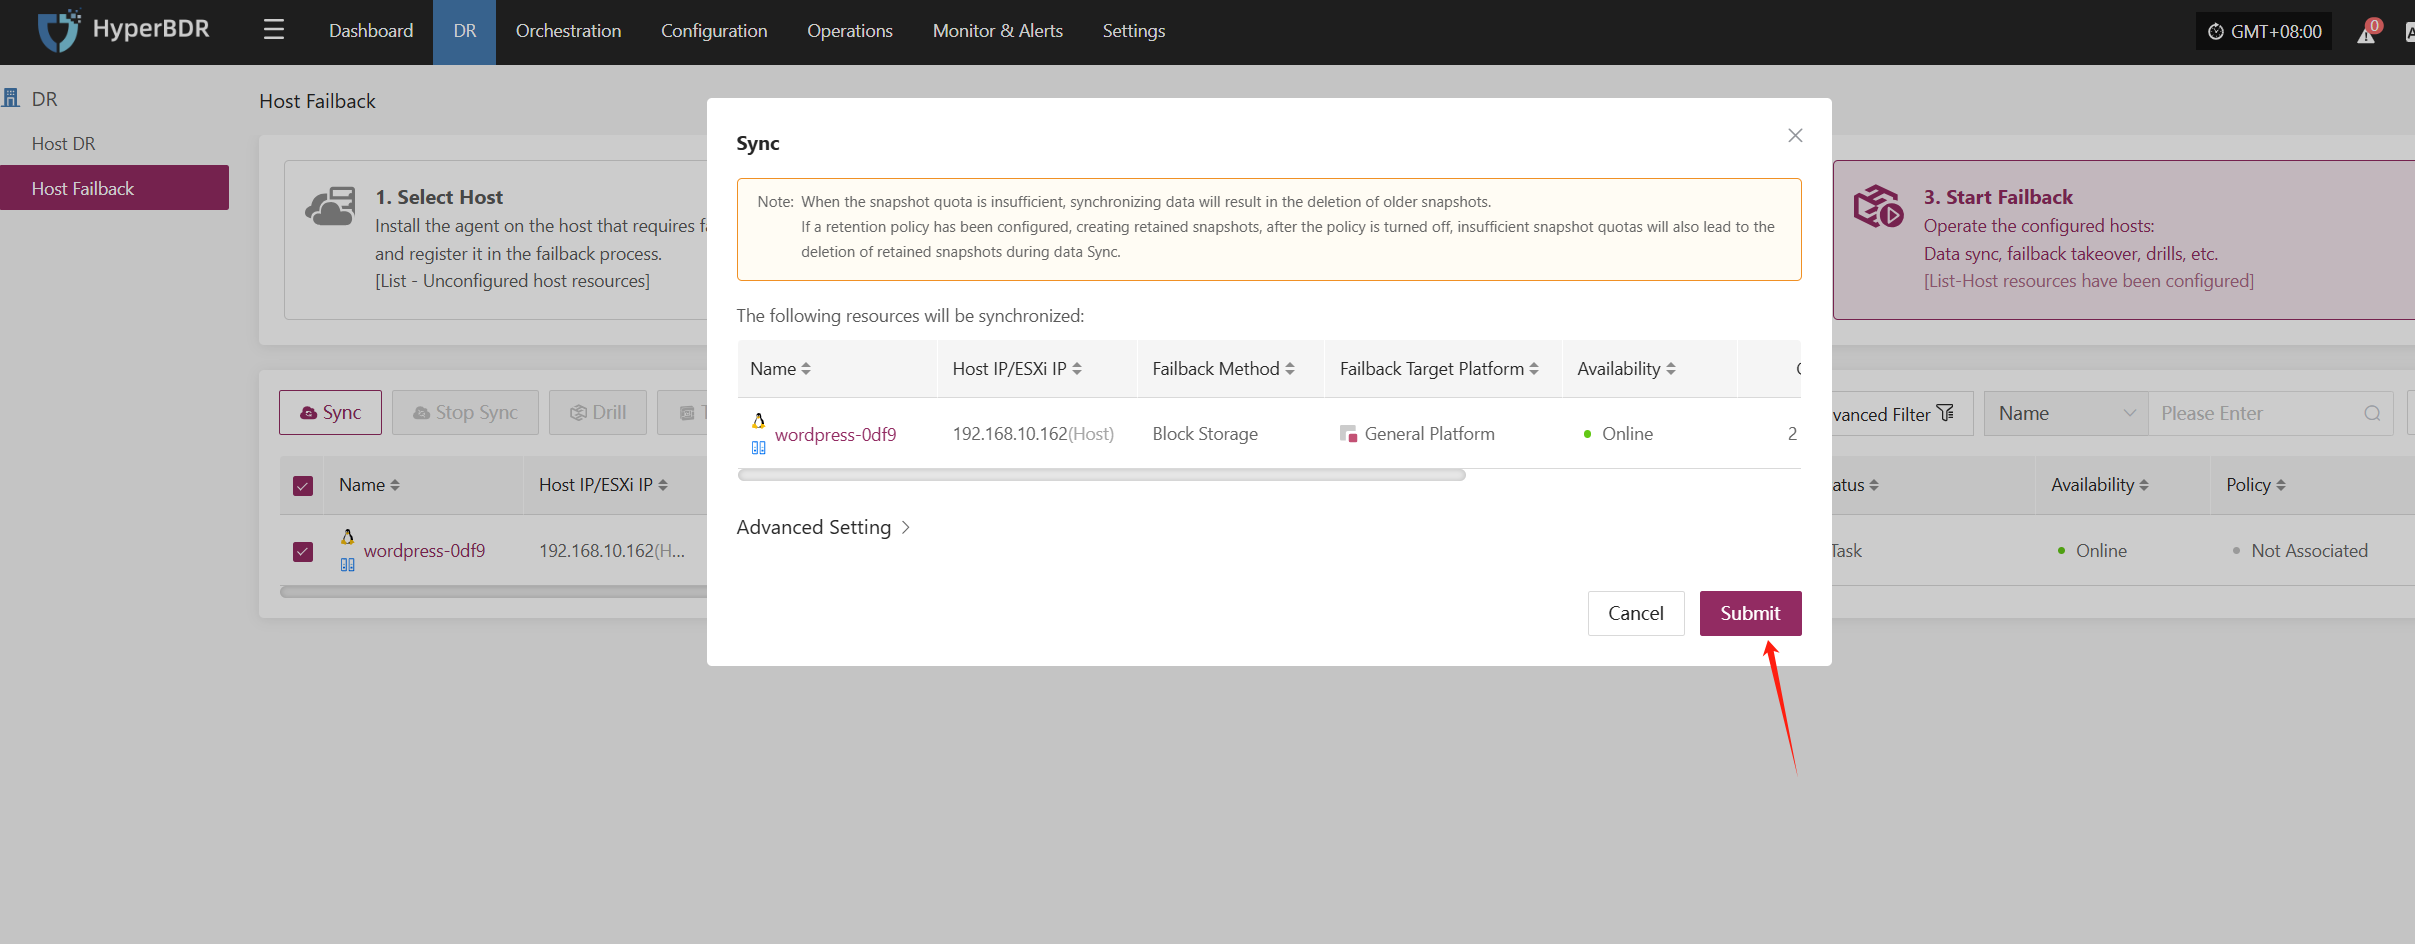
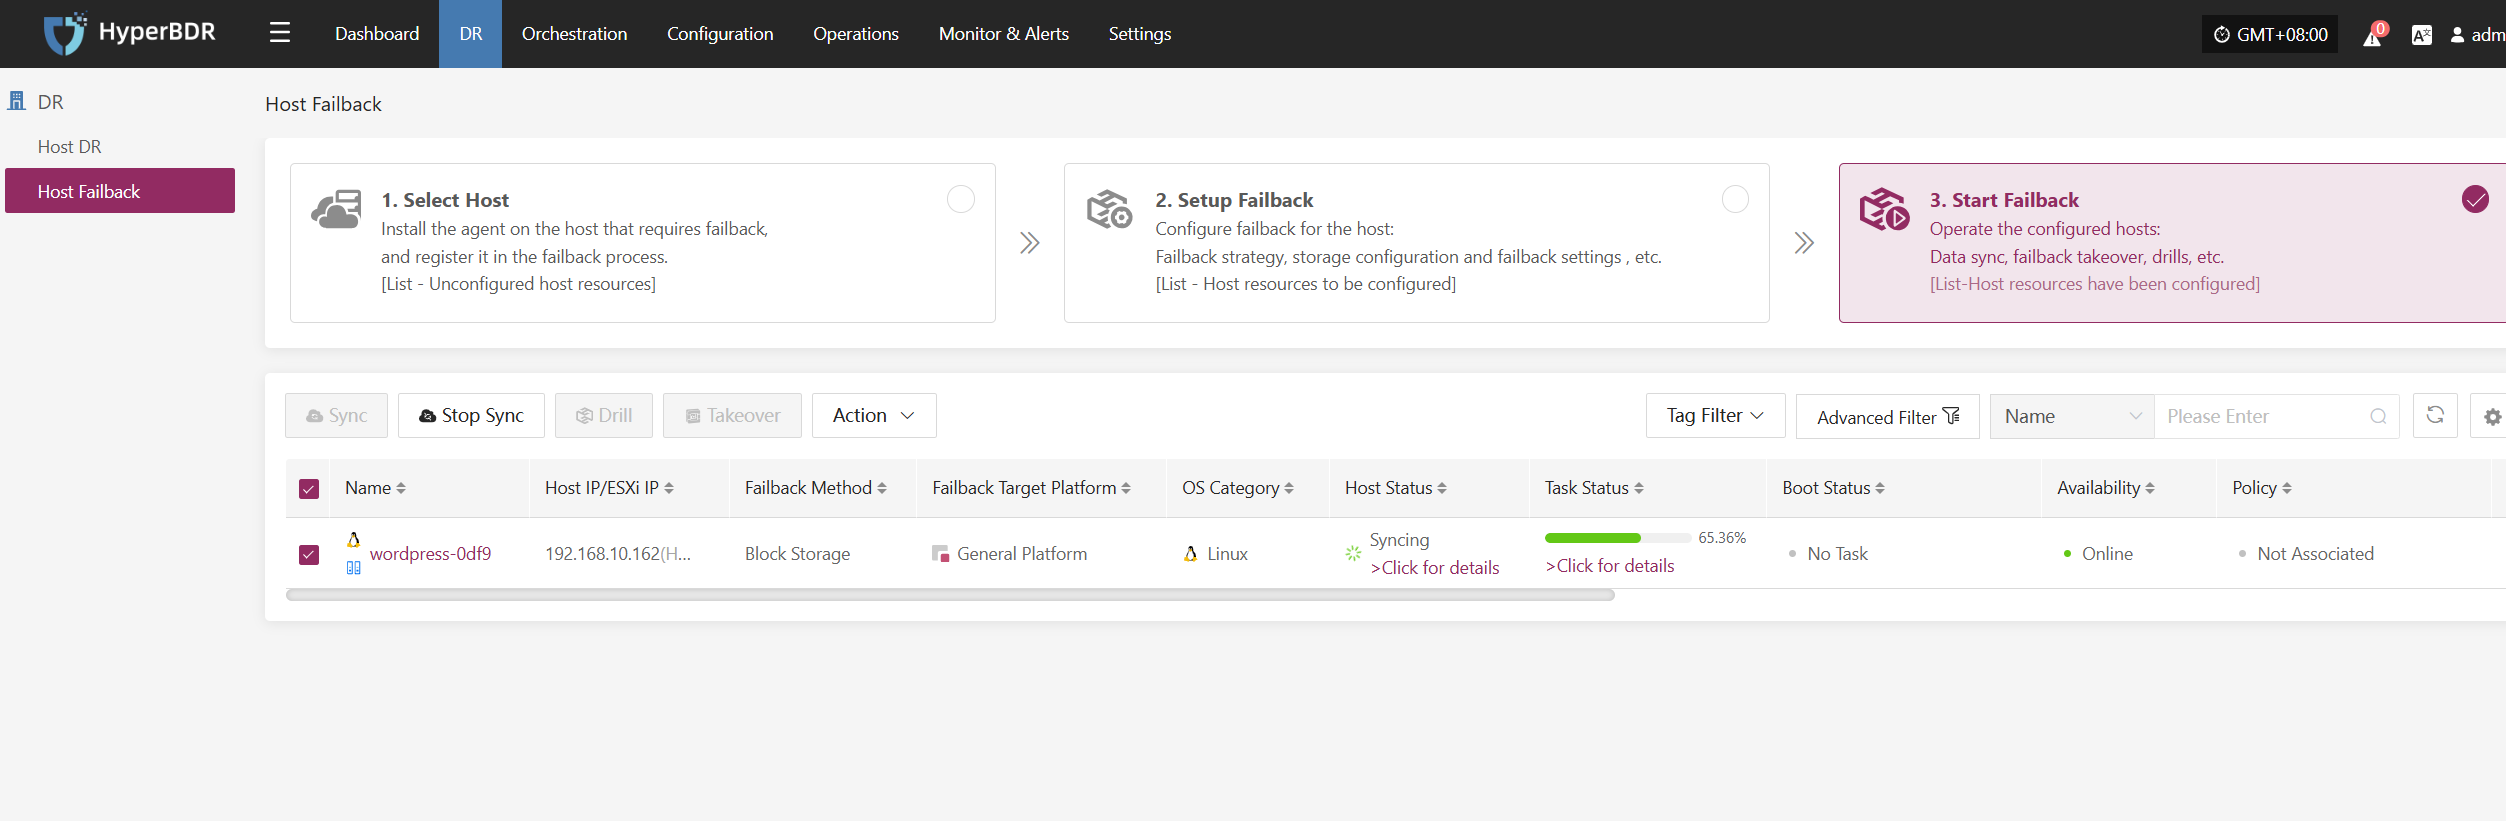
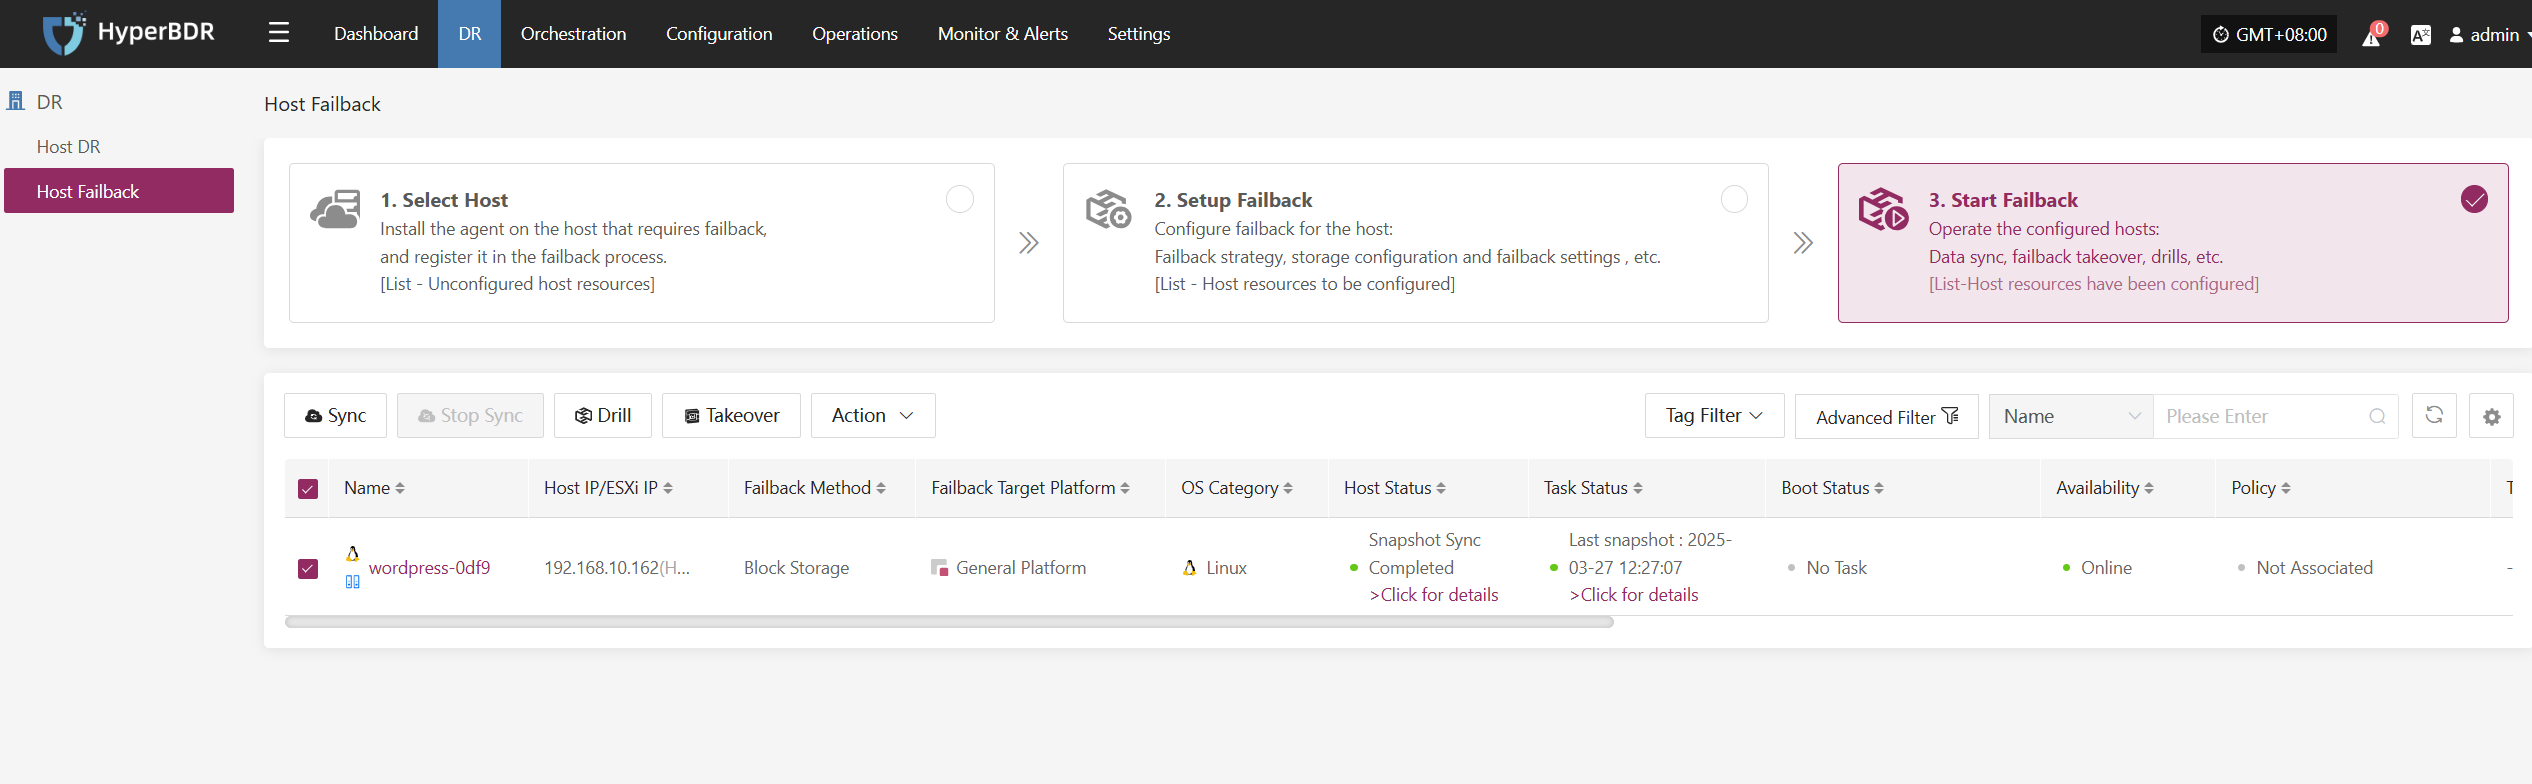
Performing data synchronization
Initiate data synchronization from the target cloud disaster recovery environment to the VMware production environment
Failback verification (pre-production testing)
Description : This step will clone the host in VMware for testing (time depending on the amount of data)
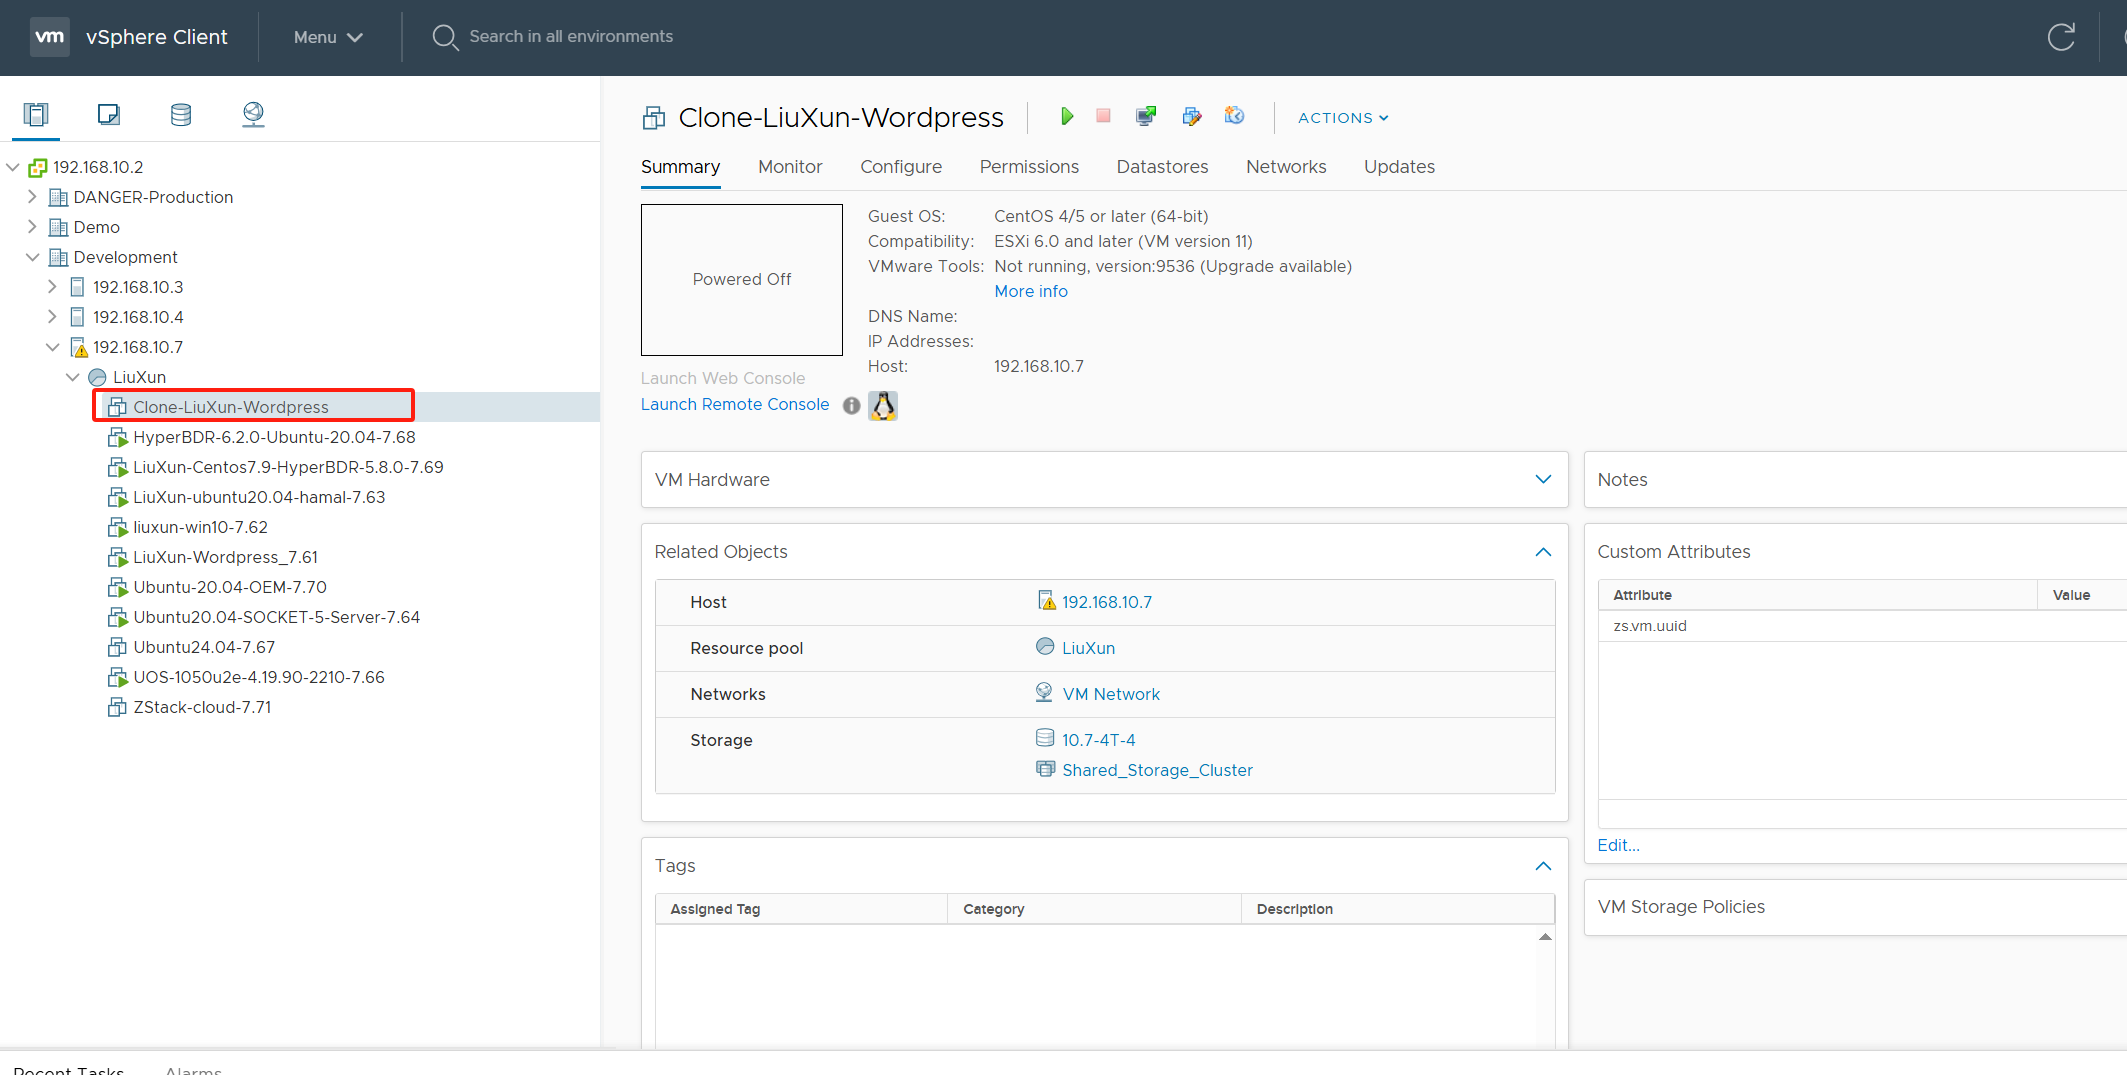
Clone host:
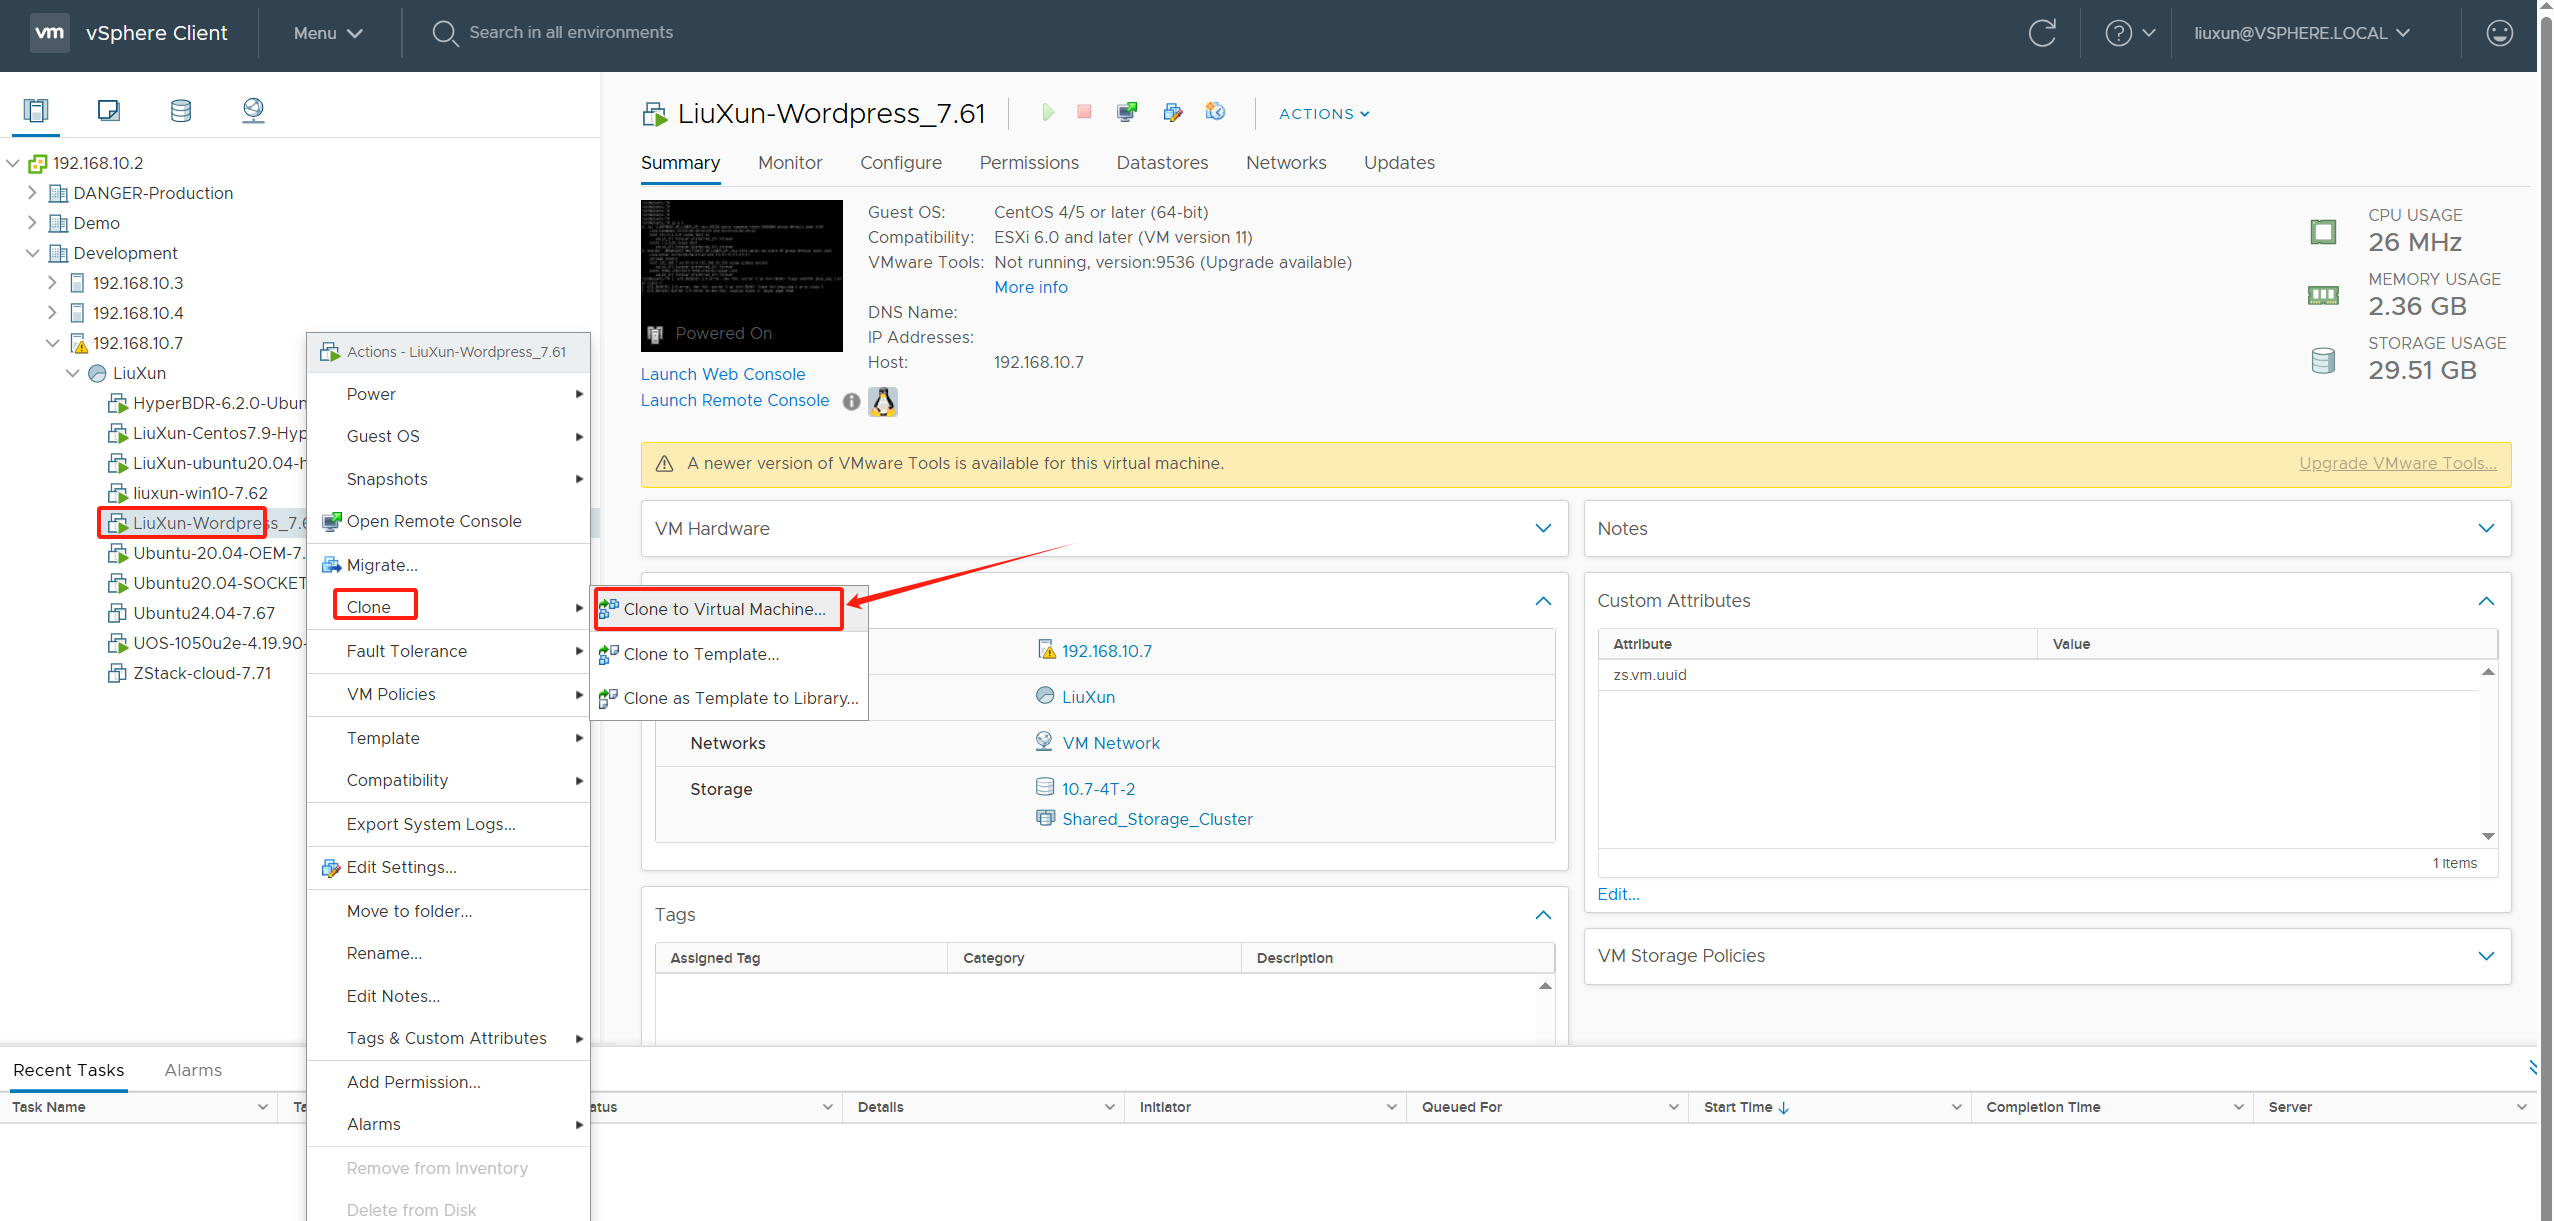
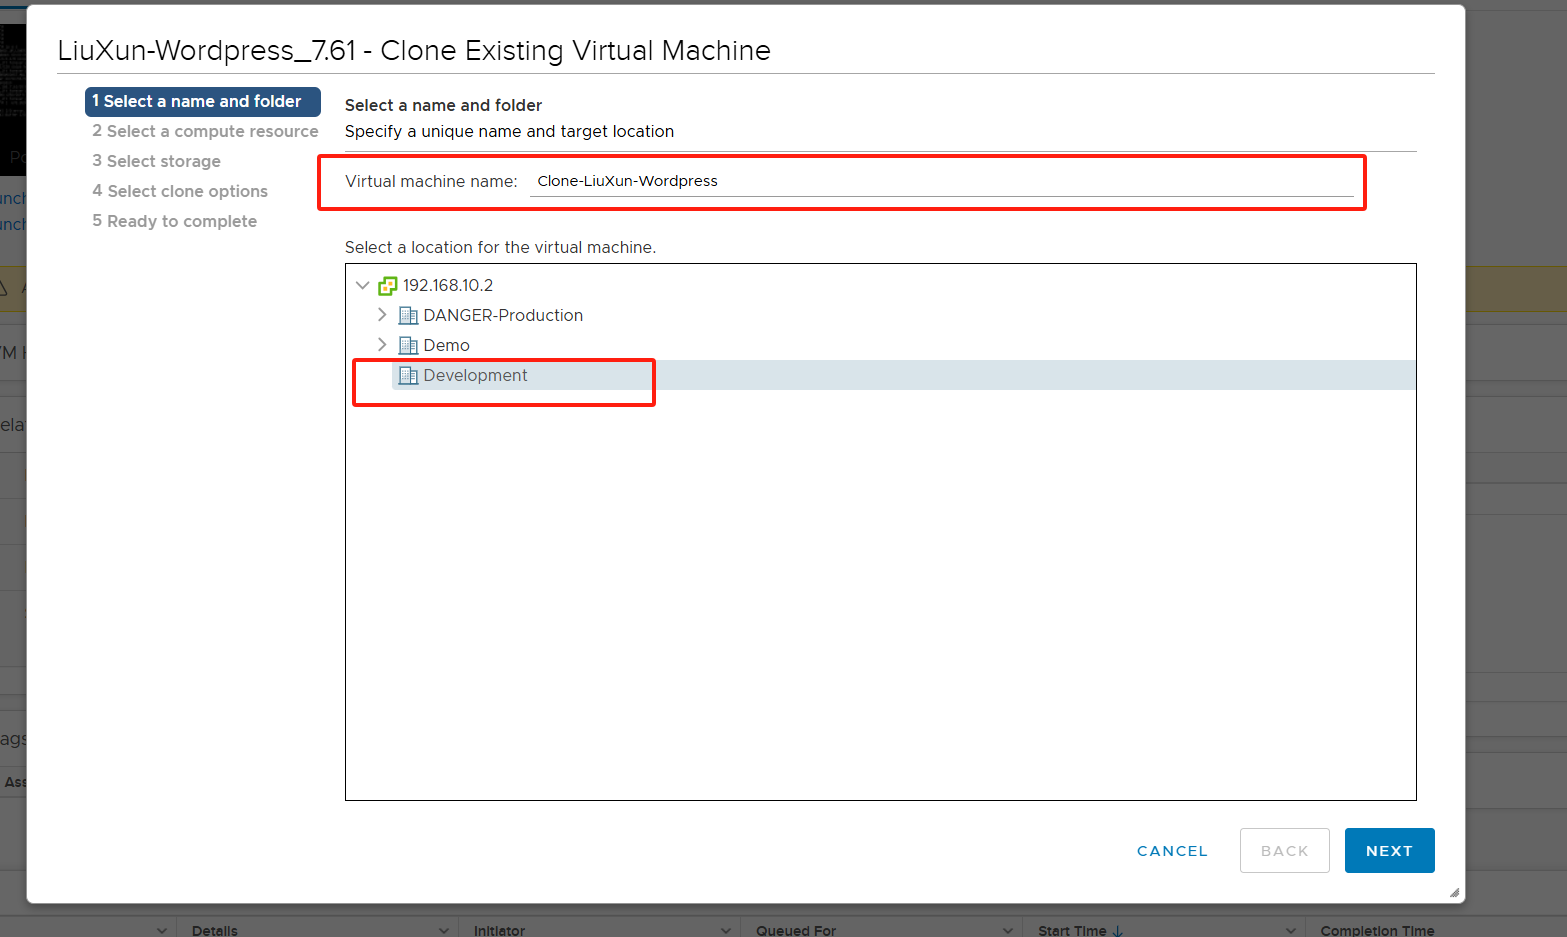

According to your own on-site environment, follow the steps indexed by VMware to perform cloning.
Cloning is successful.
Boot the clone host using LiveCD-HyperDoor.iso (refer to step 3.4)
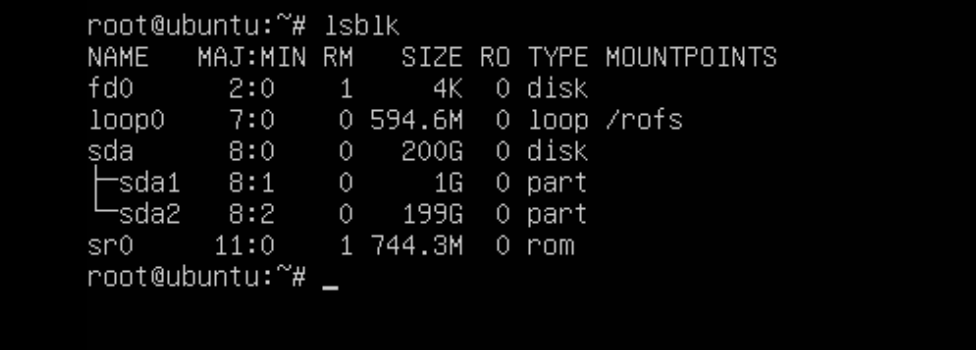
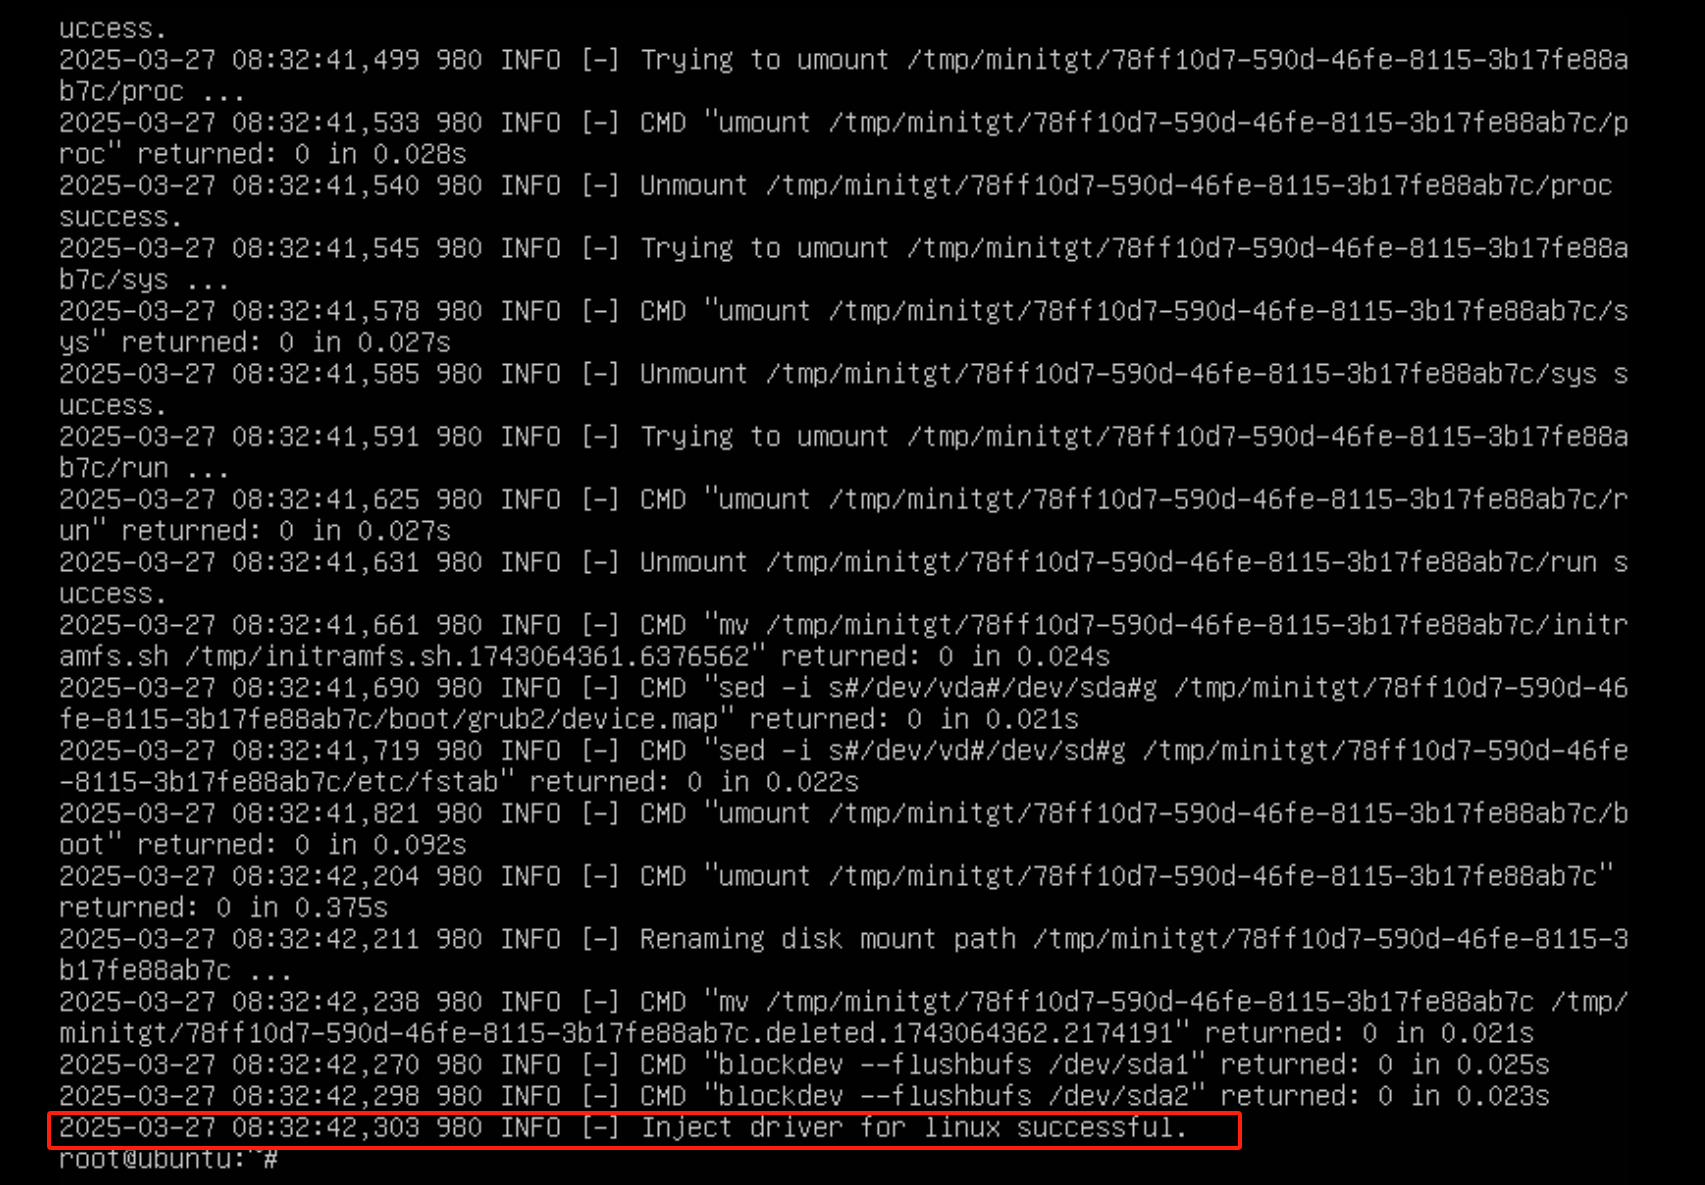
Repair system driver (replace sdaaccording to actual disk):
minitgt-fix /dev/sda
Wait for the driver repair to succeed.
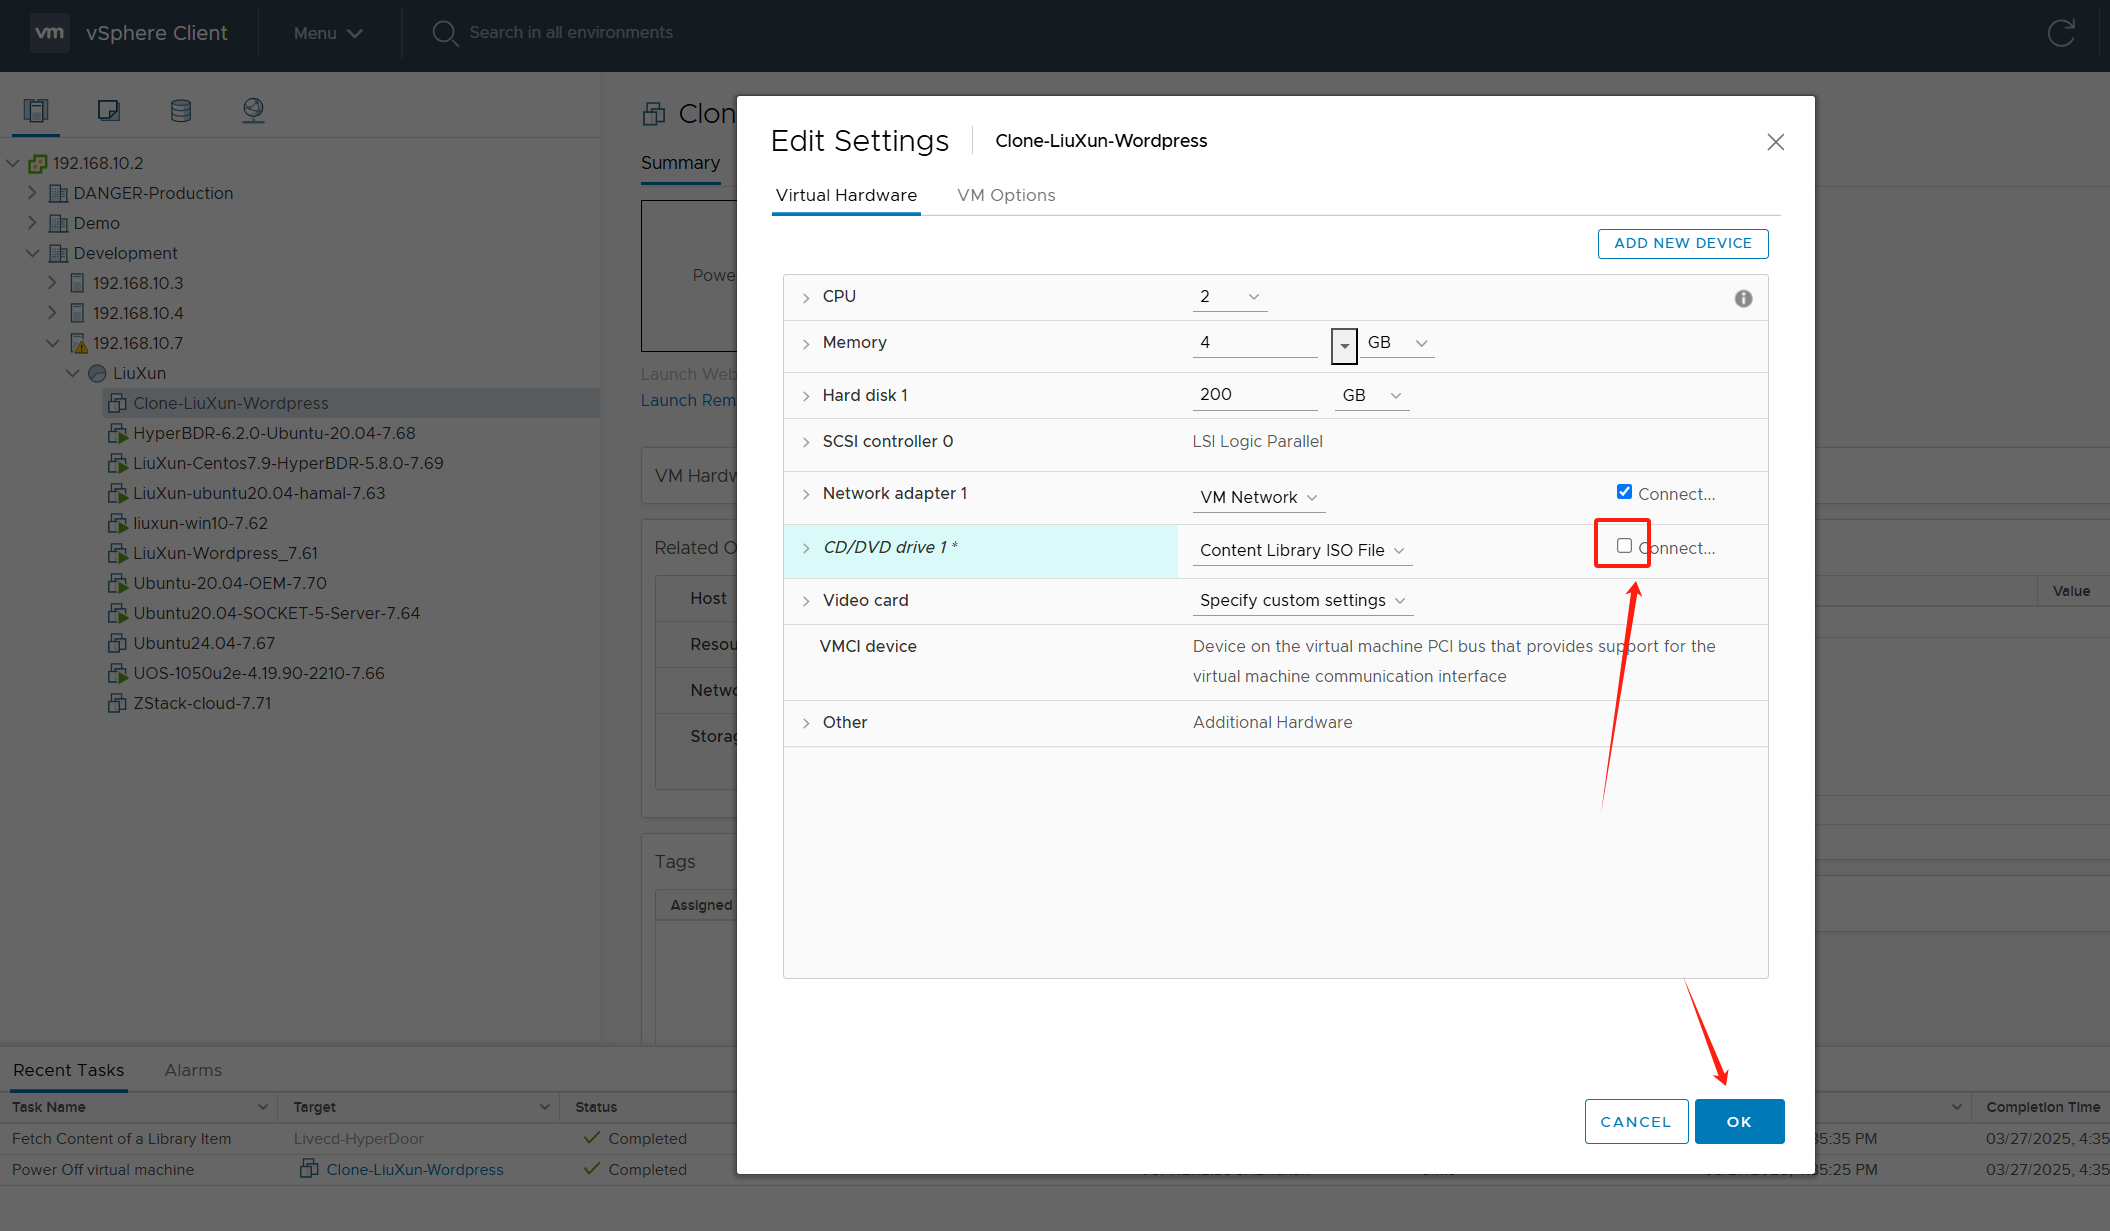
Shut down the host, remove the optical drive device and boot from the disk
Host started successfully. Configure a temporary IP Address for this host (Example: 192.168.7.65)
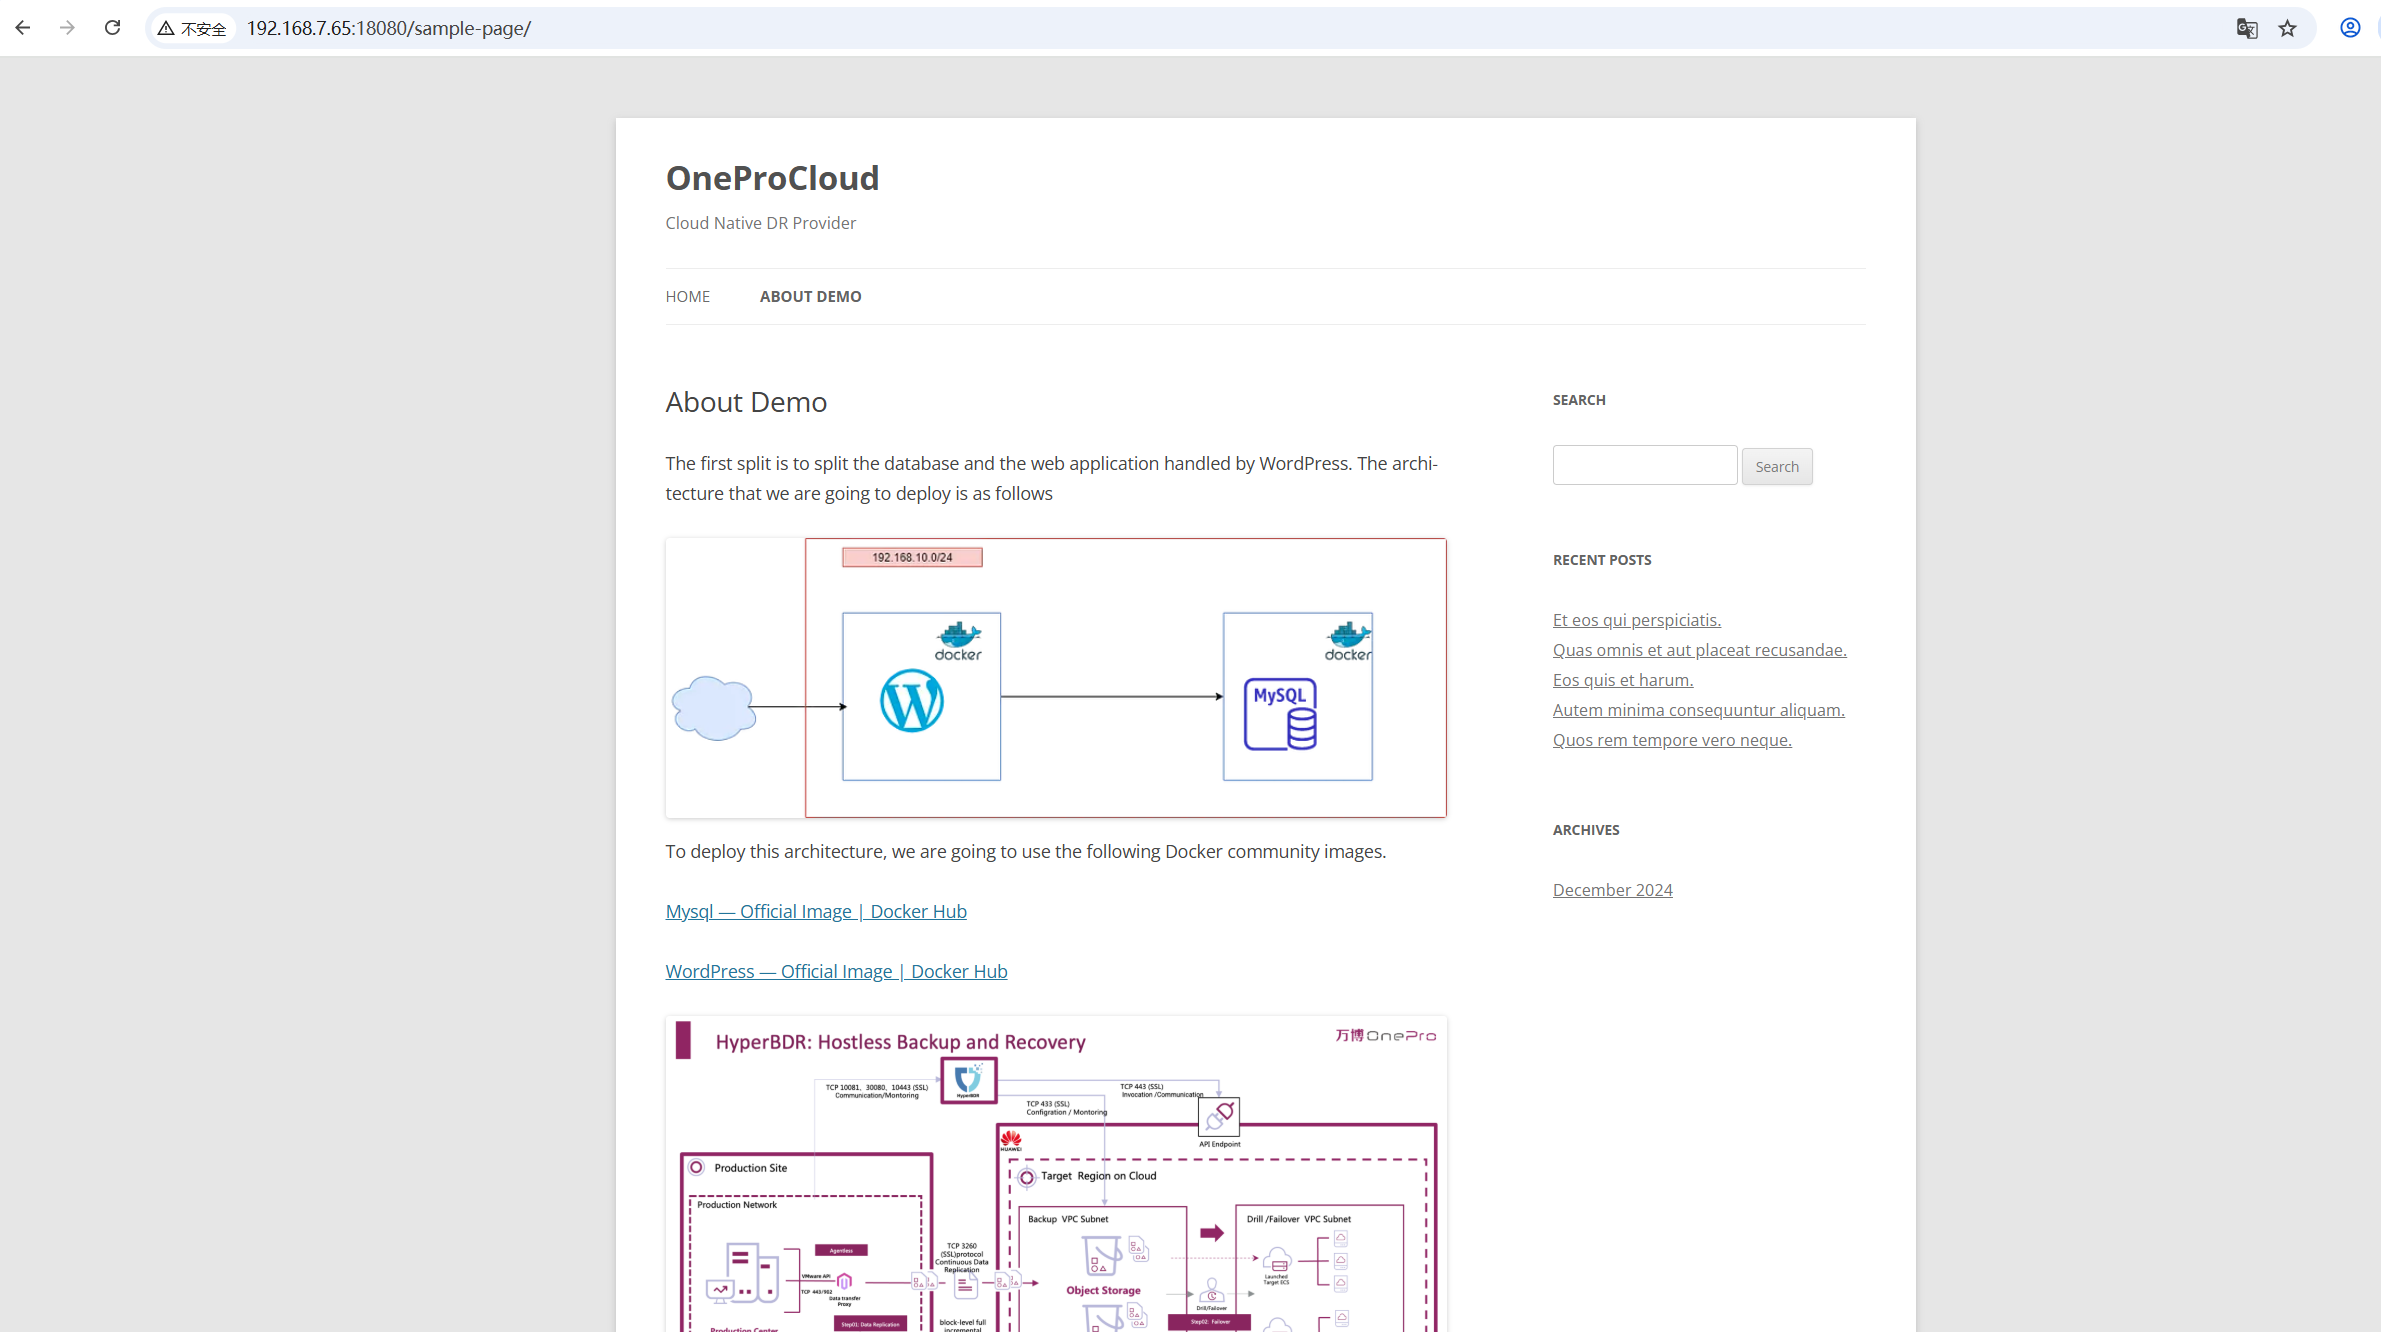
Adjust the business configuration and verify WordPress service access in the browser.
Formal implementation of failback takeover
Note: Before the formal failback takeover, the business service of the failback host needs to be stopped, and then the final incremental synchronization needs to be performed on the disaster recovery failback platform
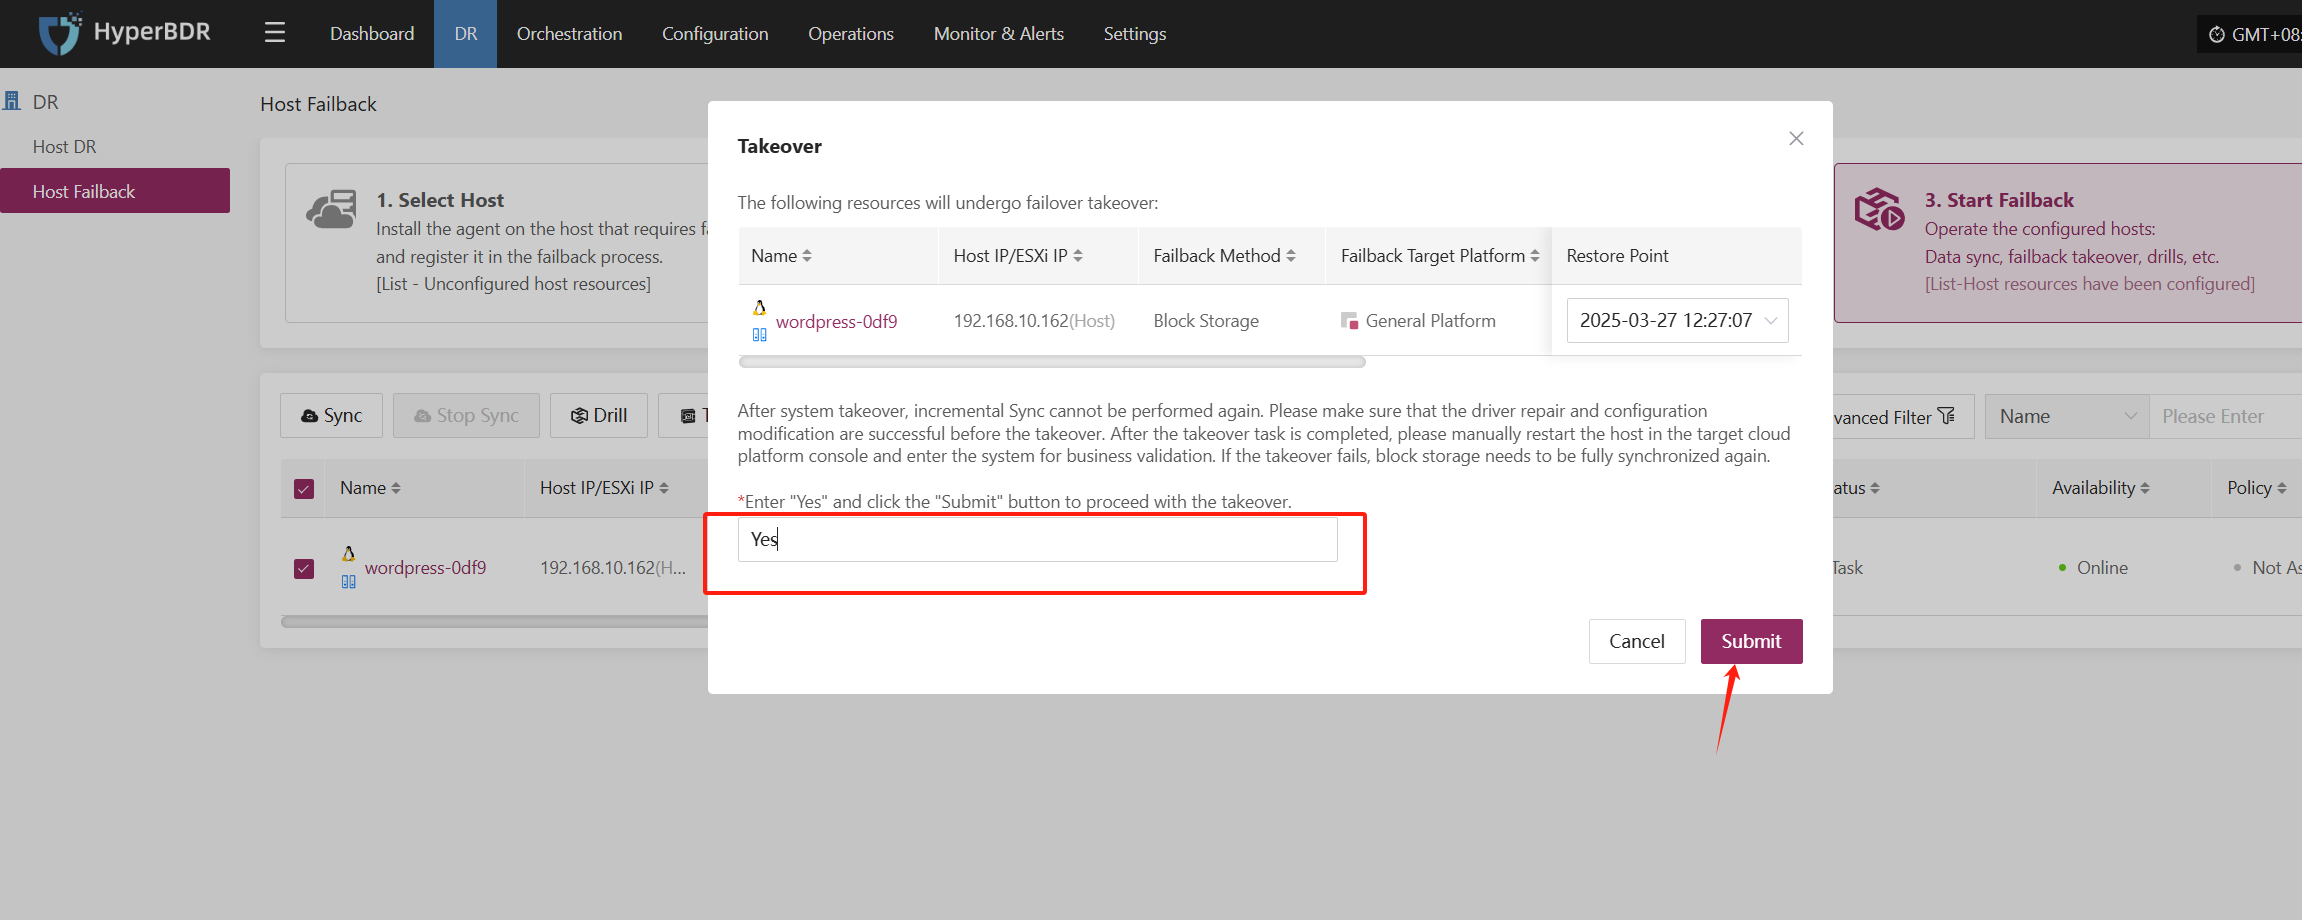

Verify Failback Results
Confirm that the host is starting normally and the service is available
First, shut down the failback target machine, then uninstall the CD/DVD and reboot from the disk

After closing the CD boot, reboot and wait for startup.
Successfully launched
Business system testing
Reconfigure IP Address to verify service status by accessing WordPress via browser
At this point, the VMware production environment failback operation is complete.